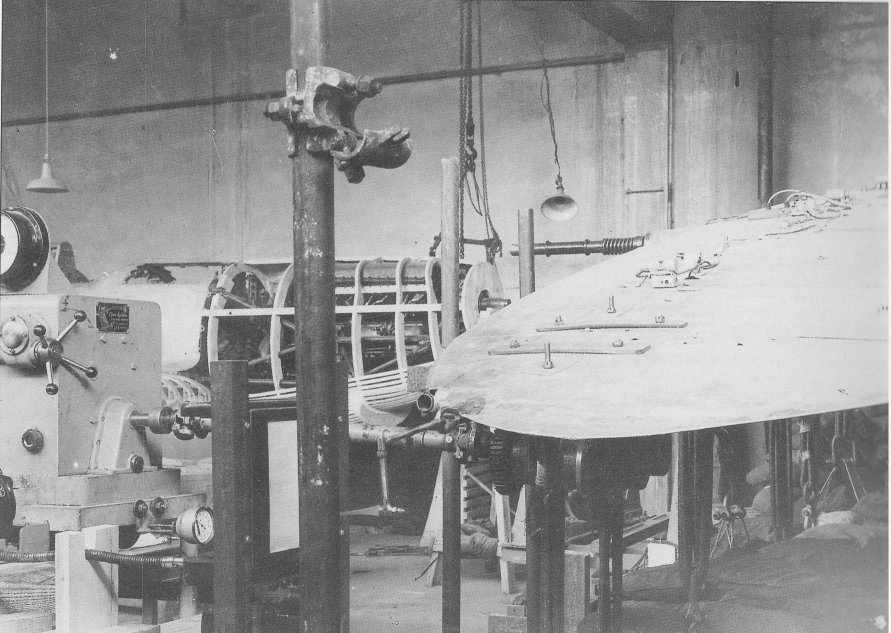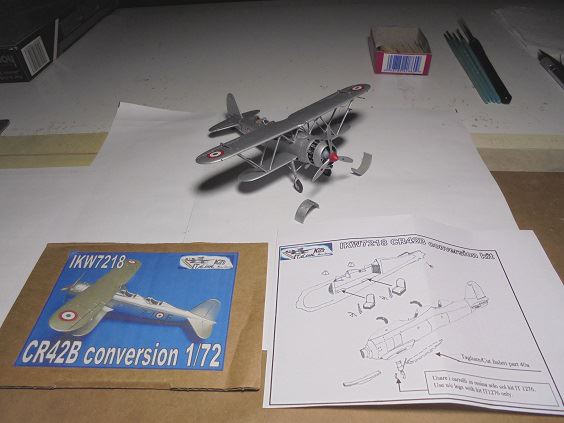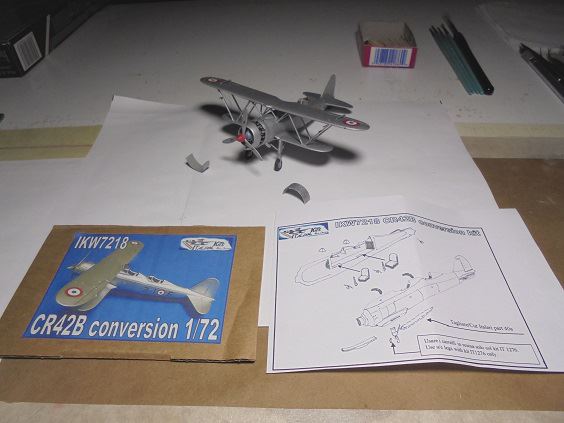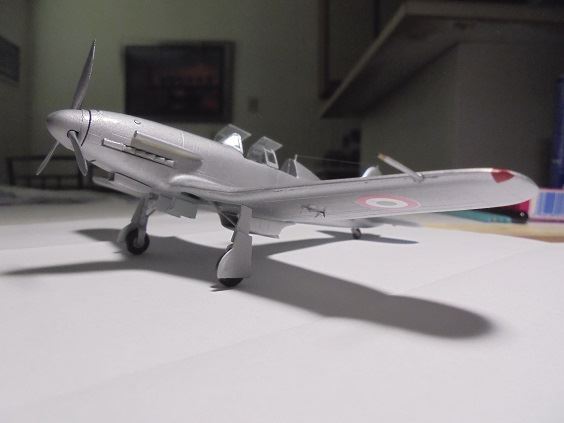
This 1/72 scale resin kit is slightly smaller than a
Boeing B-17, challenge to build as well. The one-piece main wing castings absolutely must be securely attached to the fuselage, lathering them up with cyanoacrylate glue just isn't going to cut it, must fabricate attachments for them, still studying how so [see June 11 update]. Am not going to super-detail the fuselage interior, cost involved obtaining passenger seats et. al. associated parts not worth it never mind lotta time involved in getting them well as fabricating others. I'm going to build
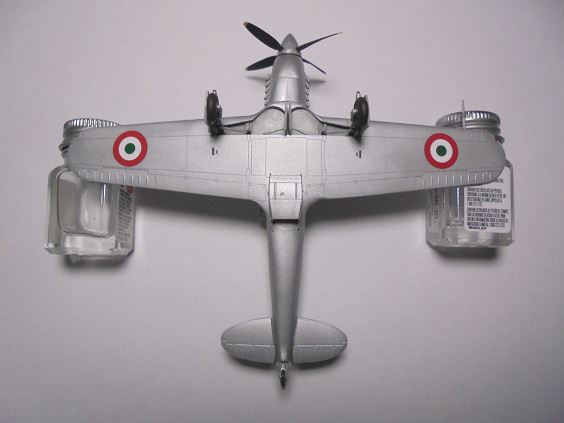
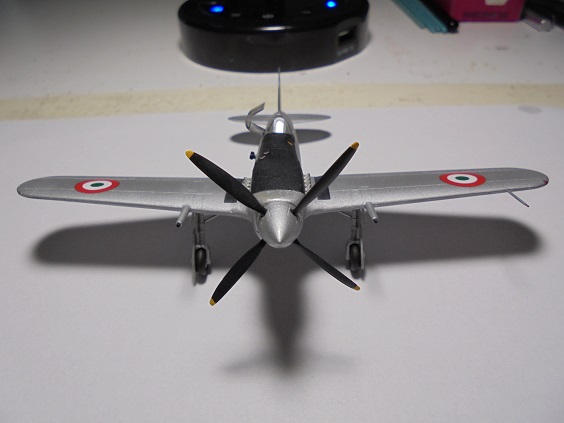
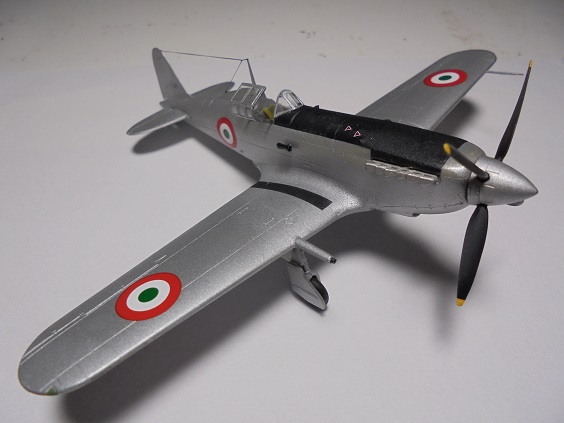
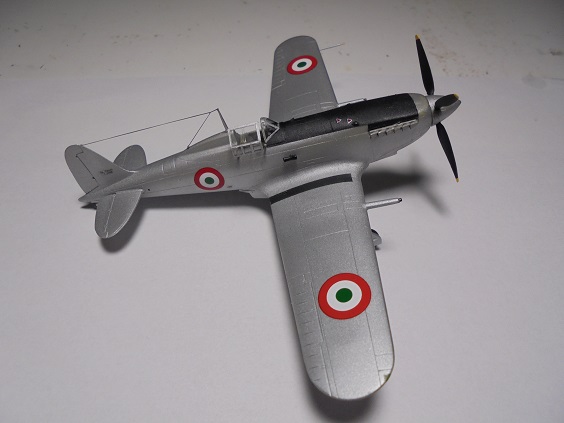
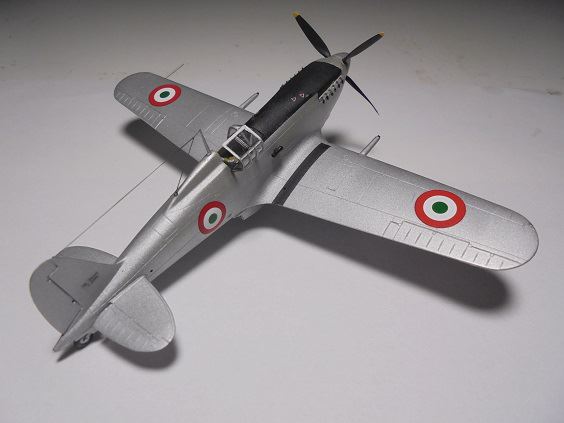
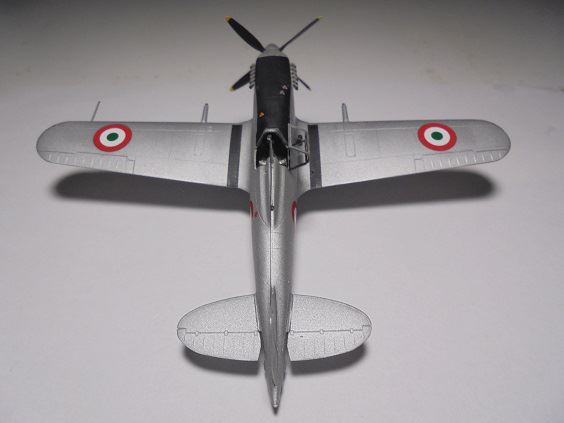
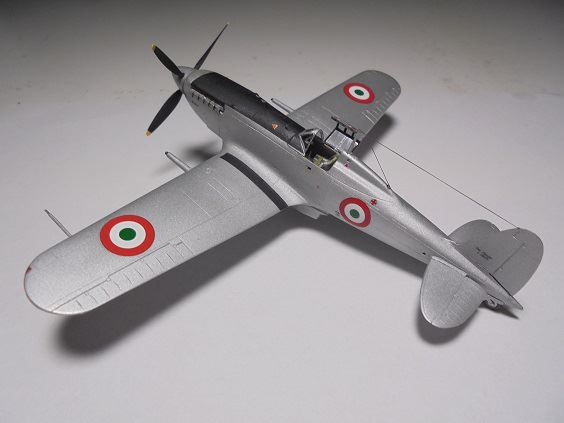
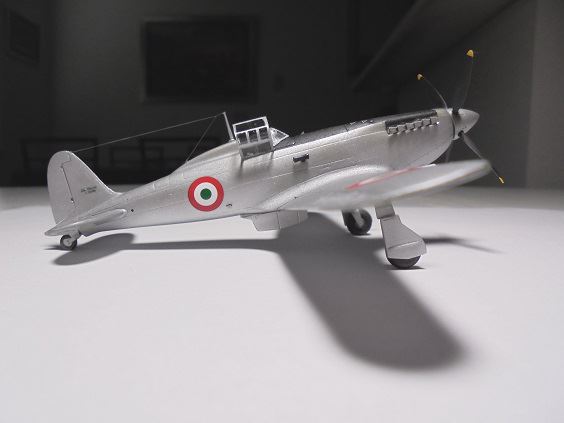
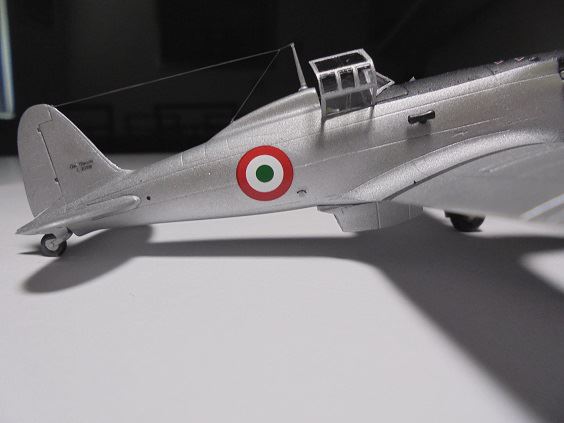
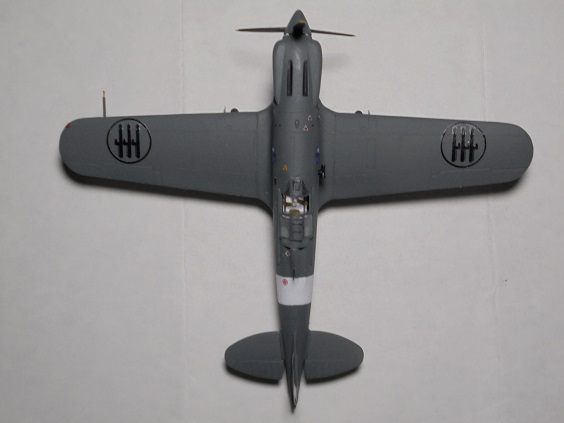
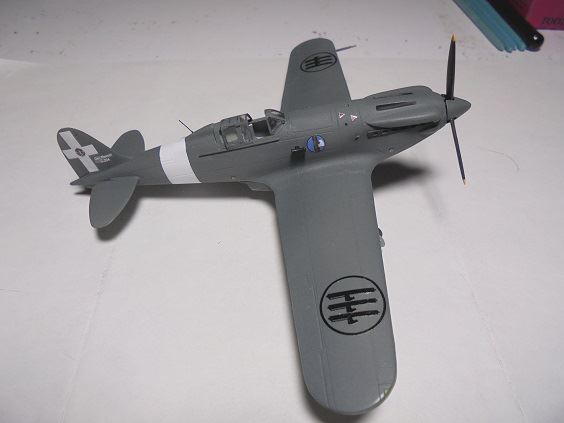
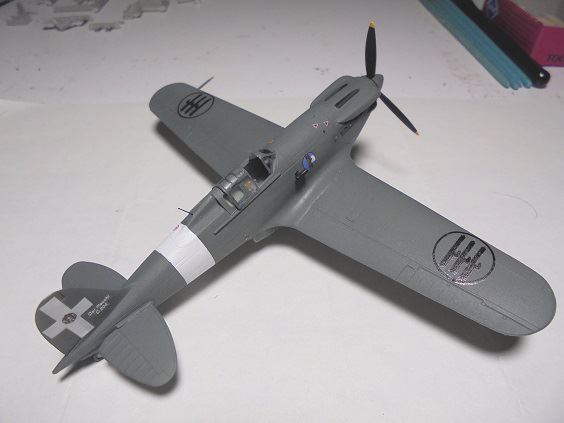
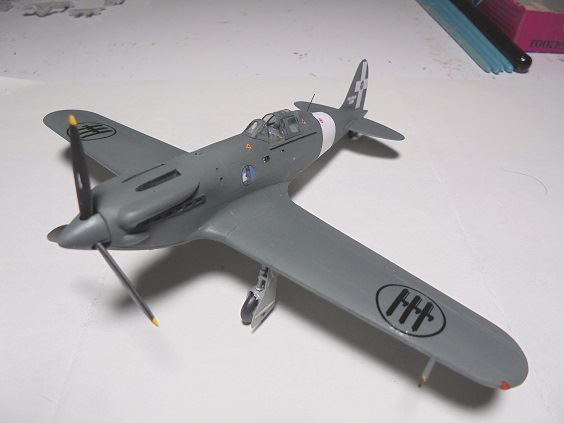
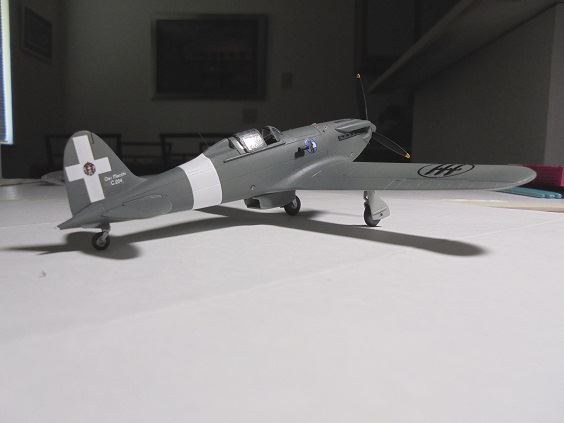
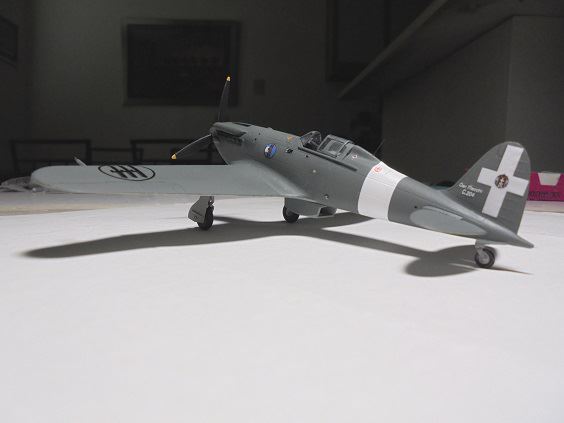
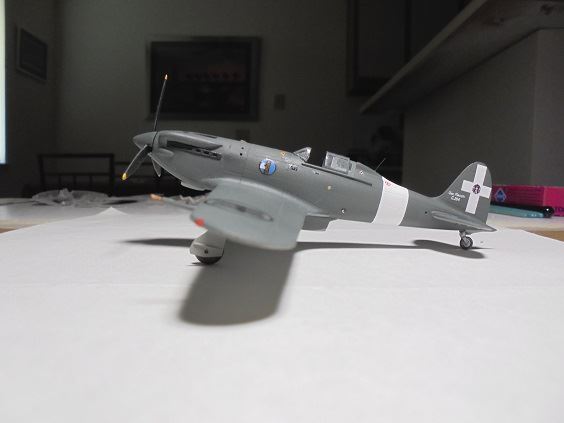
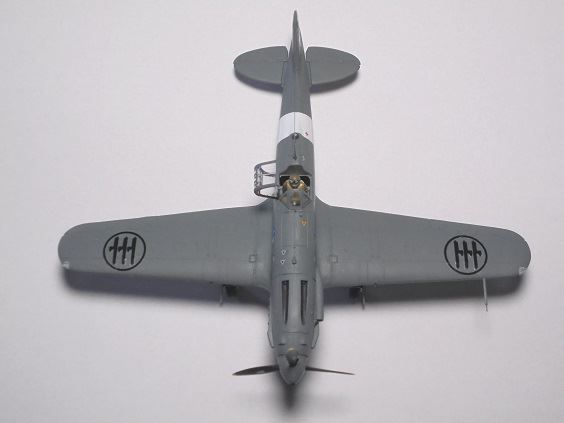
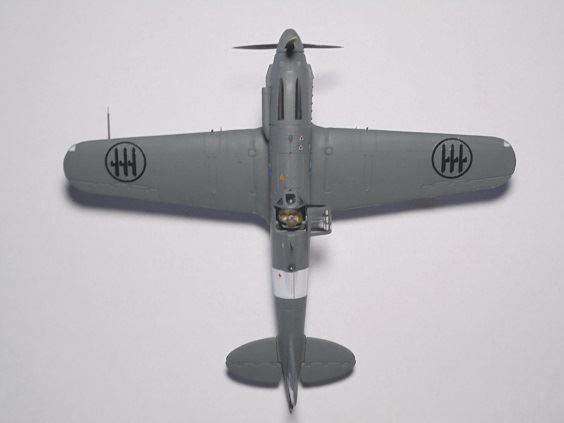
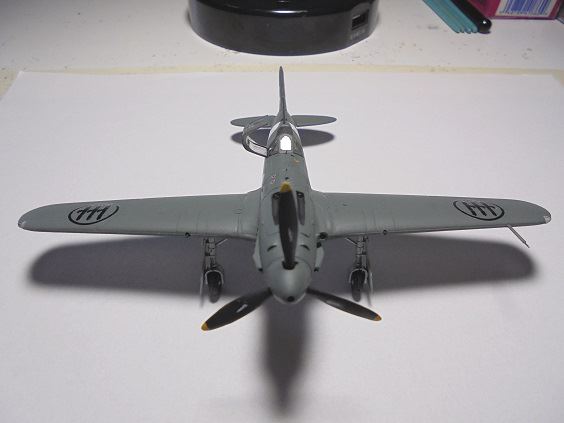
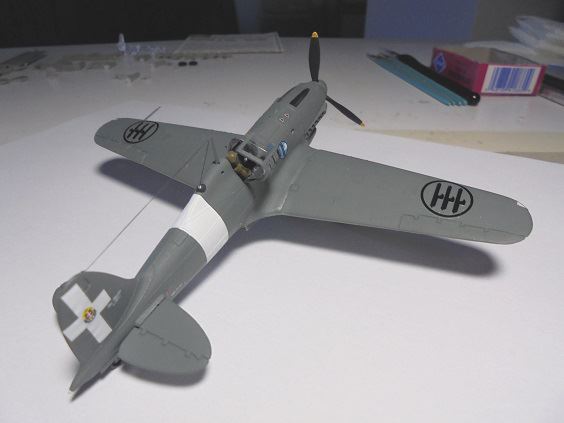
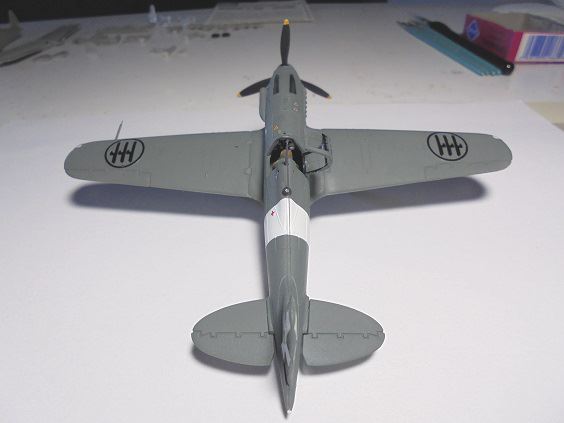
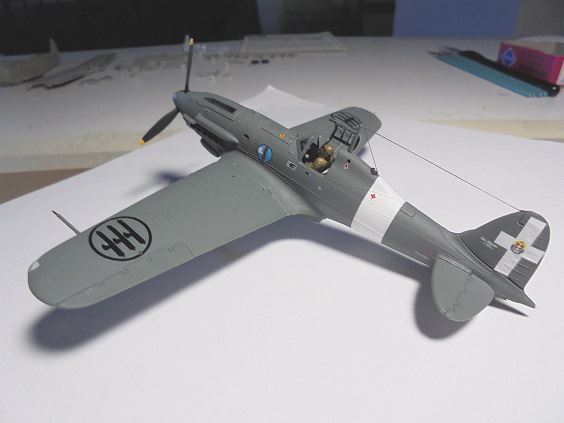
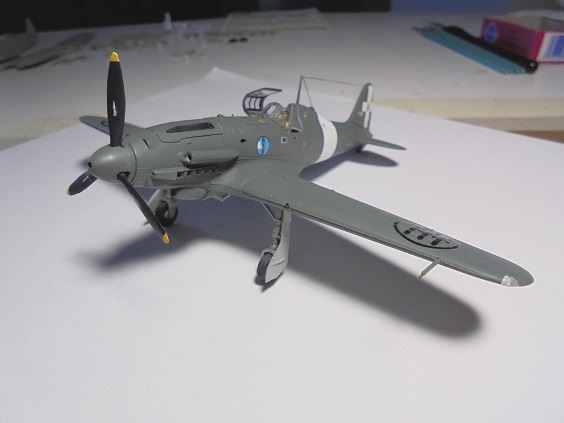
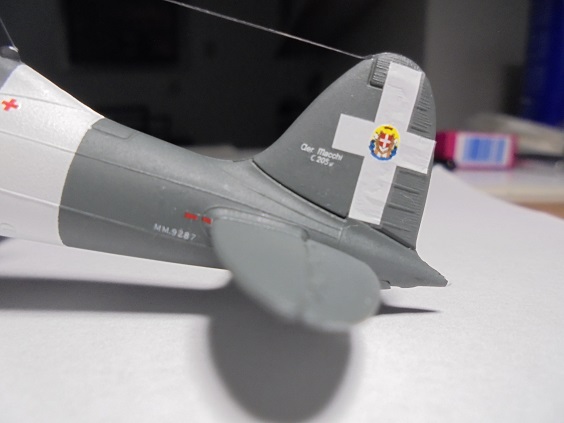
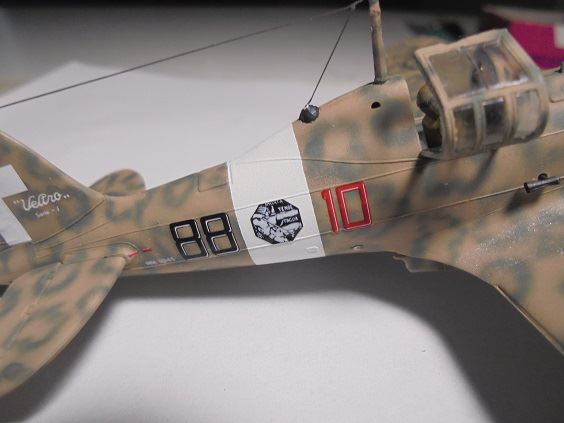
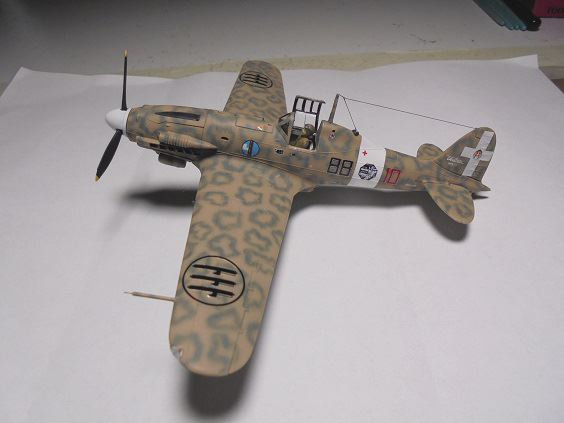
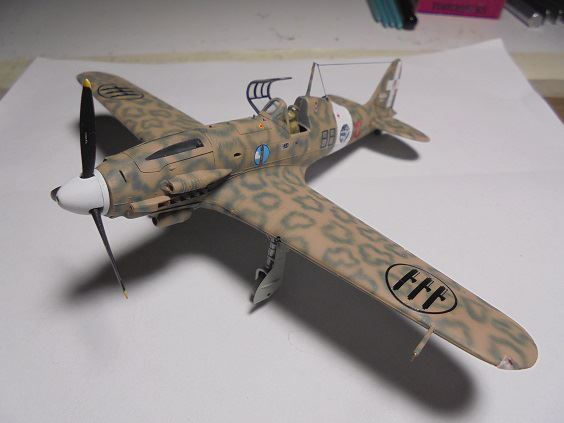
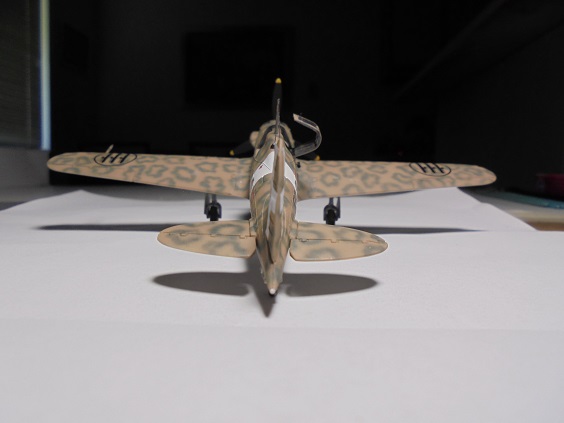
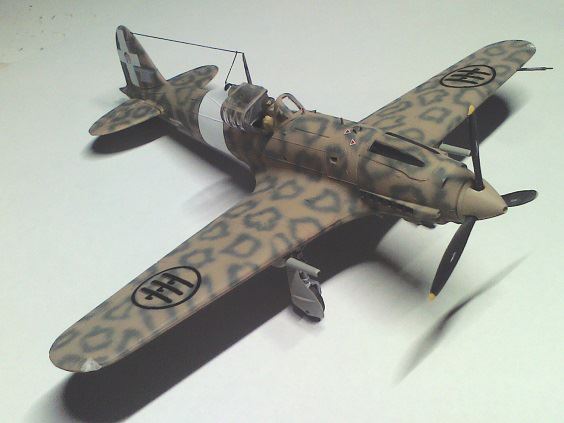
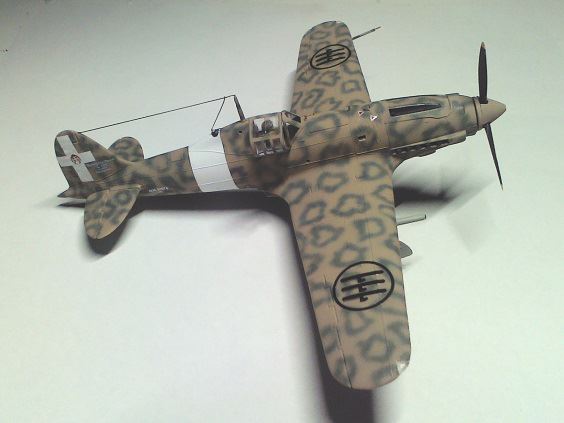
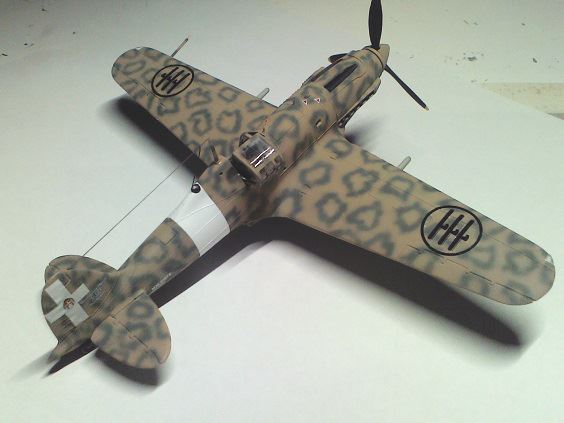
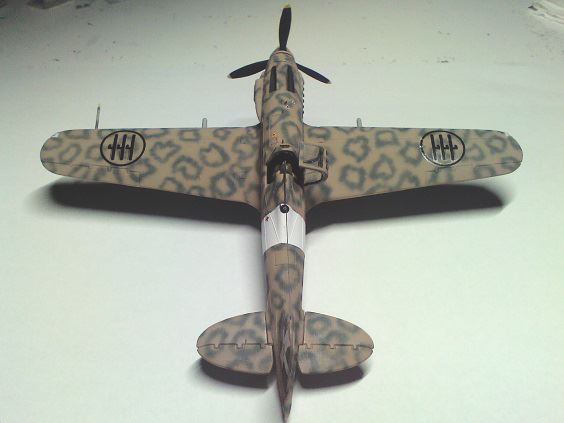
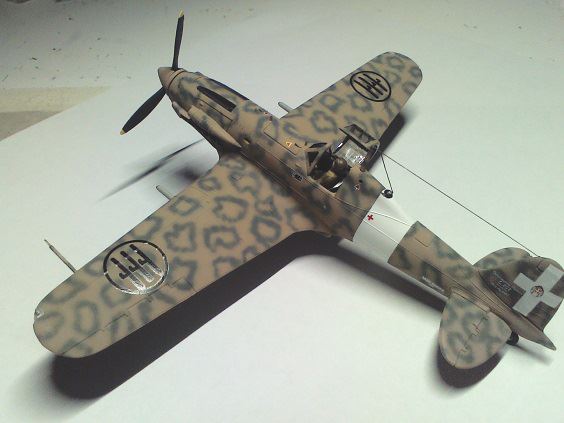
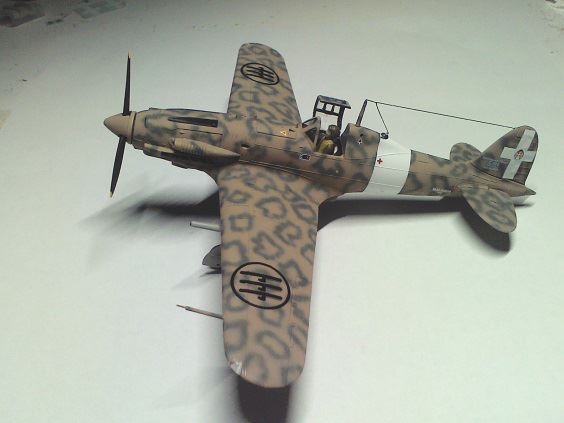
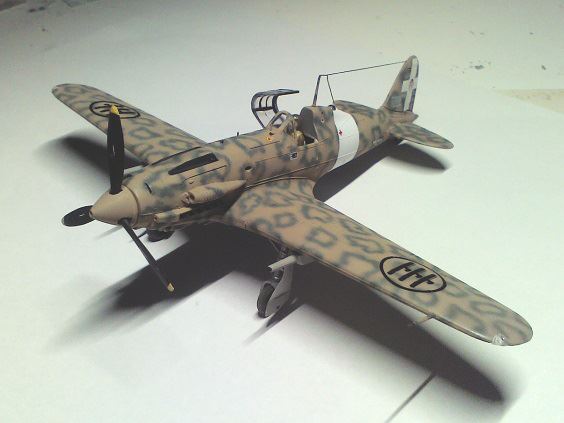
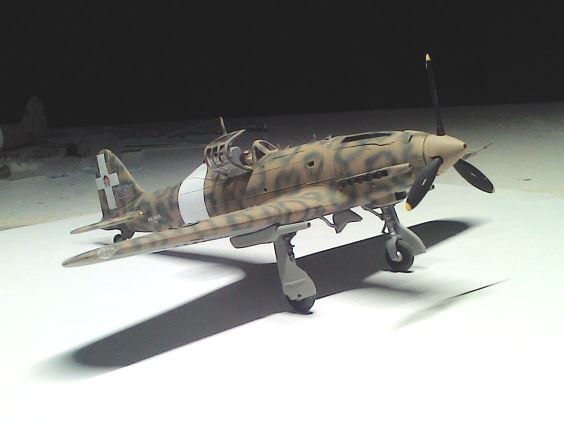
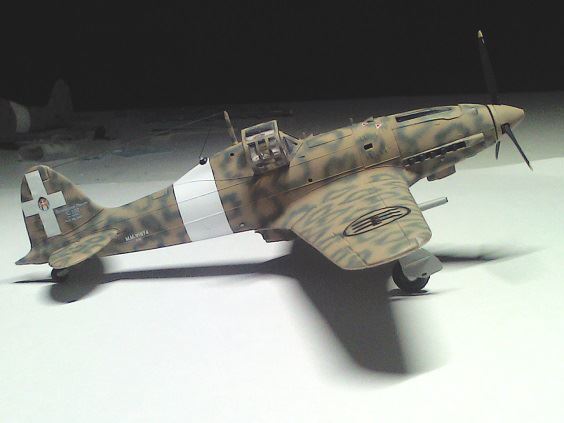
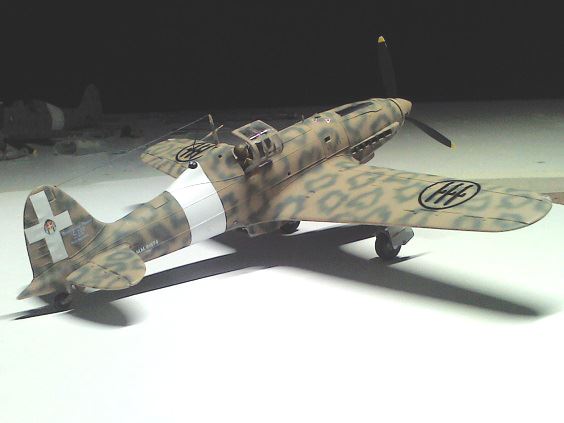
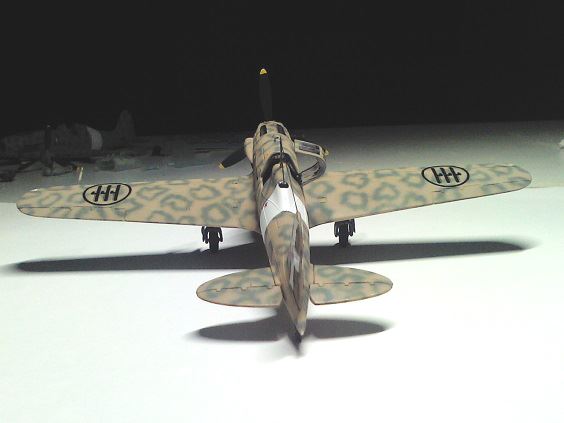
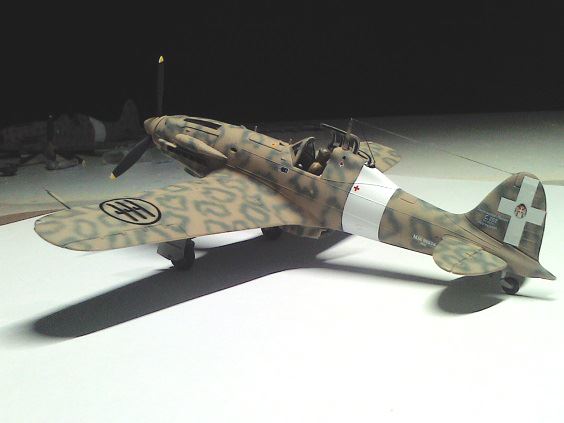
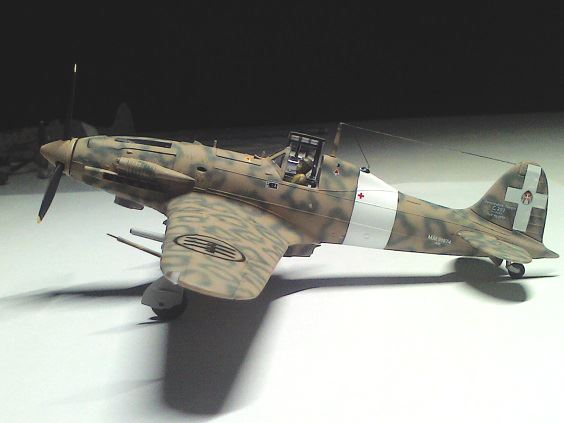
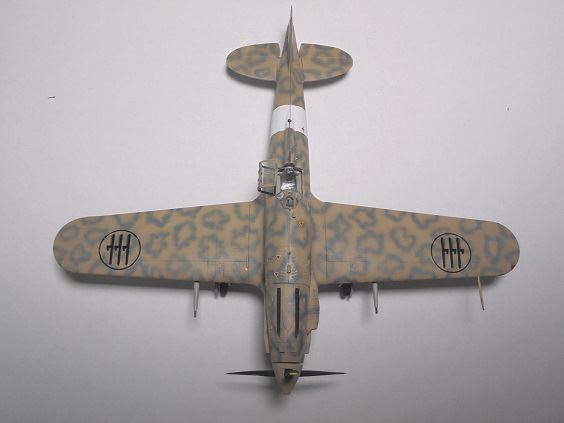
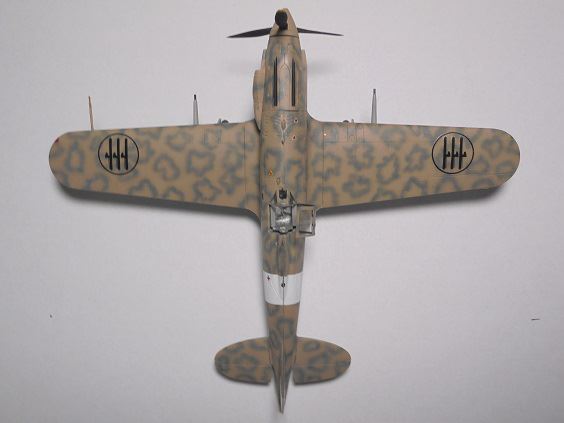
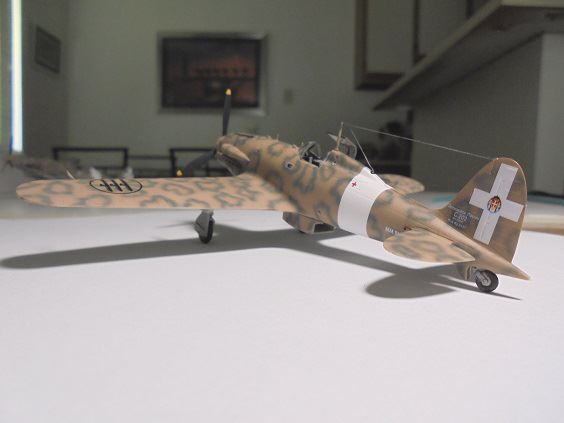
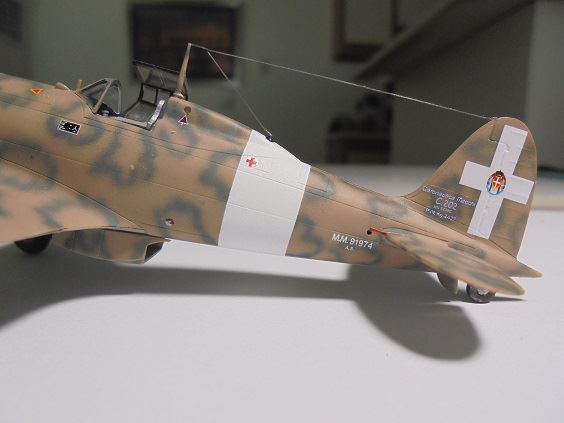
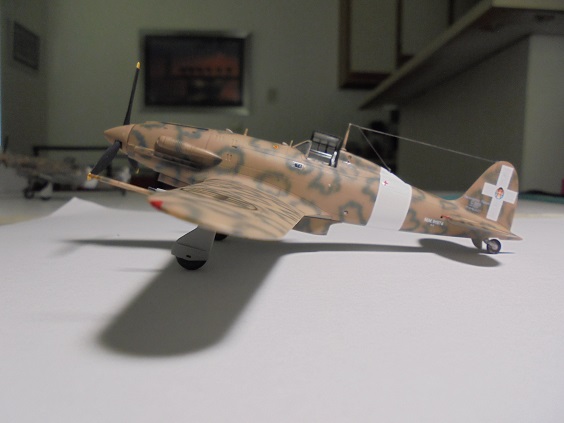
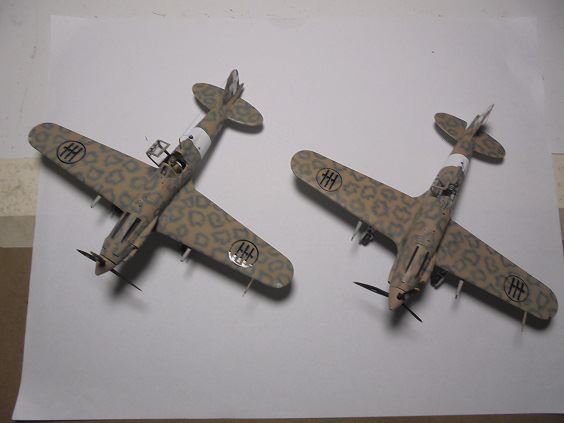
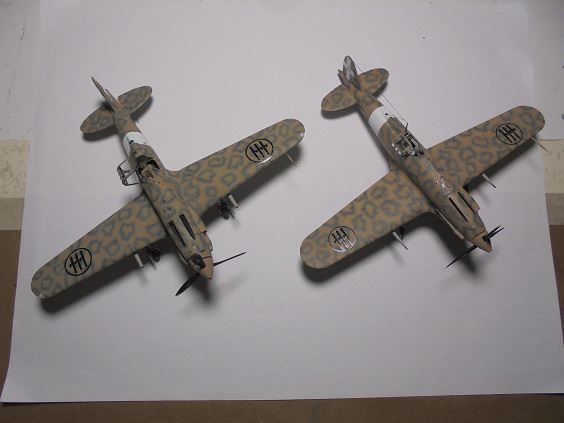
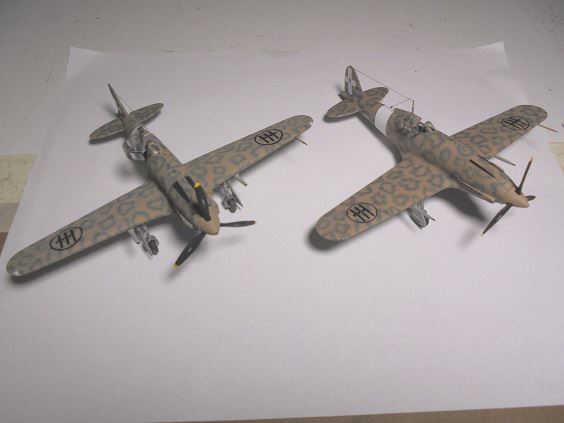
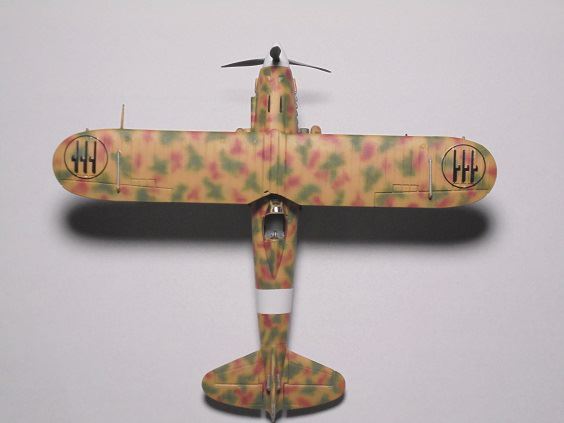
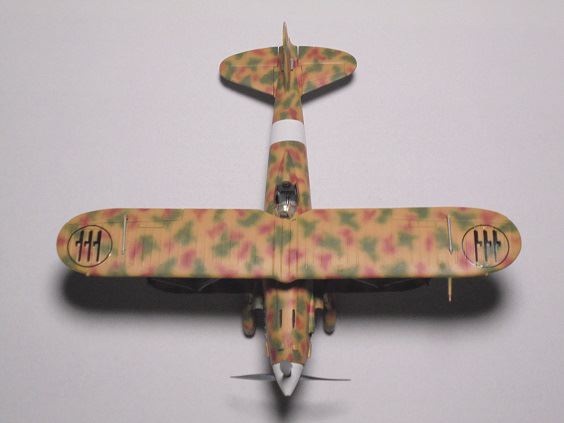
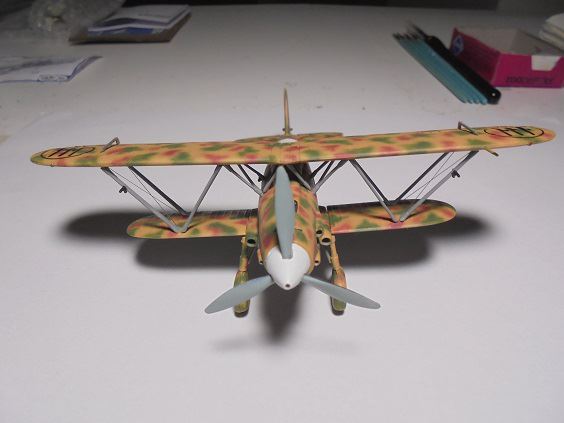
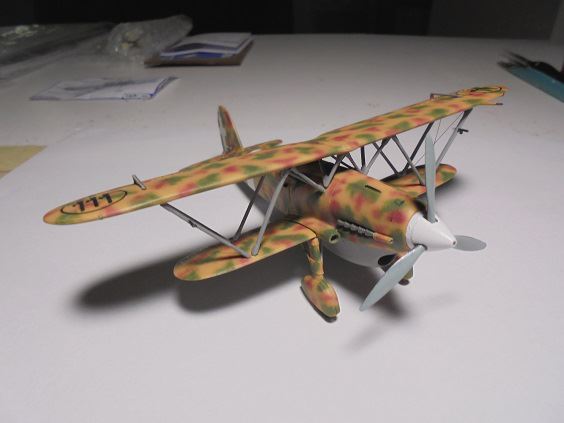
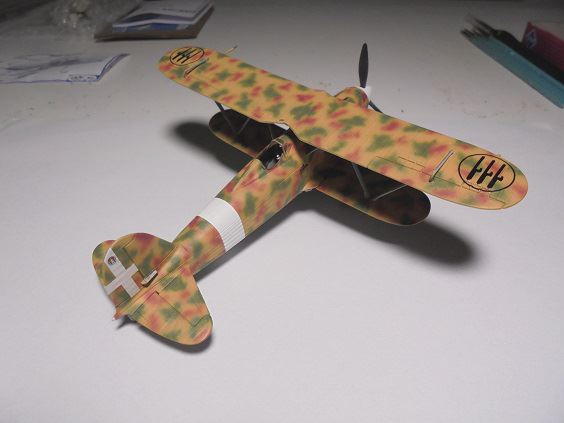
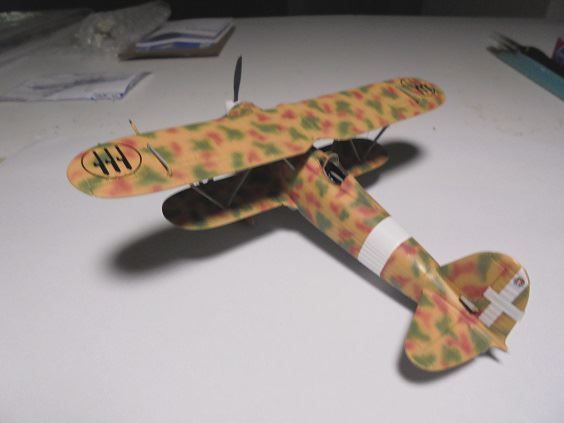
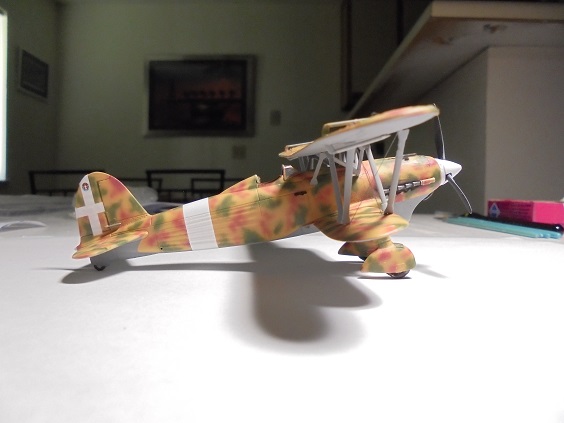
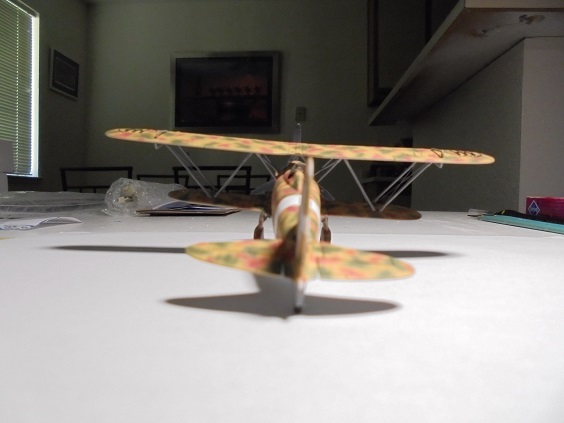
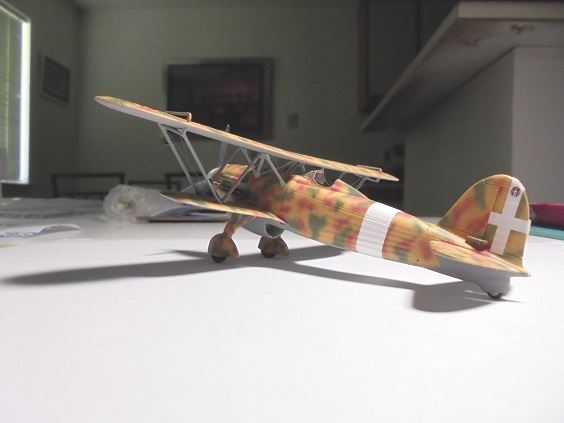
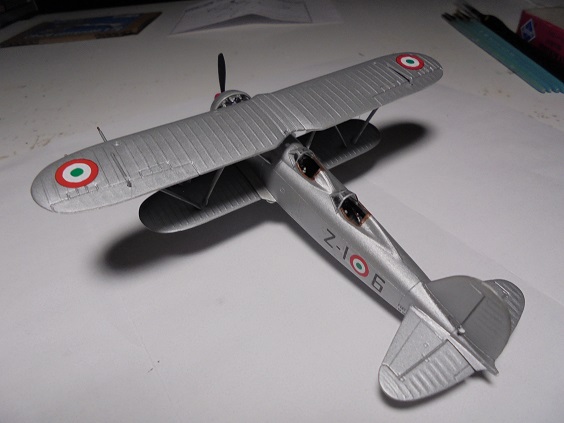
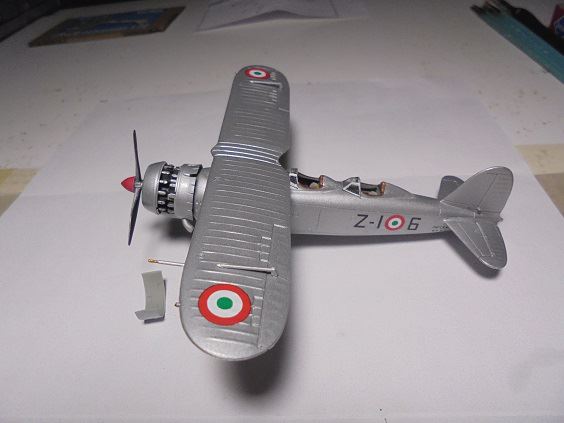
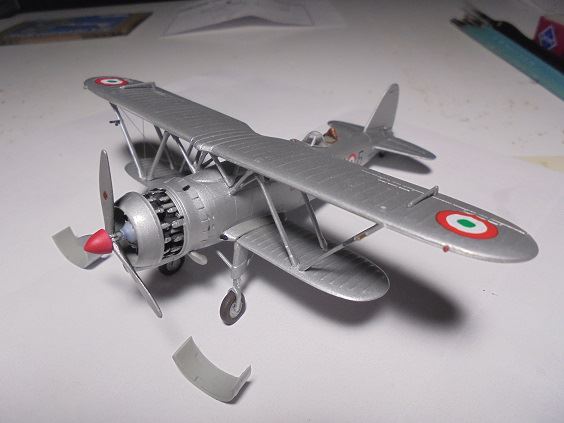
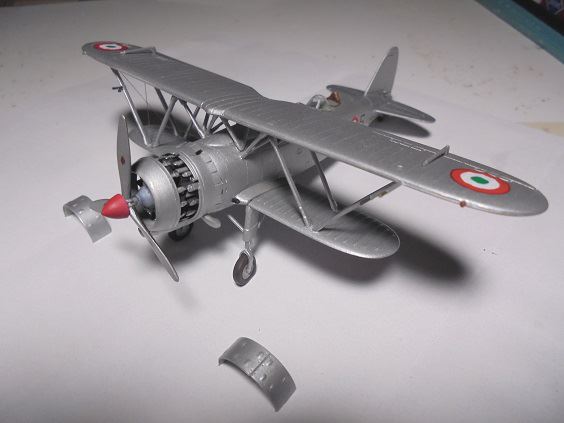
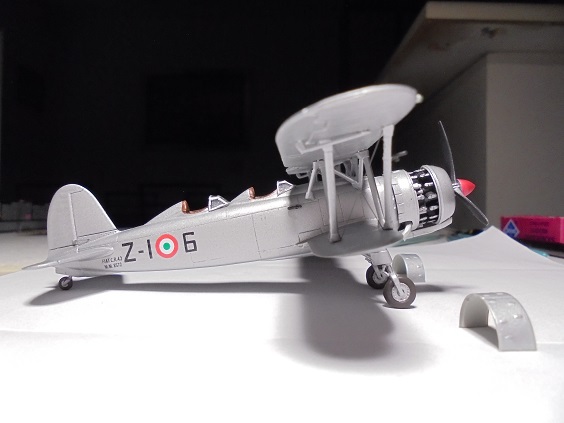
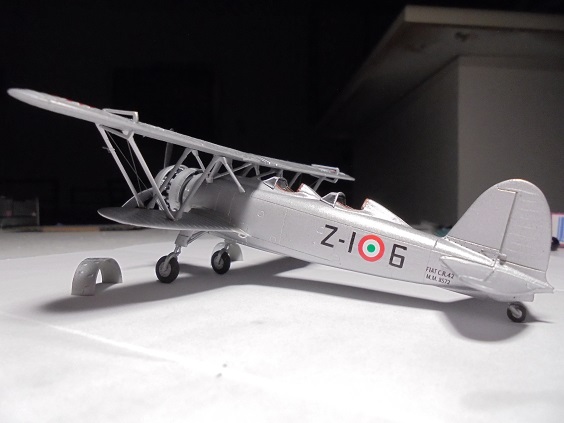
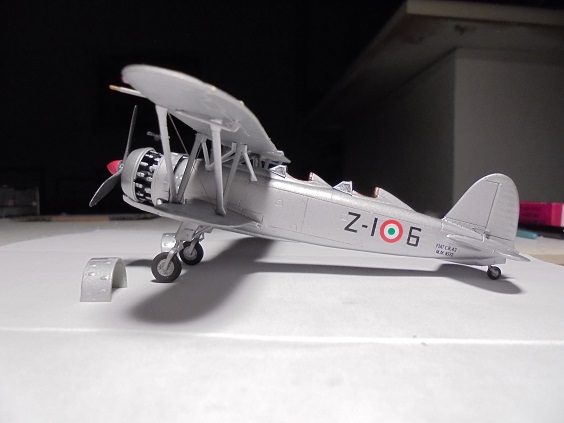
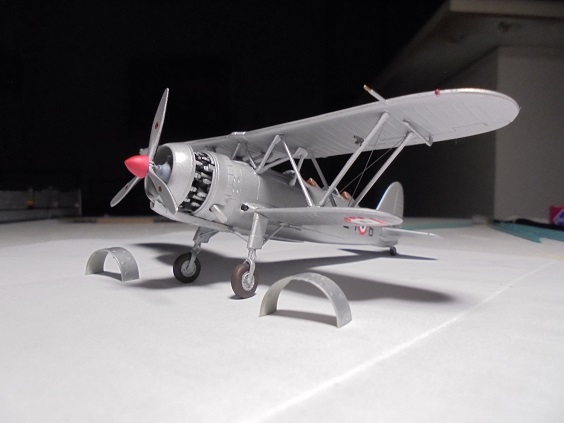
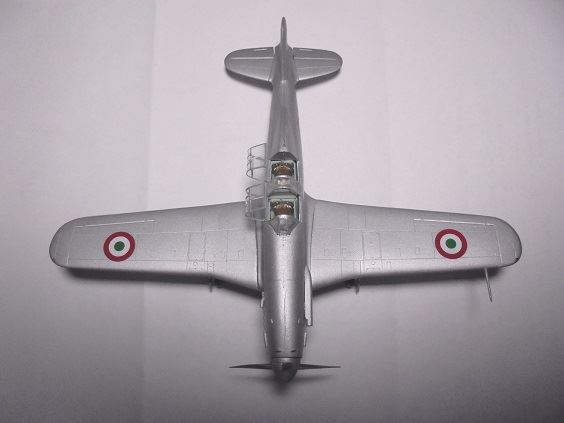
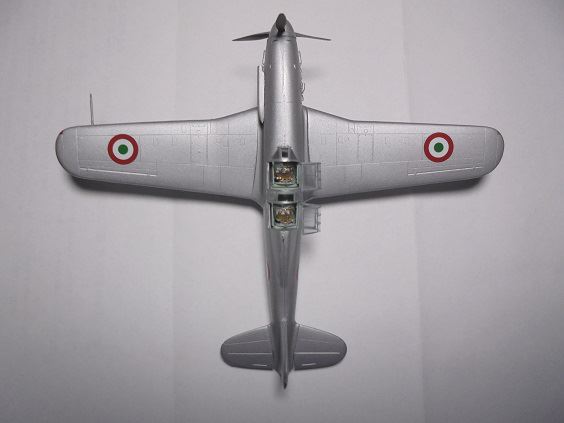
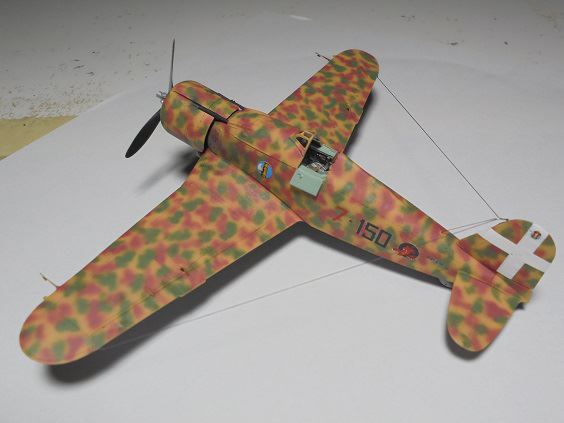
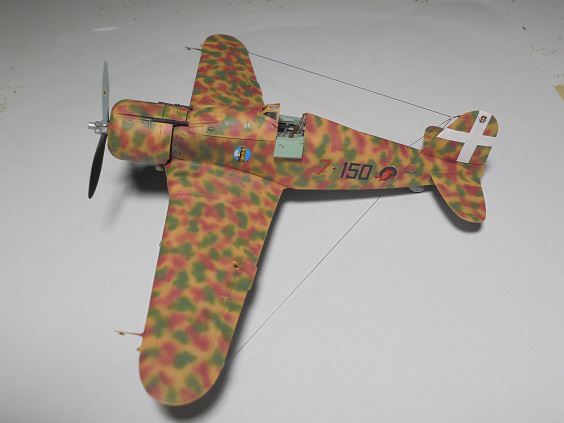
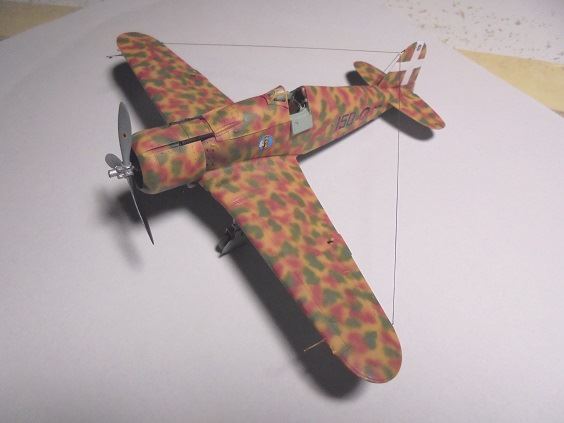
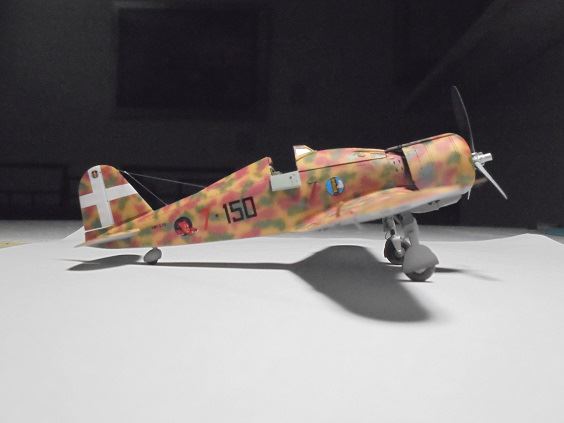
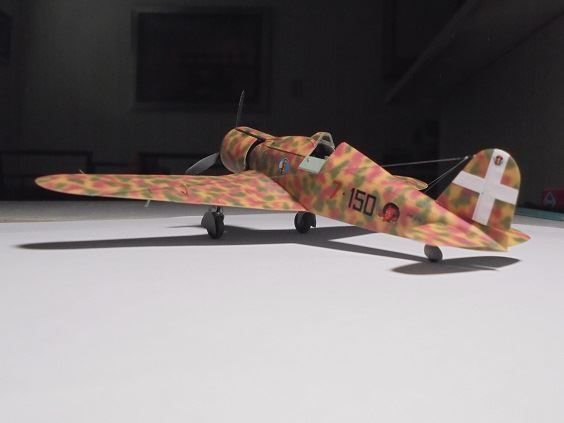
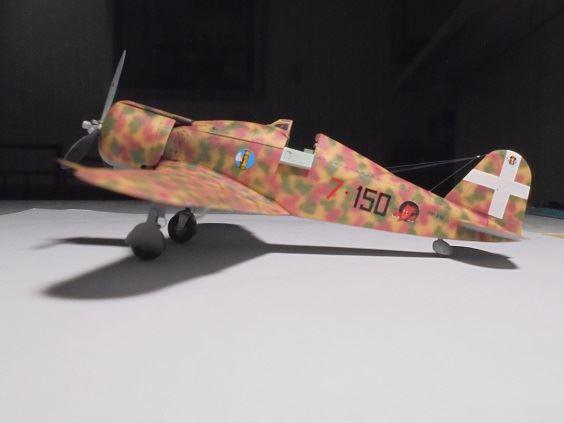
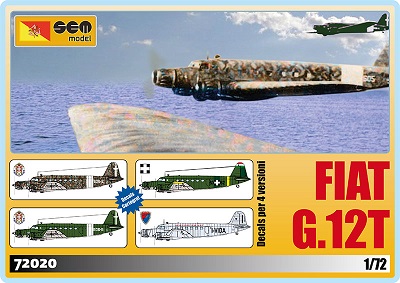
G.12T M.M.60673 "606-2" in FIAT factory-applied
Schema C1A Mimetico good multi-view color photos of which readily available via the Internet. This is going to be a "slow build" though nevertheless want to get it done by month's end so can get to the
Xotic cum Aviation-USK FIAT RS.14 floatplane itself just if not more of a "bear" to build.
June 11, 2019 Update
Fuselage rod run-throughs is likely what I'll do though don't have large enough drill bits. I'd like to get by with two 1/4-inch rods, ask old neighbor friends if I could use their drills & bits for the job, will report on this later.
June 12, 2019 Update
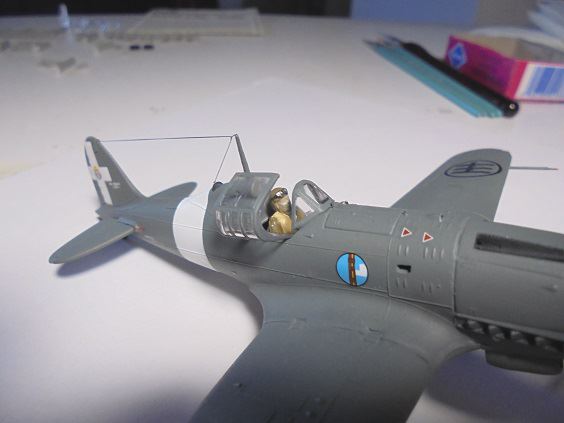
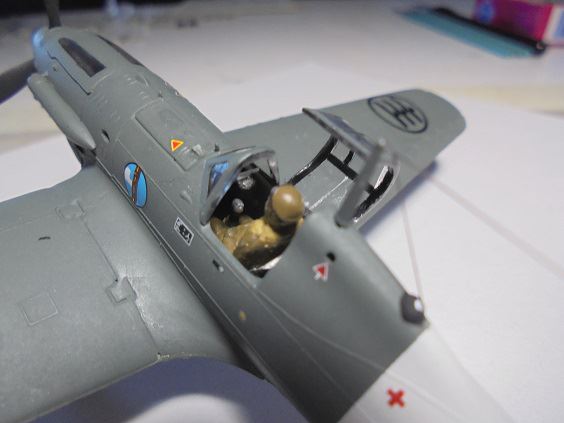
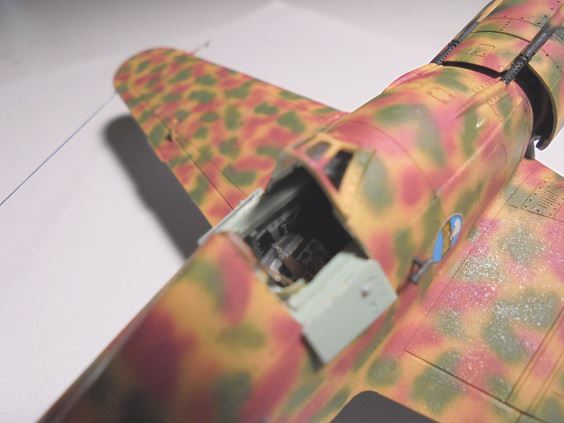
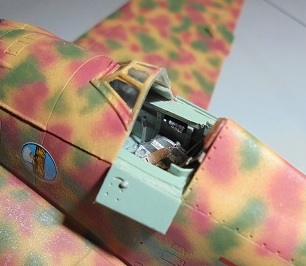
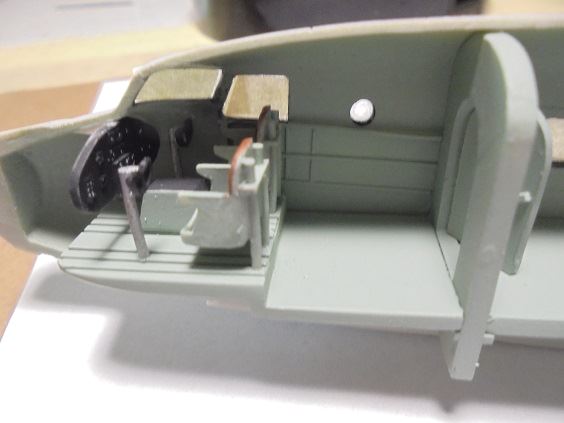
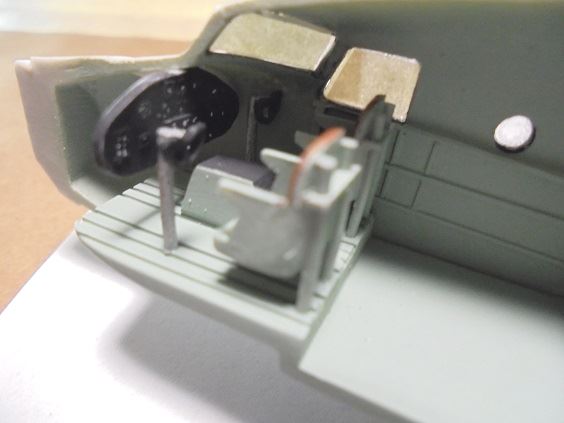
Had to buy electric drill & bits, former neighbors not at home to borrow their hardware, needed those I'd bought for any future resin builds requiring power drilling well as for household use. Quarter-inch holes drilled same-size as clear plastic fuselage pass-through pegs, good "dry" fuselage & main wing fits. Major fuselage interior parts painted Humbrol 78 Matt Cockpit Green + Testors Flat White 50/50 mix + 36% White shading replicating Verde Anticorruzione (VM; anti-corrosion green) yesterday, tomorrow will get on with detail fuselage interior assembly & painting work.
FIAT well as Savoia-Marchetti painted fuselage interiors a Grigio (gray) shade, don't have readily available info regarding G.50T MM.60673 interior color so defaulted to VM. Regia Aeronautica Italiana (RAI) aircraft interior colors is a research specialty onto itself for RAI aficionados, paint availability more than anything determining how aircraft were factory painted well as at Servizia Riparazioni Aeromonili e Motori (SRAeM) depots. Reggiane in particular painted interiors of their 2000-series fighter/bombers a green similar to FS 34227, Humbrol 120 Matt Light Green coming closest, dutifully I'd painted the interiors of my models that color but not all, after using up the tin reverted to Humbrol 78, color difference between the two not enough to warrant buying another.
June 14, 2019 Update
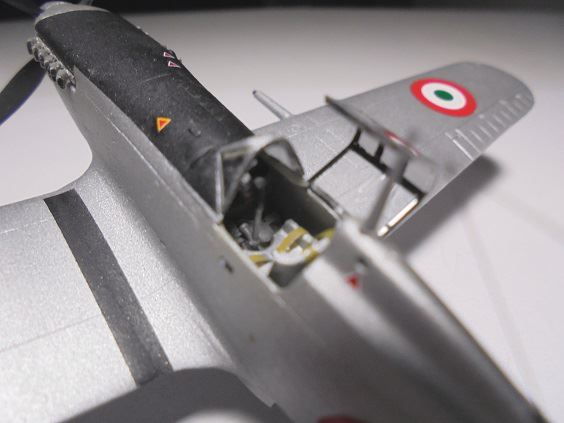
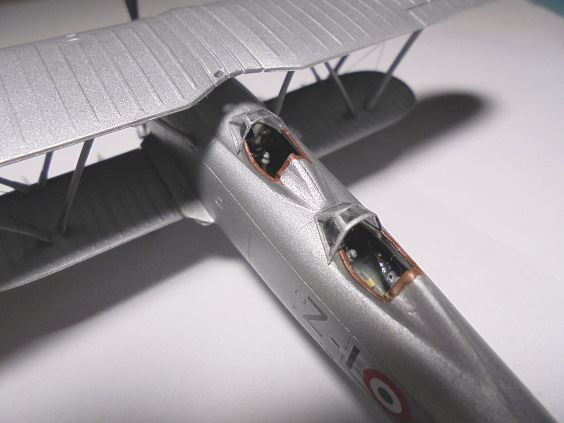
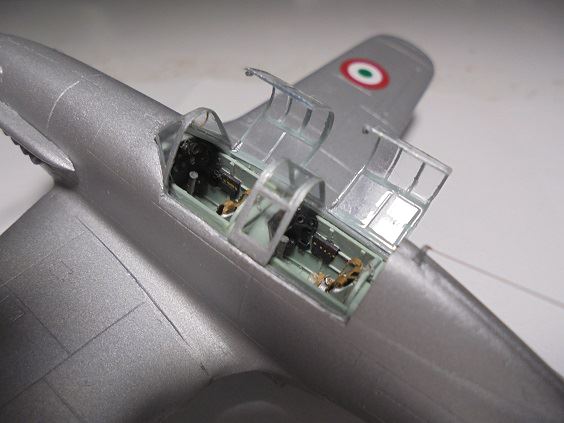
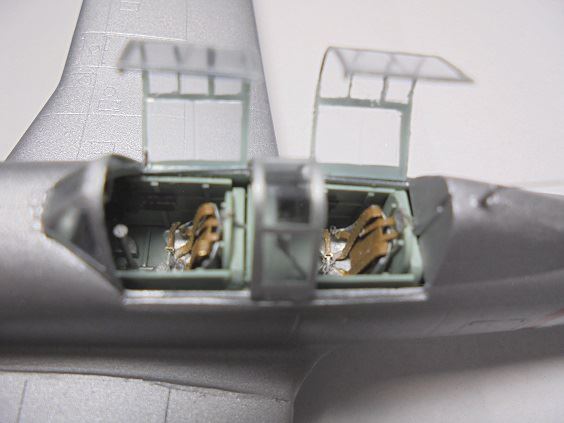
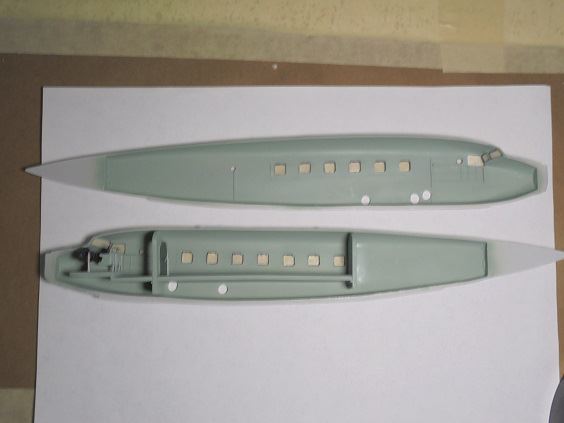
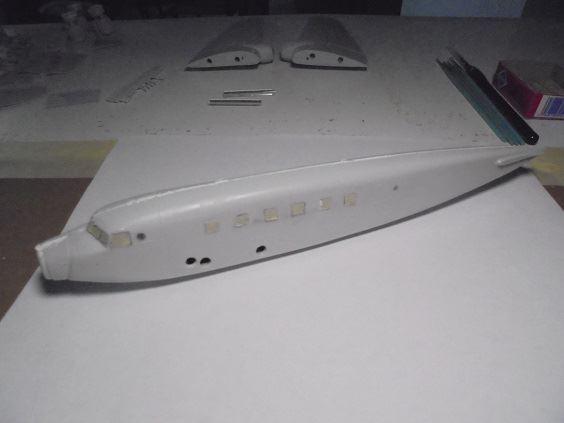
Two days spent cutting & gluing in fuselage window parts, masking them for spray painting over; kit provided ones mostly too small. new ones cut & fitted, much time spent. Major kit cockpit parts sprayed & glued in place, detail painting them et. al. tomorrow, may glue fuselage halves tomorrow if can complete the work during A.M. This isn't going to be a five-star build by any means, if it comes out competently built will be thrilled.
June 15, 2019 Update
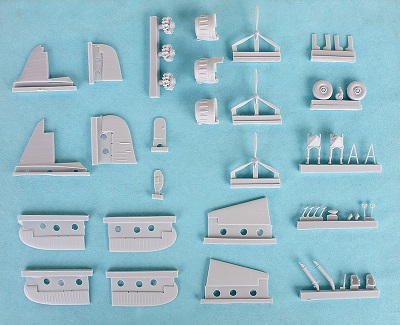
Fuselage interior parts glued in place:
Fuselage halves glued together & putty filled:

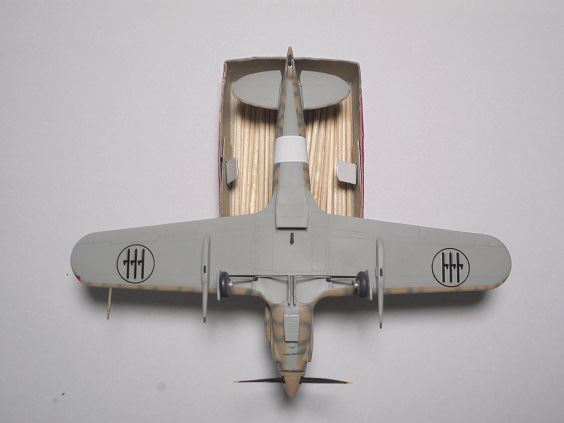
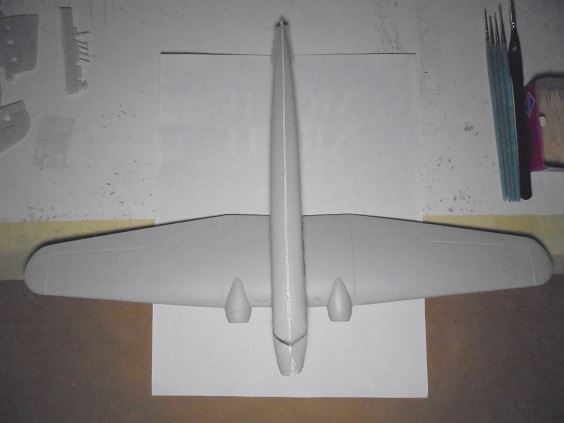
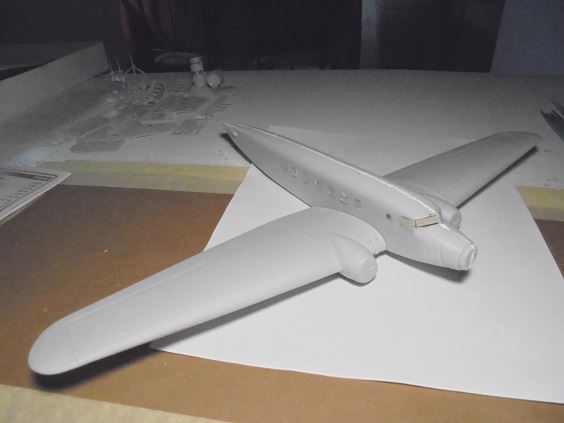
Fuselage-Mainwings join dry fitting:
 June 16, 2019 Update
Fuselage putty seam filing & sanding complete; molded-in underside airframe ridge extending most of fuselage length required additional spot puttying, extensive filing & standing work; topside seams broke in several places whilst handling the fuselage, glued them back together. Rudder & tailplane sails glued in place, seams puttied, sanding them tomorrow.
June 17, 2019 Update
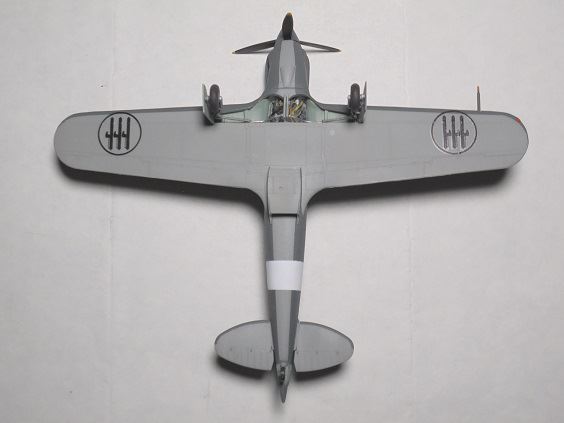
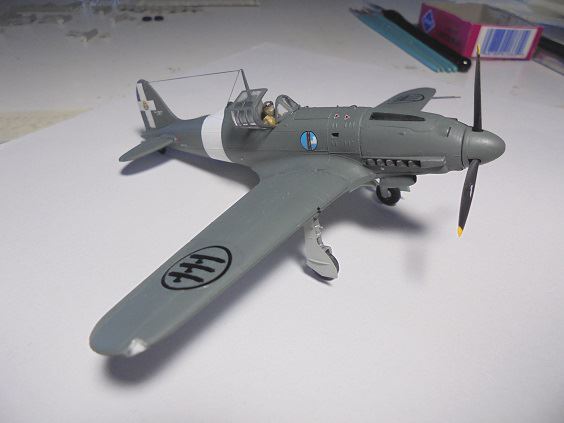
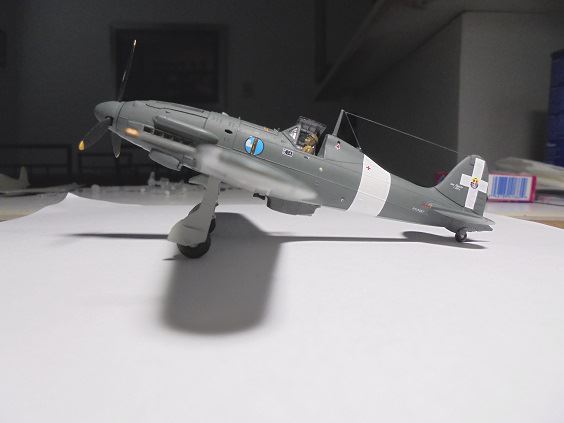
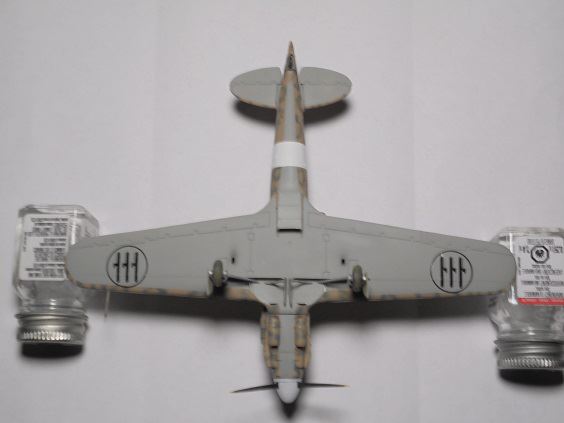
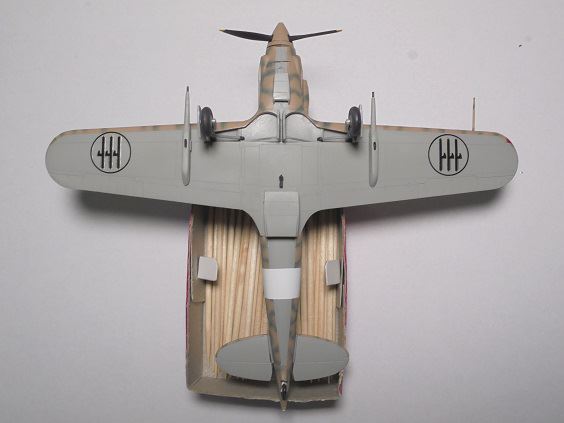
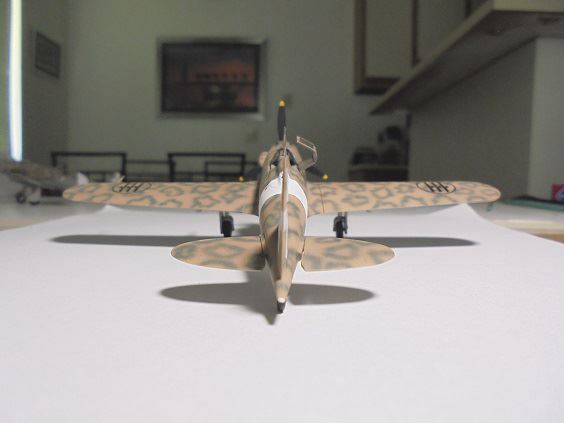
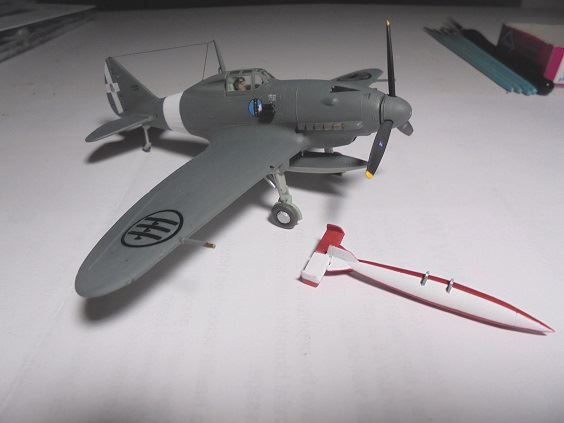
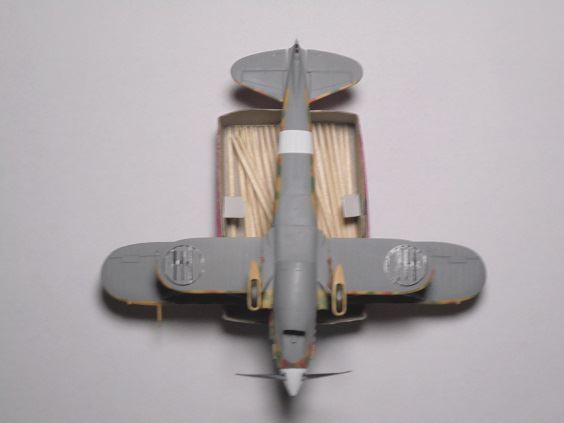
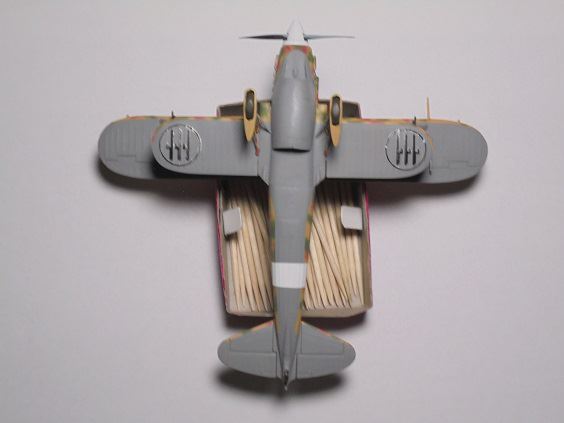
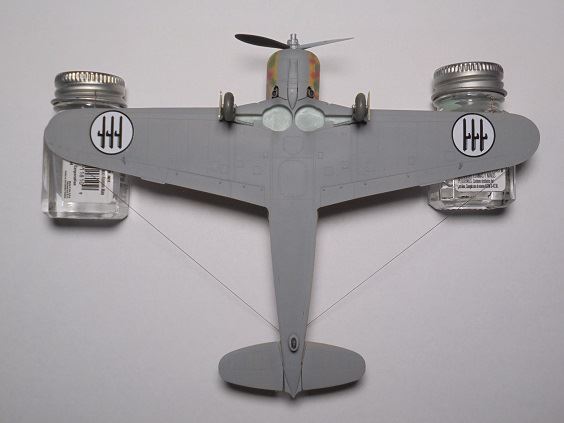
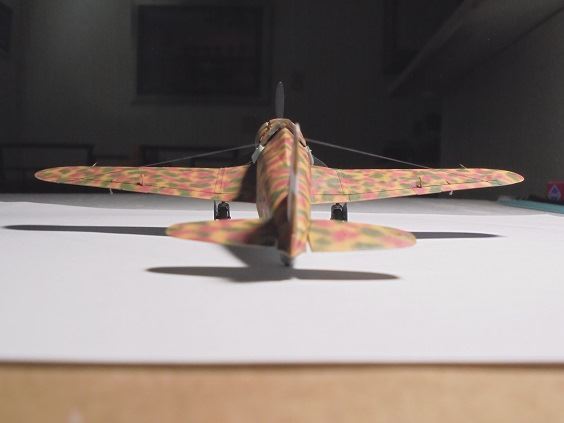
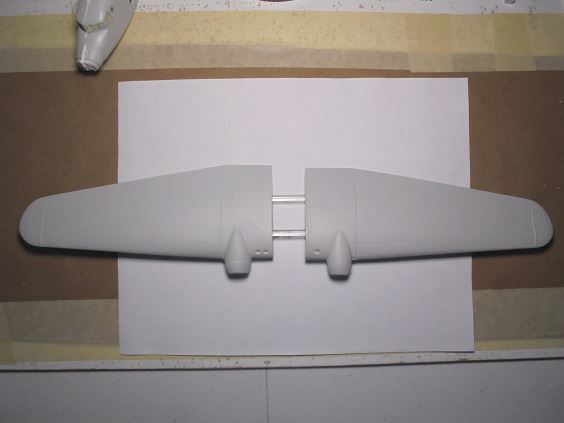
Fuselage rudder & tailplane sails sanded; starboard side fuselage tailplane sail root misaligned, considerable filing & sanding necessary. Entire upper fuselage painted Humbrol 63 Matt Sand + 10% Testors Flat Yellow + 36% Flat White shading replicating Giallo Mimetico 3 (GM3), set aside to dry. Fuselage topside seam section & rear starboard side tailplane root imperfections must be puttied, sanded over & repainted, will do that tomorrow well as painting the mainwings. Heavy one-piece resin mainwings precluded gluing them on the fuselage
before spraying on GM3 that along with having to extensively handle the assembly whilst spraying on other mimetico colors, fuselage & mainwings will be separately painted before joining them.
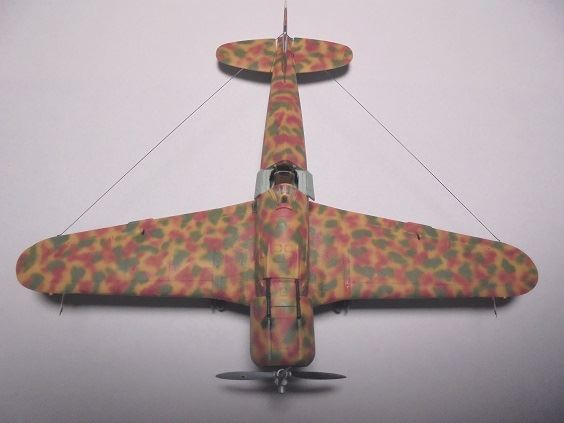
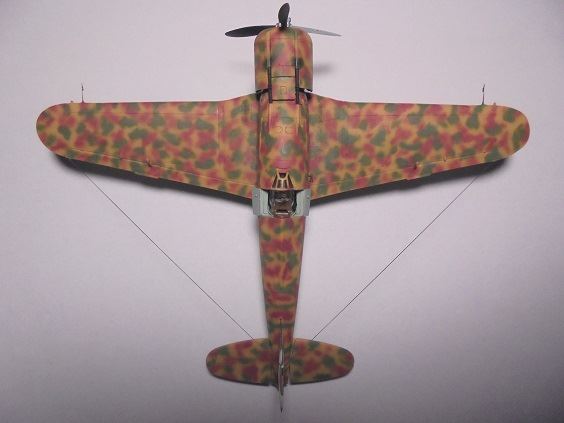
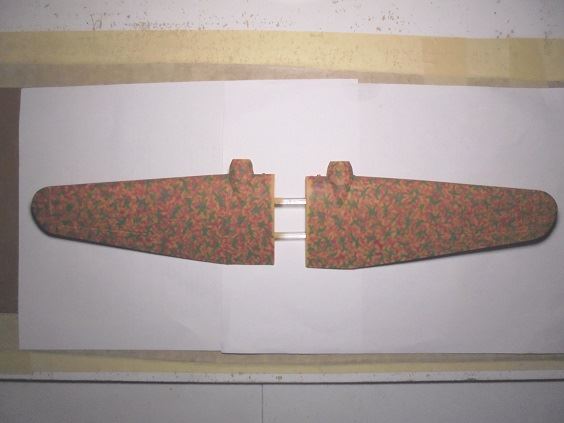
June 19, 2019 Update
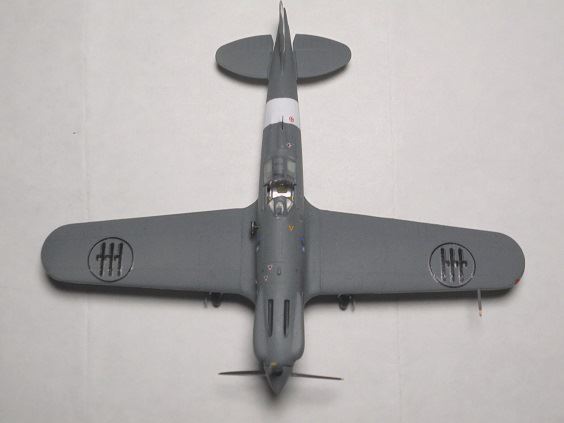
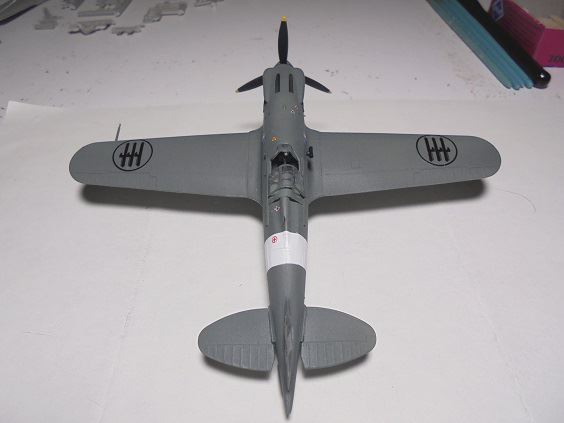
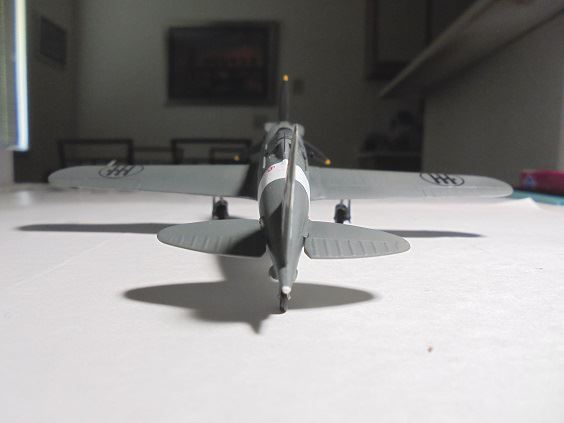
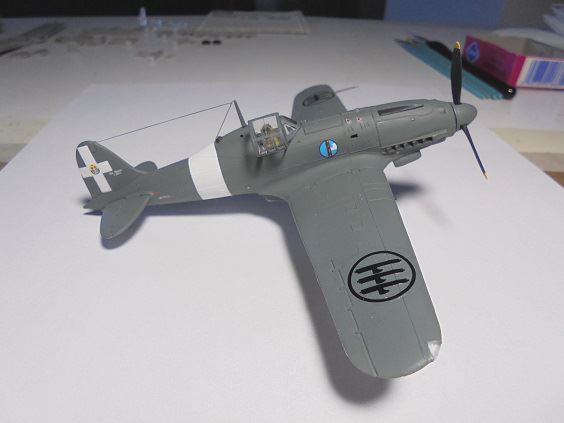
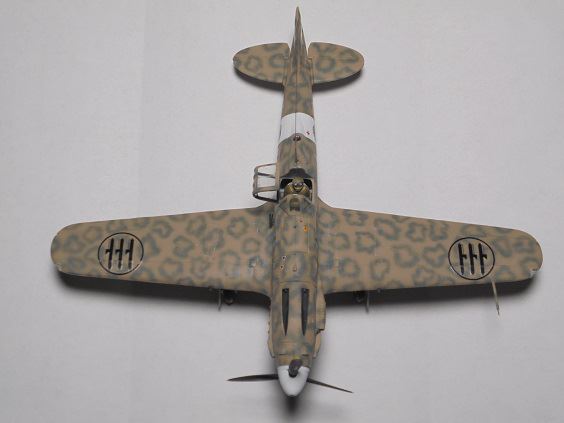
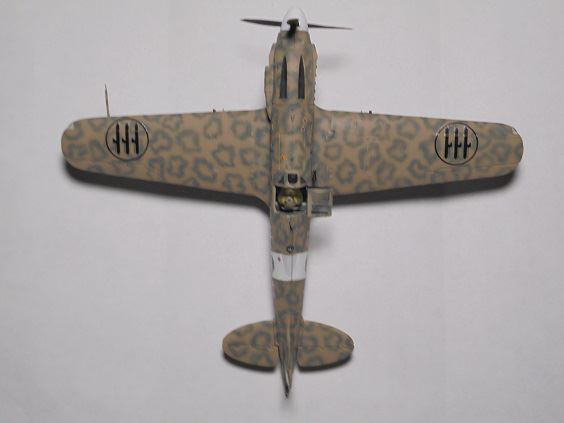
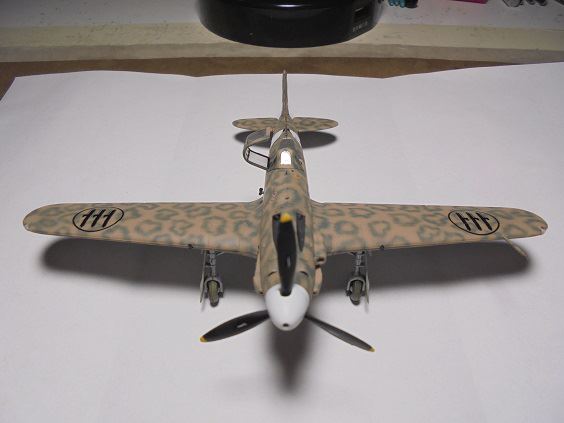
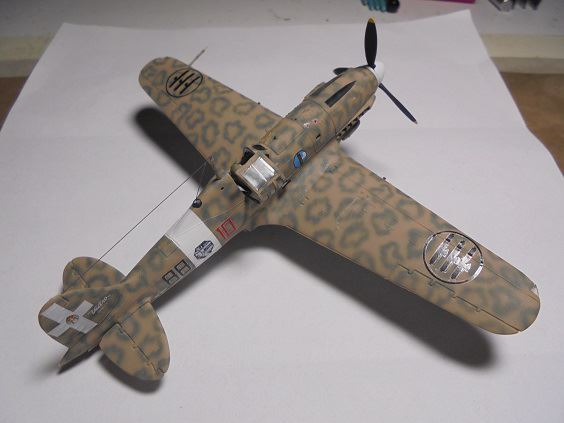
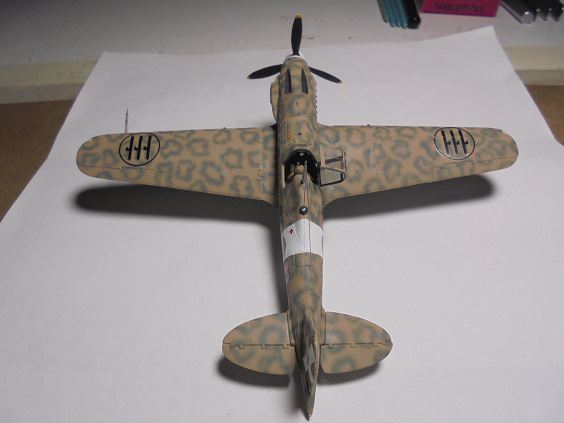
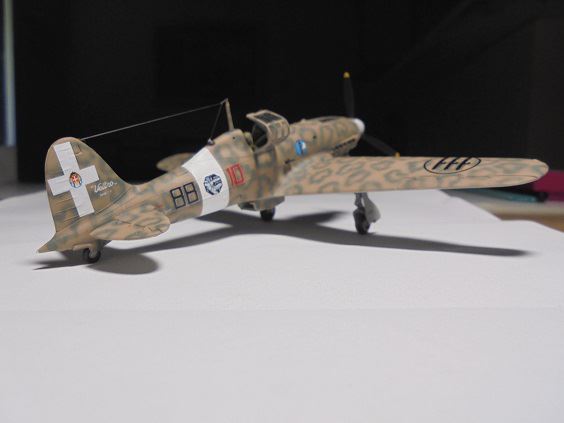
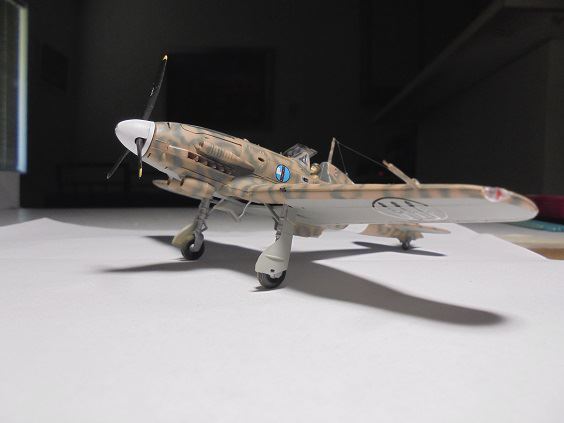
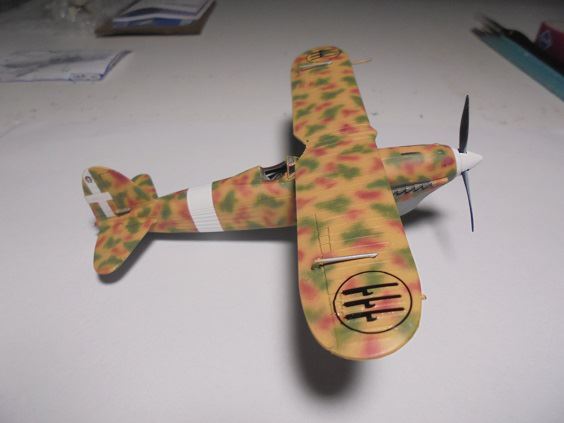
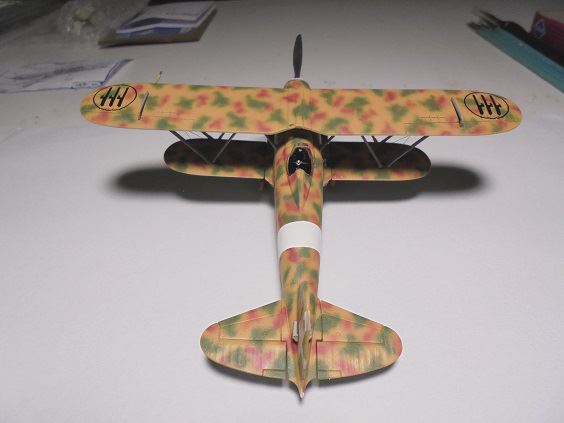
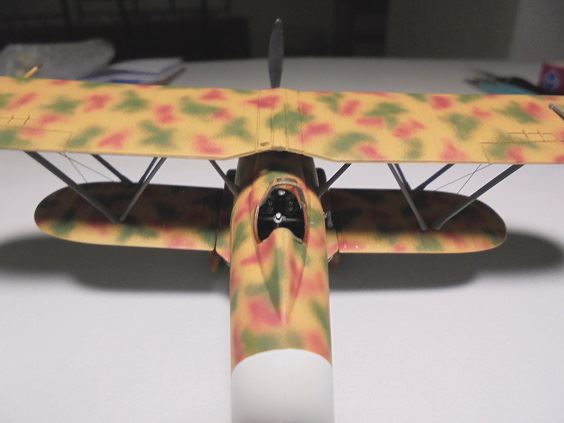
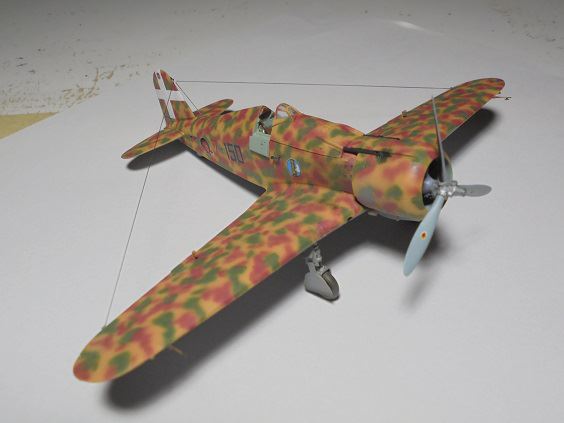
Schema C1A/C1B Mimetico mottles applied to Mainwings with Humbrol 117 Matt US Light Green replicating Verde Mimetico 3, Model Master 2009 British Crimson + Humbrol 118 US Matt Tan 80/20 mix replicating Marrone Mimetico 2 each with 36% Testors Flat White shading:
 June 20, 2019 Update
Fuselage mimetico mottles applied, set aside to dry:
 June 21, 2019 Update
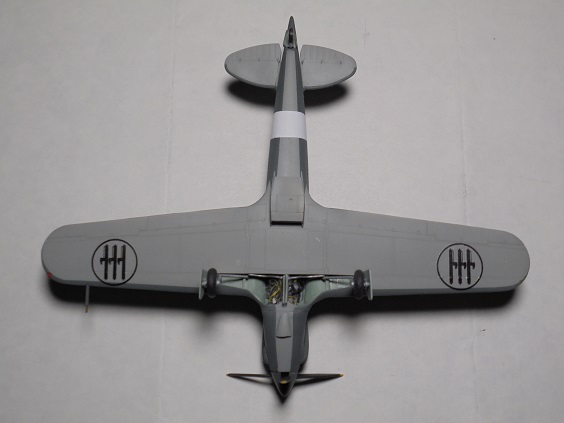
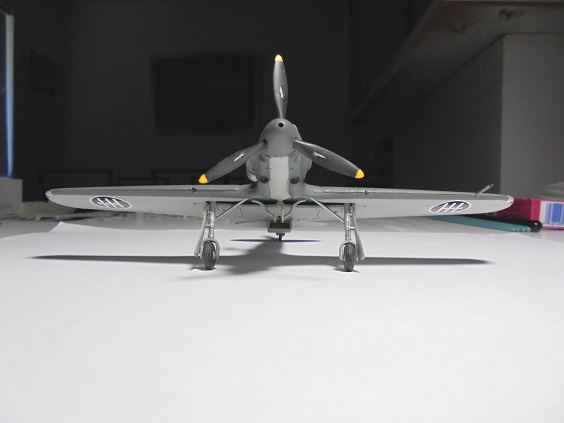
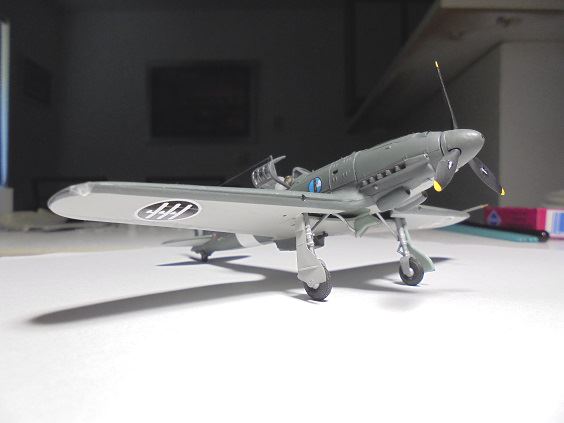
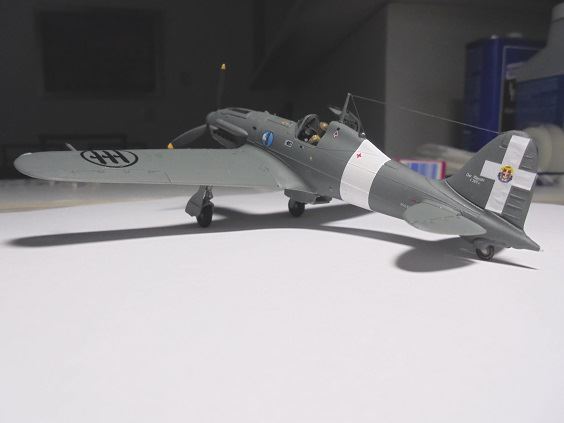
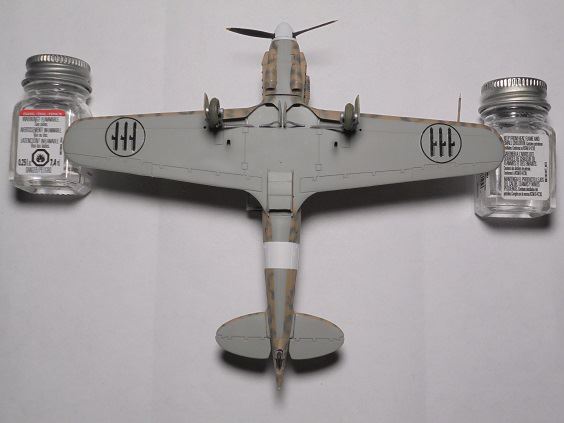
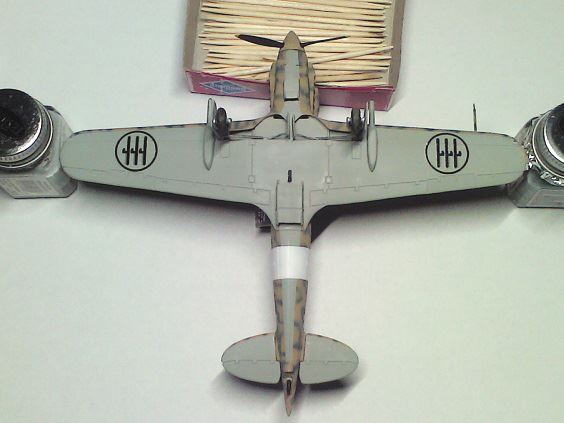
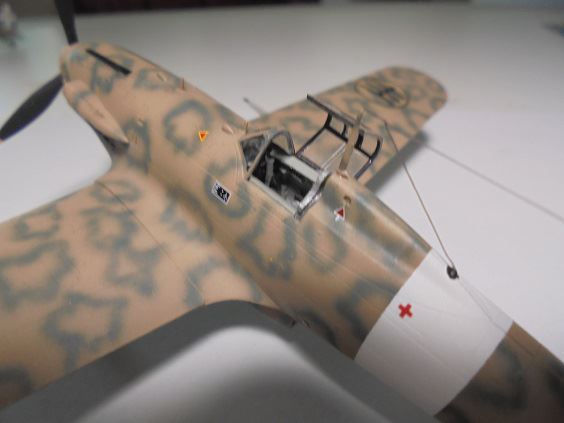
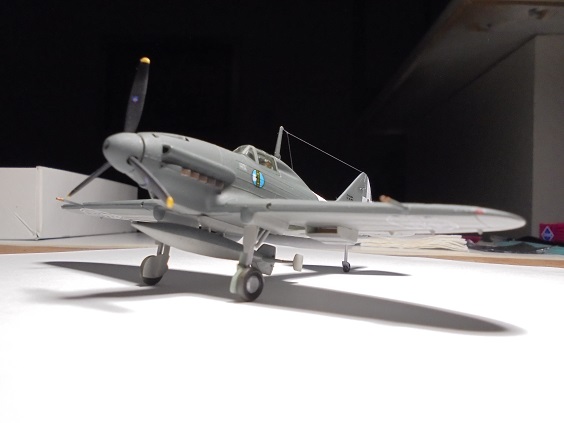
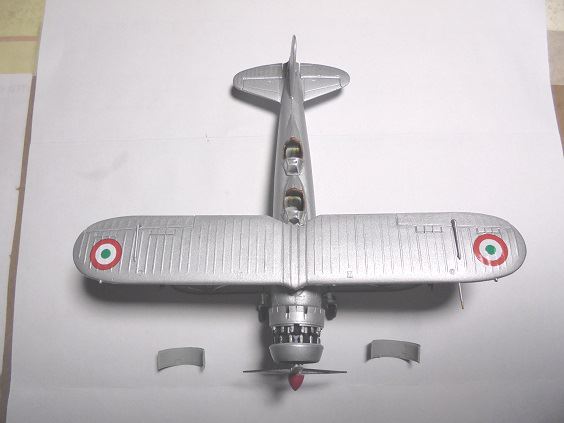
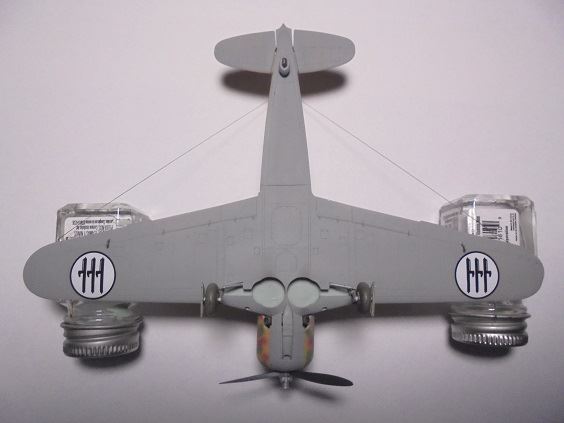
All model undersides painted Humbrol 140 Matt Gull Grey + 36% Testors Flat White replicating Grigio Mimetico.
June 23, 2019 Update
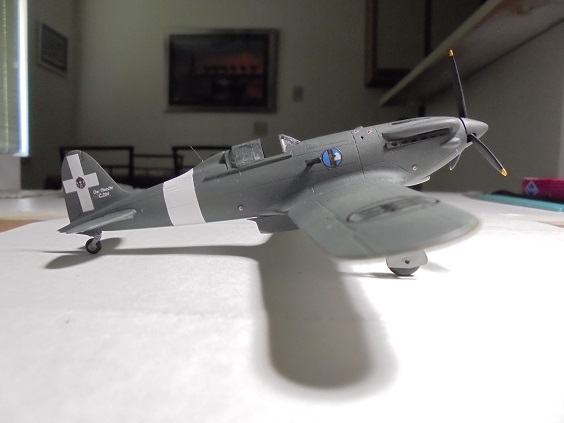
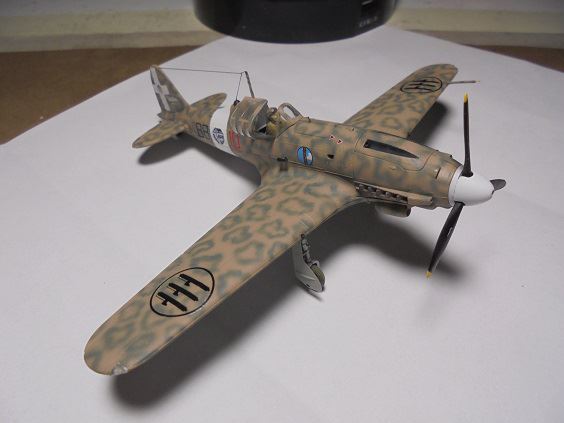
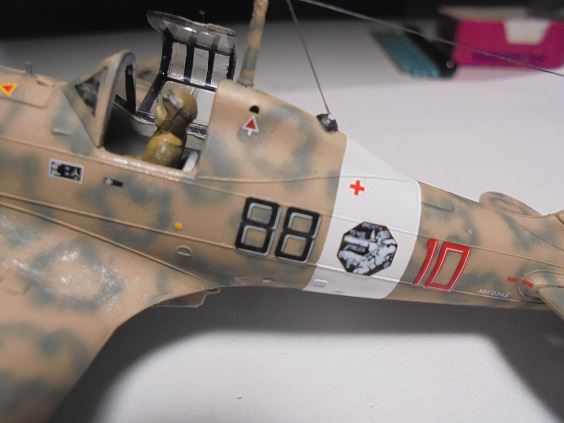
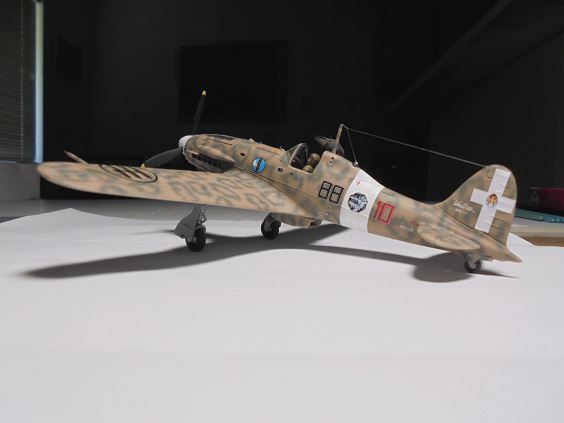
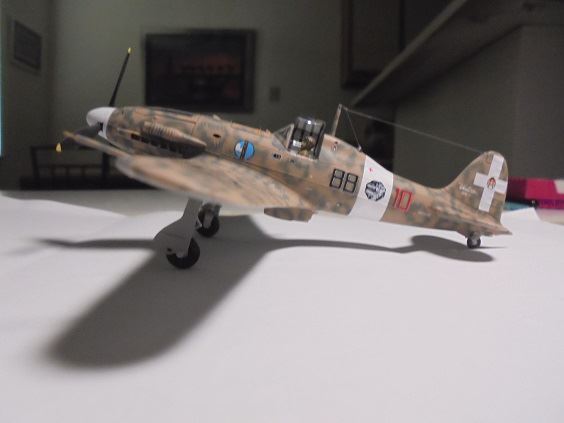
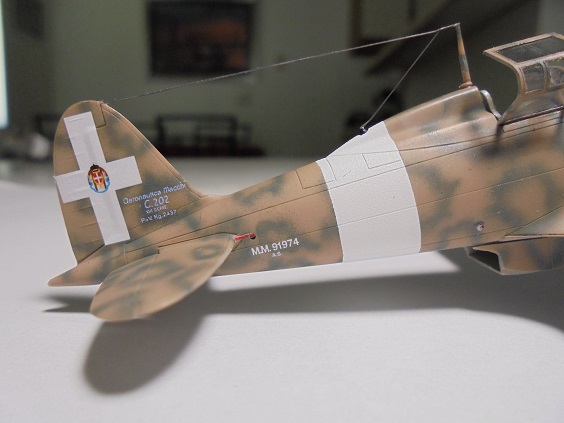
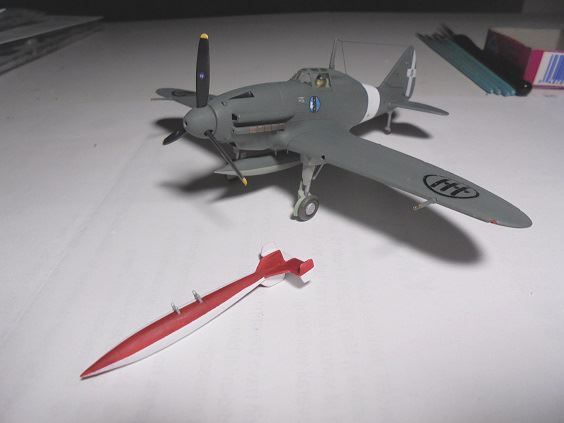
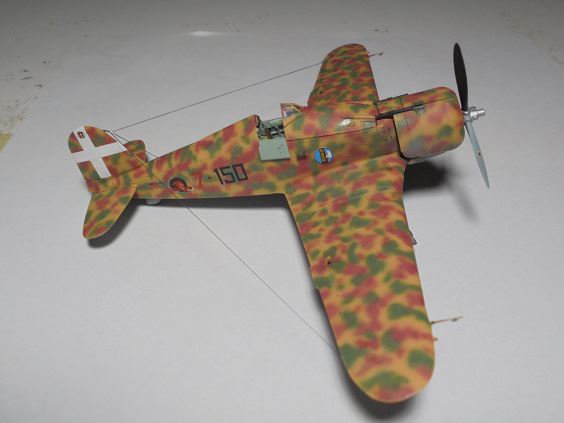
Testors Flat White fuselage band &
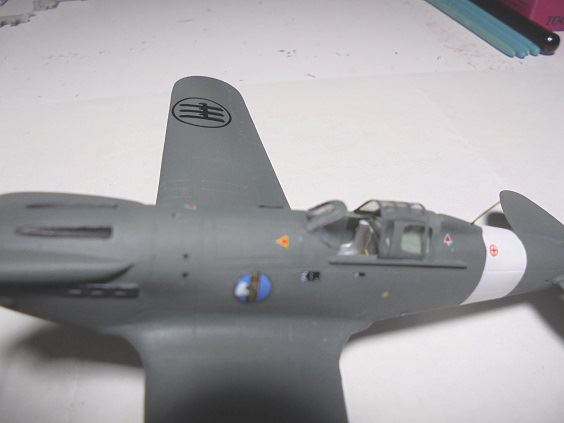
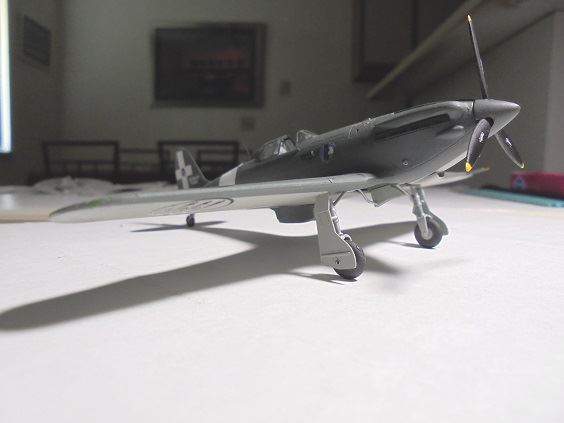
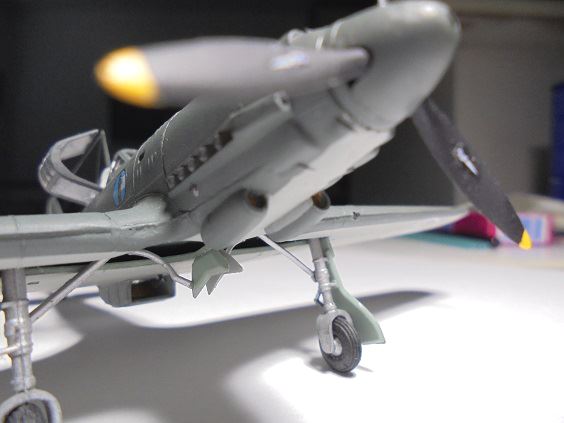
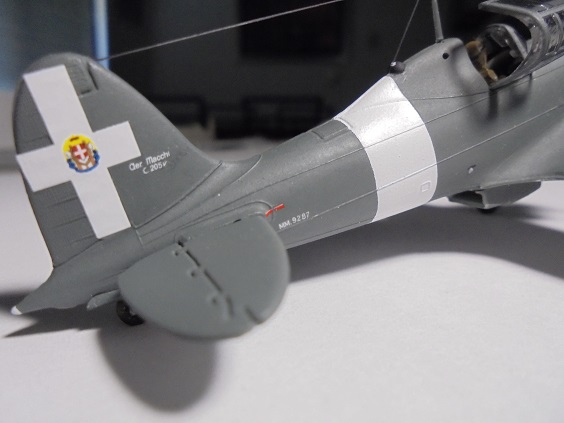
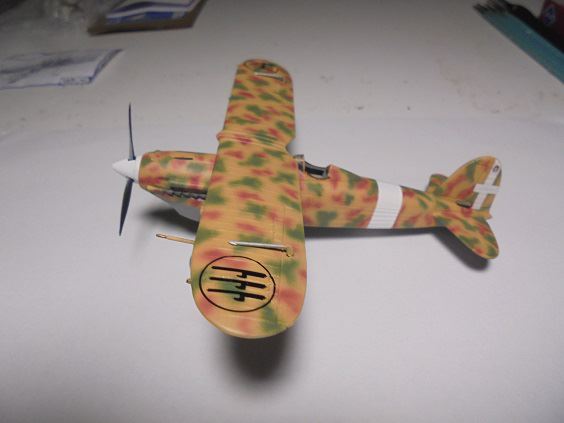
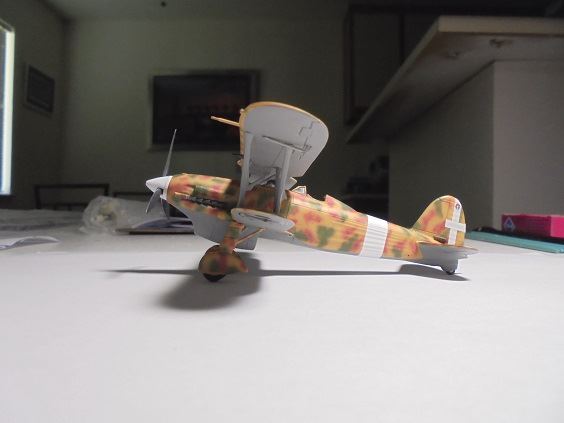
Distintivo di Guerra cross sprayed on rudder; engine cowling interiors & exteriors respectively base painted Humbrol 78 Matt Cockpit Green + Testors Flat White 50/50 mix replicating Verde Anticorruzione & Humbrol 63 Matt Sand + 10% Testors Flat Yellow replicating Giallo Mimetico 3 each shaded 36% Testors Flat White; engines painted Testors Flat Black + 5% Flat White.
June 24, 2019 Update
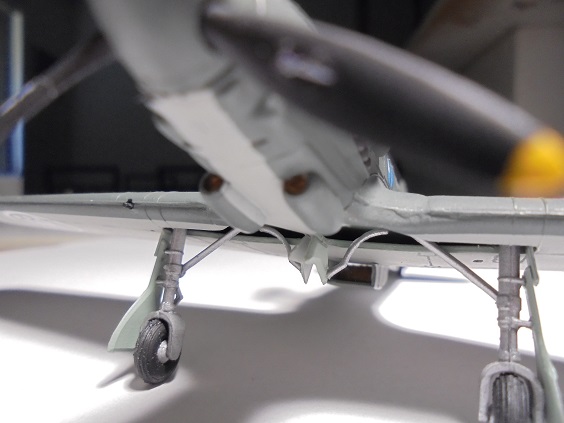
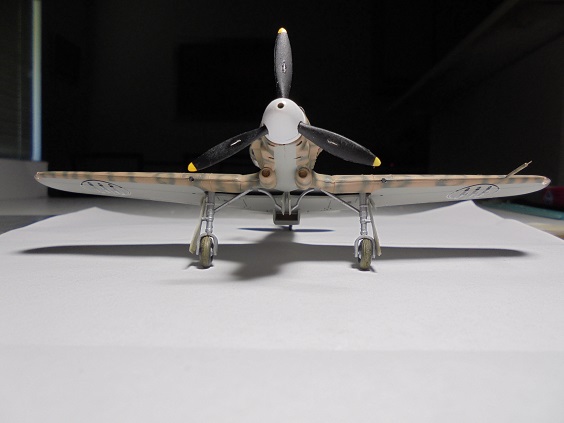
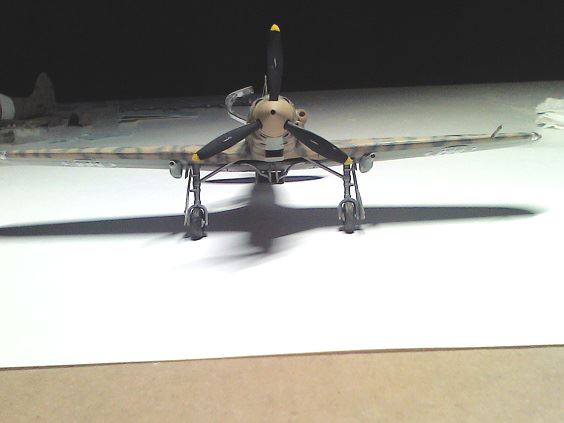
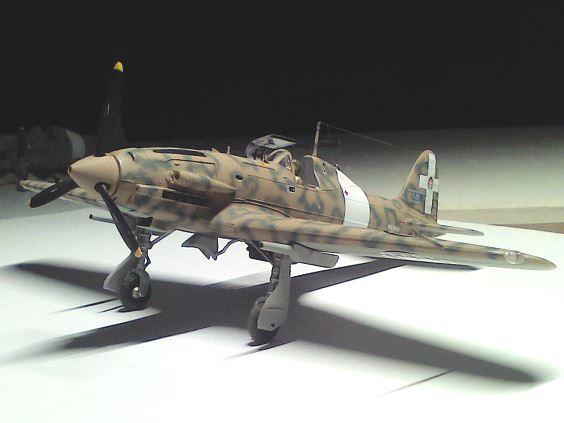
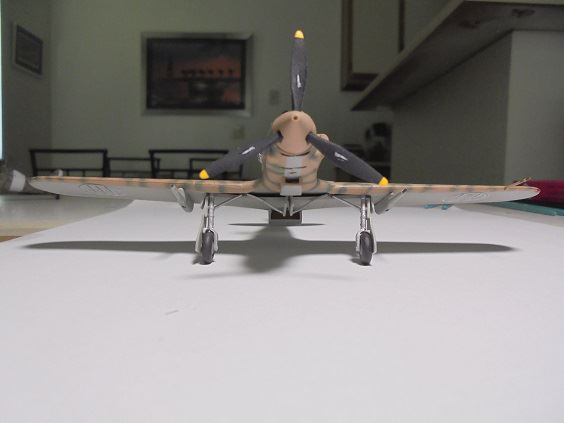
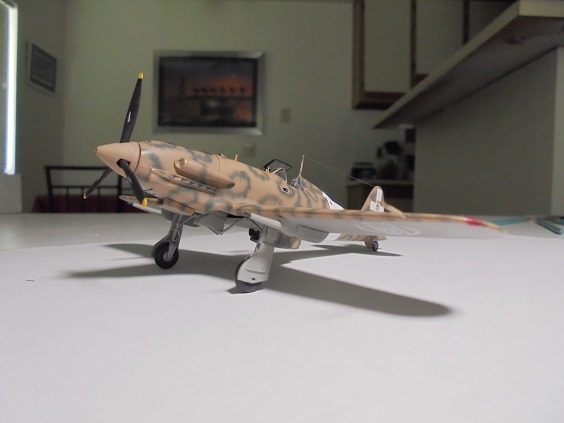
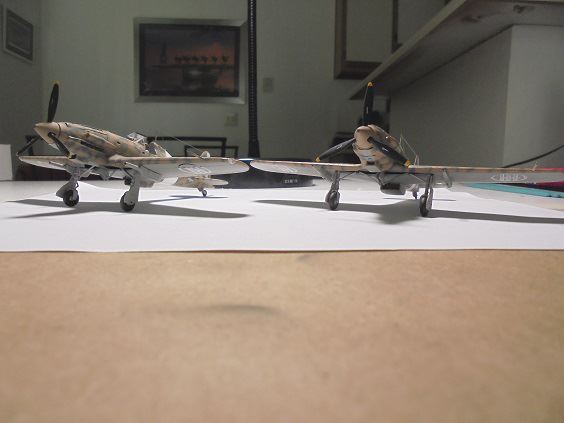
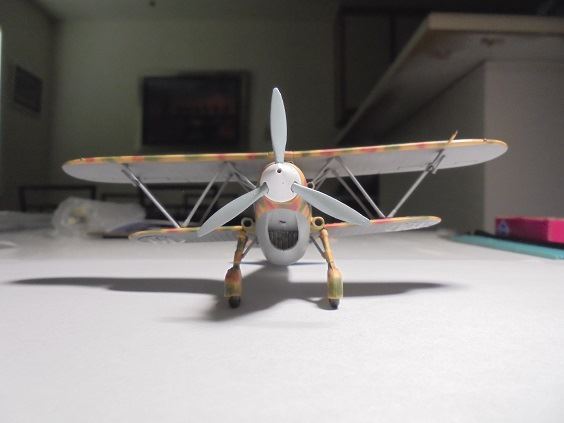
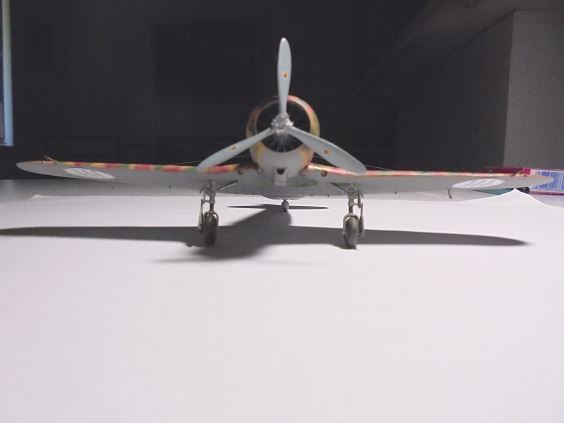
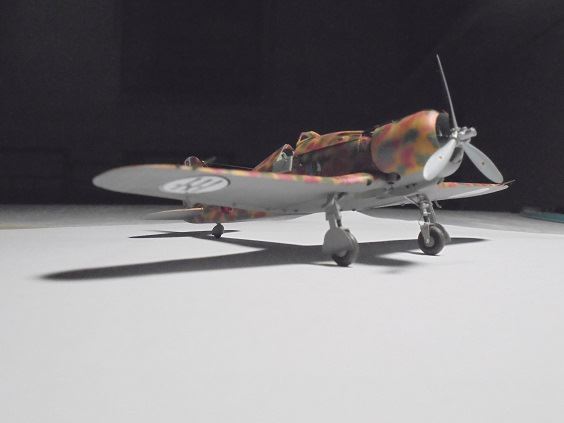
Landing gear components base painted Testors Flat Aluminum, tires 70:30:10 Testors Flat Rubber, Black, White mix, propeller reverse sides Testors Flat Black + 5% Flat White; considerable resin flash carve-out removal & filing was necessary prior to painting. Engine surface details painted with Testors Flat Aluminum & Model Master 7510 Dark Blue Grey (crankcase housing), propeller shaft holes drilled out to fit propeller parts.
June 25, 2019 Update
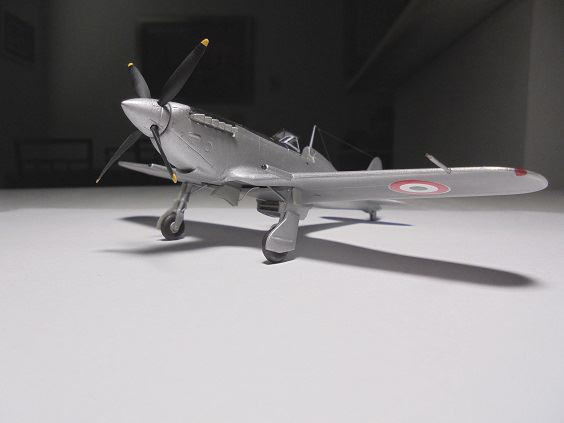
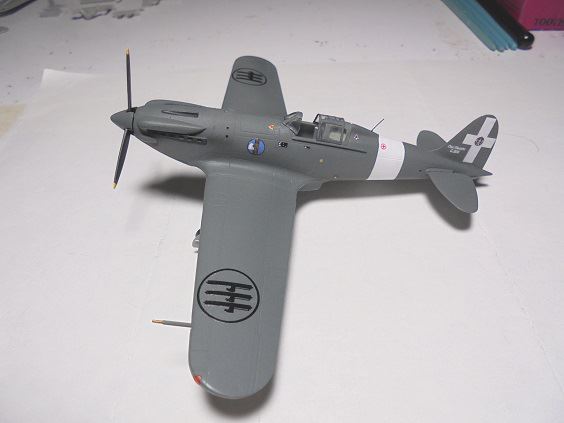
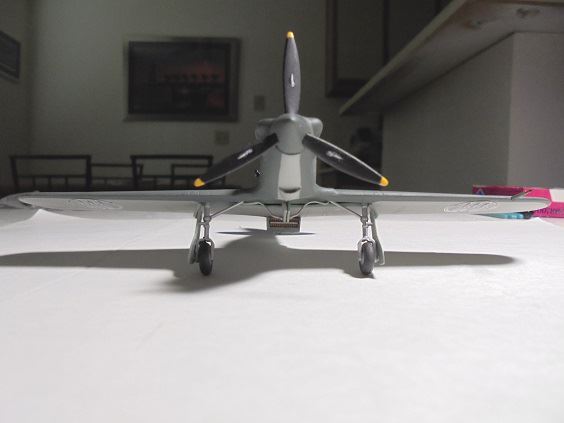
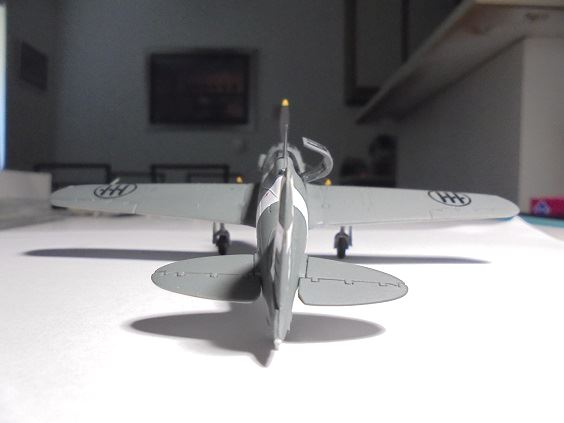
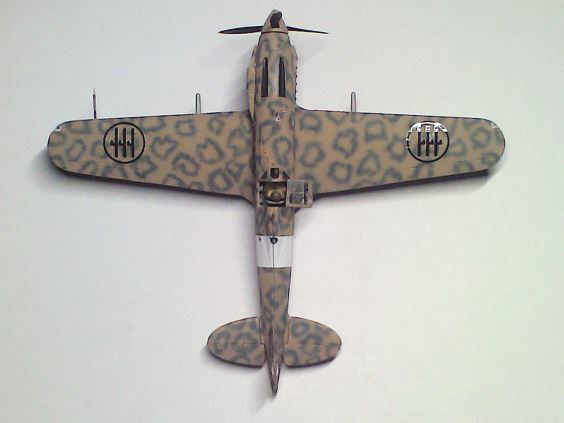
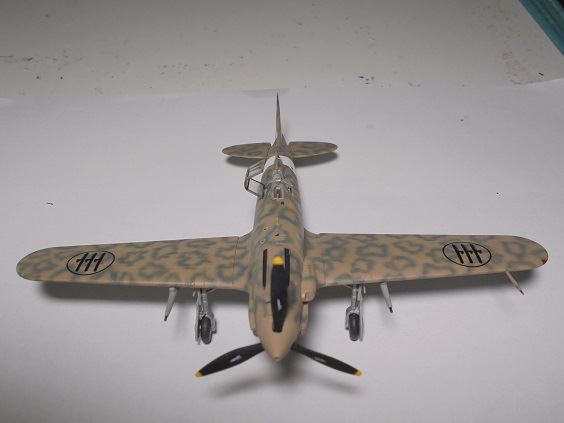
Engine cowlings & aileron counterweights fully mimetico painted. Propellers fully painted, obverse blade sides Testors Model Master 2078 RLM 65 Hellblau enamel approximating Regia Aeronautica Italiana specs. Tire hubs painted Testors Flat Aluminum.
June 26, 2019 Update
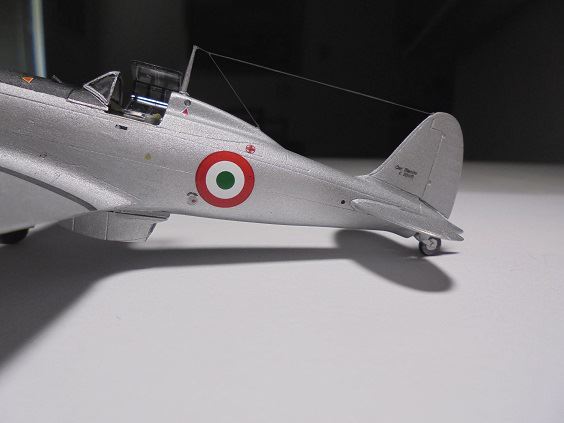
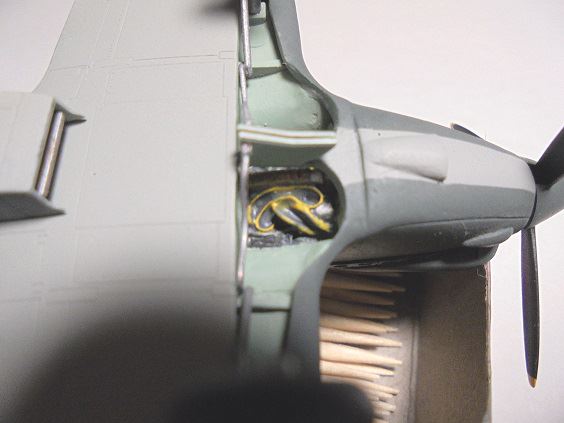
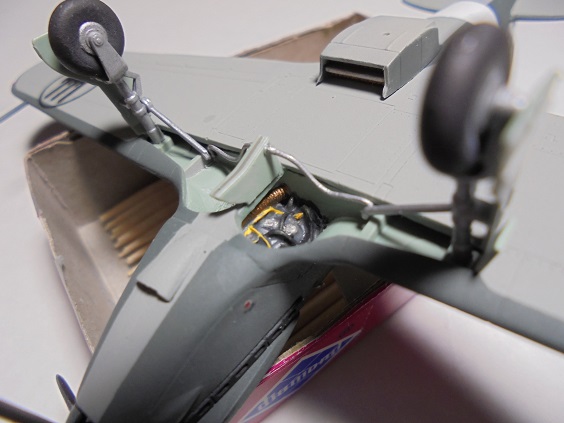
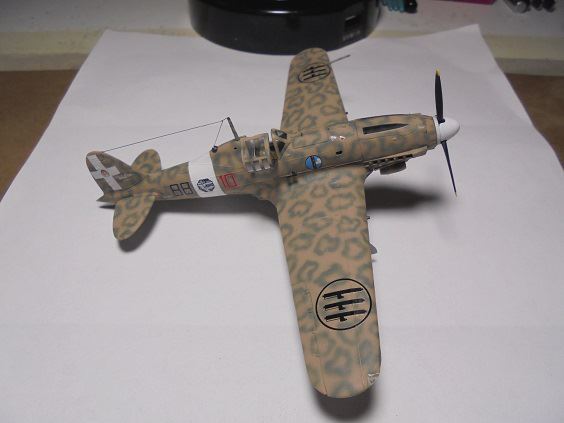
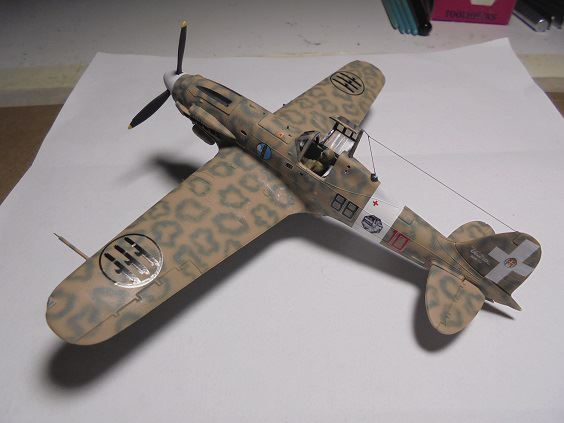
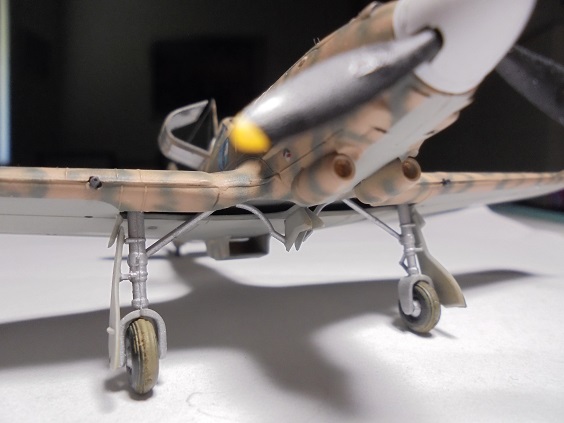
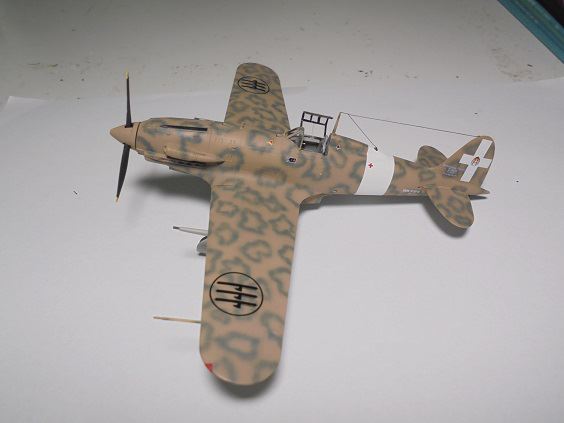
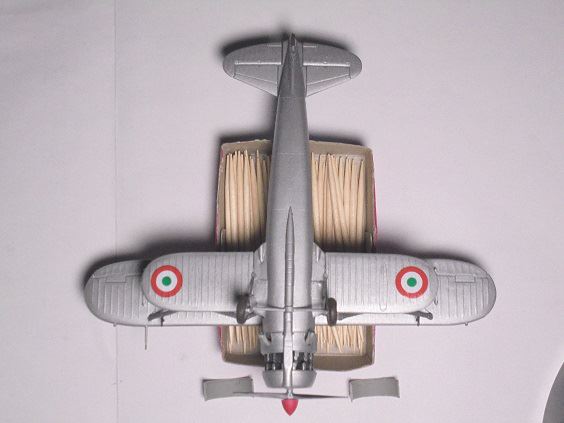
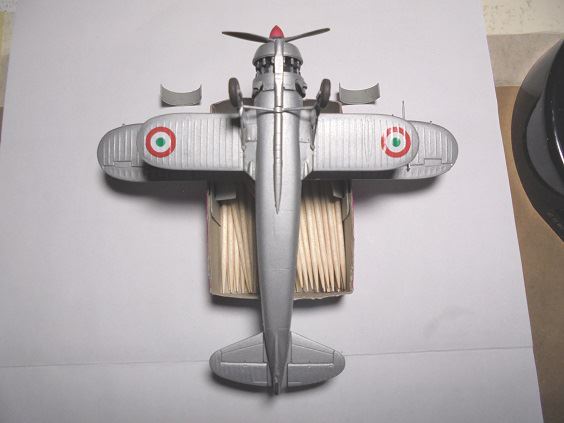
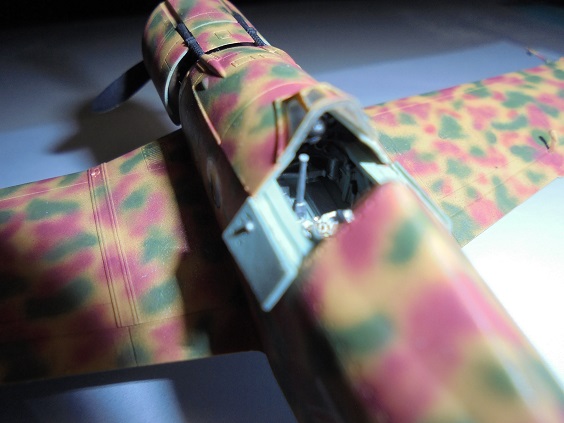
FIAT A.74 R.C.42 engine mounted on fuselage nose, alignment acceptable following
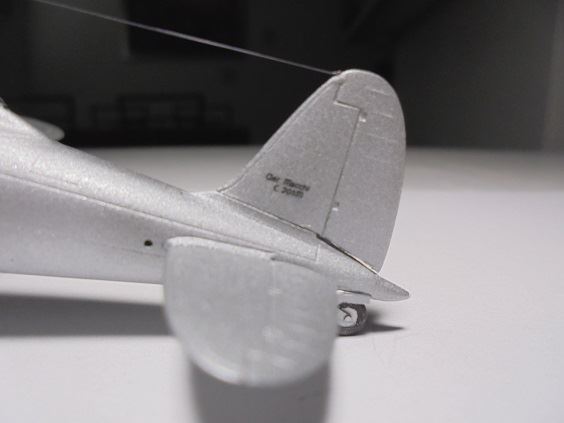
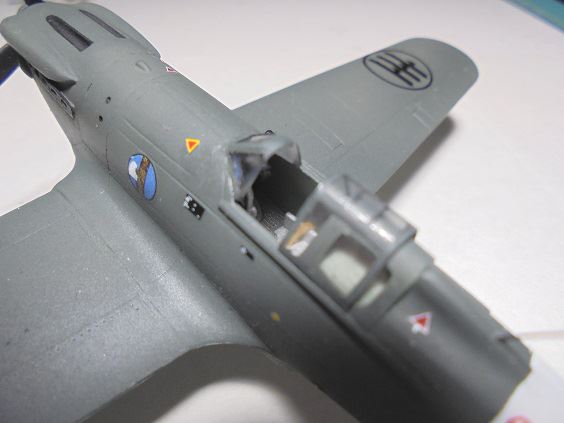
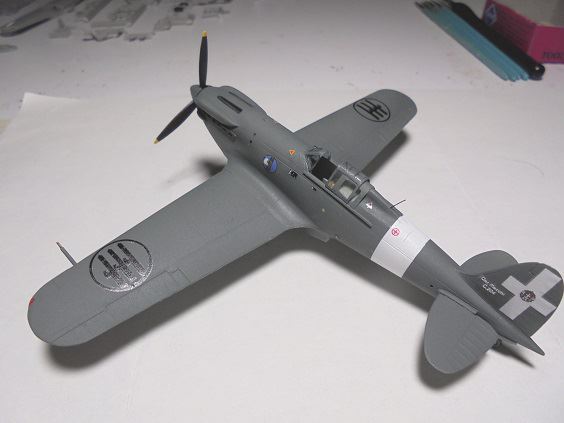
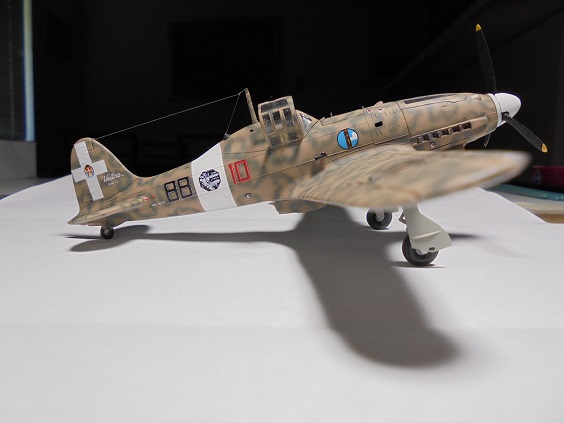
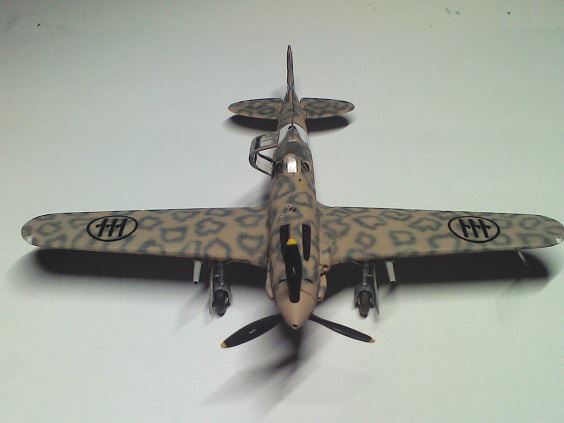
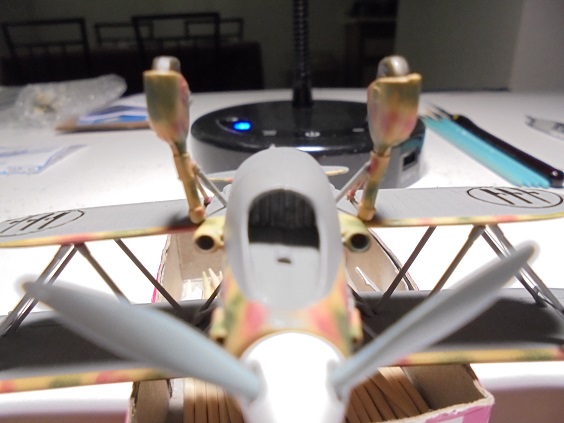
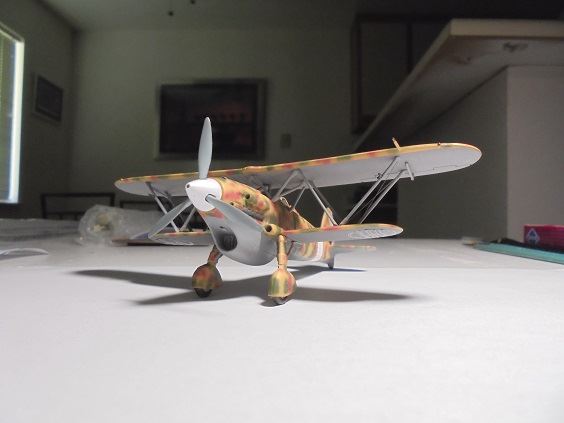
three glue-on tries last after drilling holes, gluing in plastic shaft to hold engine in place. All water decals placed on fuselage & rudder latter subsequently glued on fuselage. Main landing gear struts & tires mud-weathered with Polyscale "Dirt" & "Mud" acrylics, tires subsequently glued on struts. Fuselage will be spray-sealed with Testors Semi-Gloss Clear Lacquer, clear plastic masks removed A.M. tomorrow, spot putty patching may be necessary. Engine exhaust pipes painted a Testors Rust & Steel enamel mix, detailing with Polyscale acrylics tomorrow . All fuselage components will be glued on prior to joining with main wings latter by this weekend.
June 27, 2019 Update
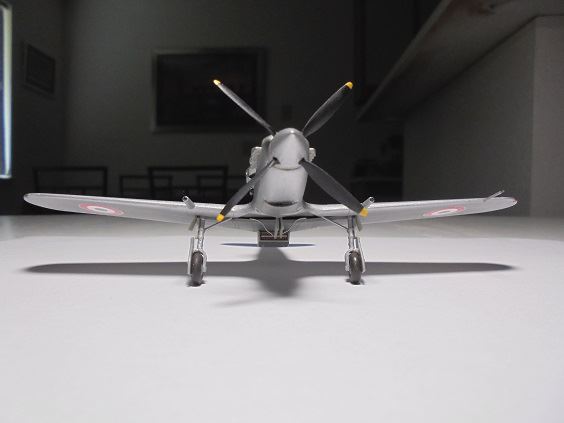
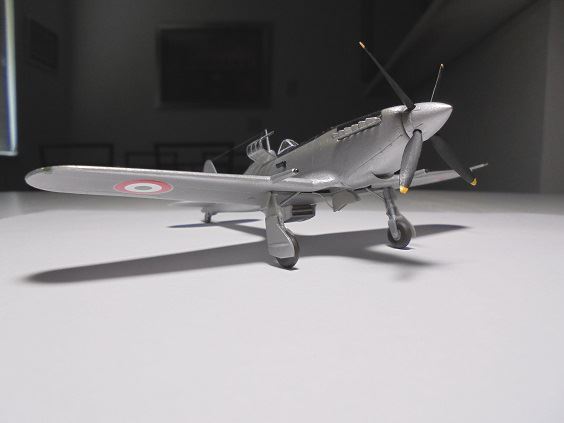
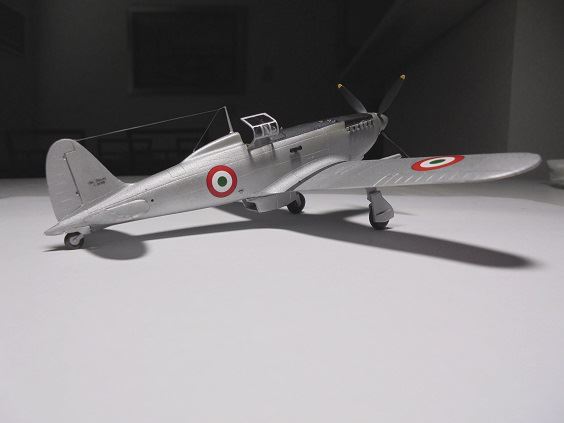
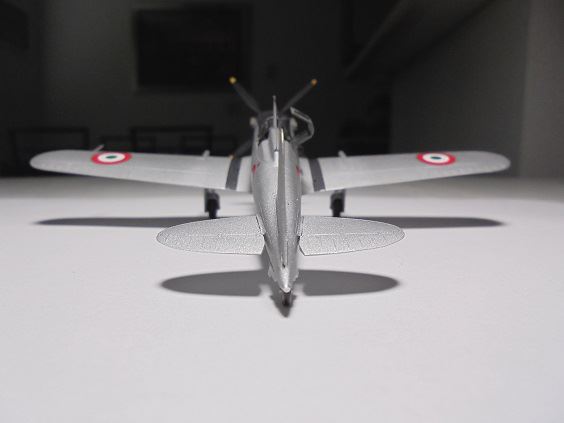
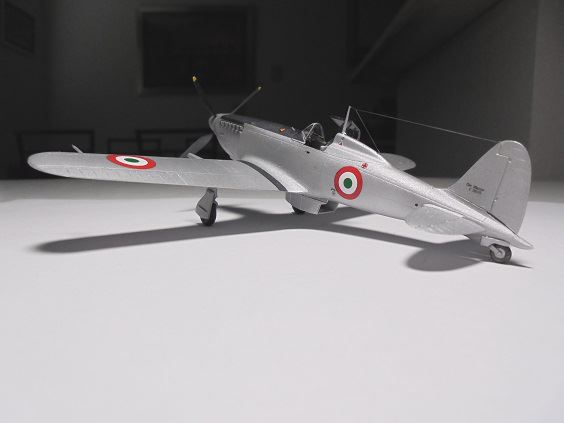
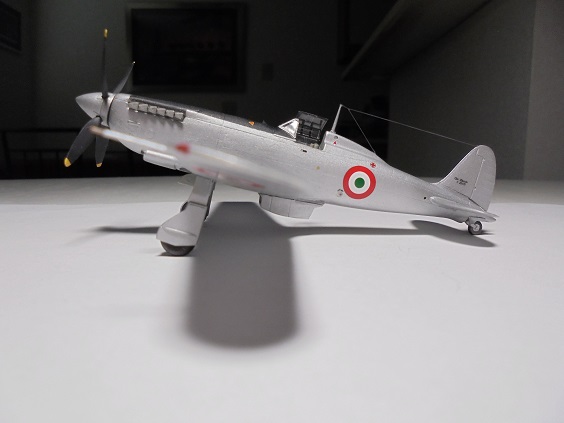
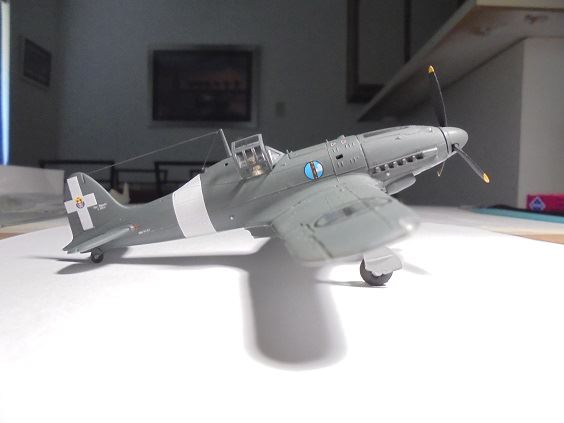
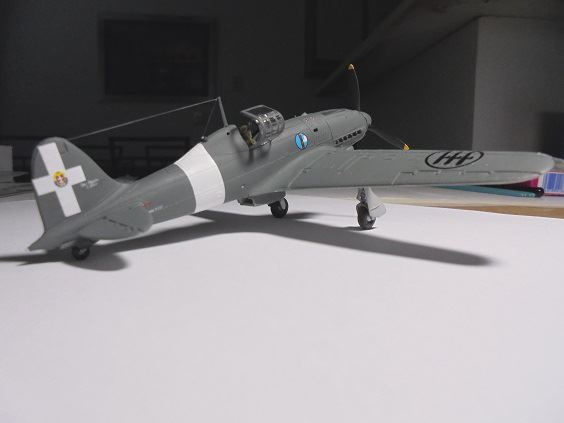
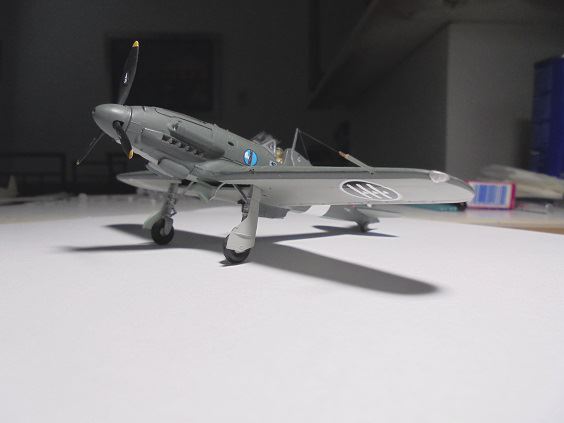
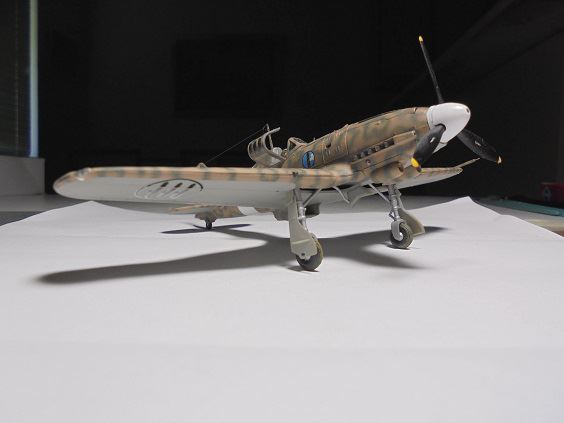
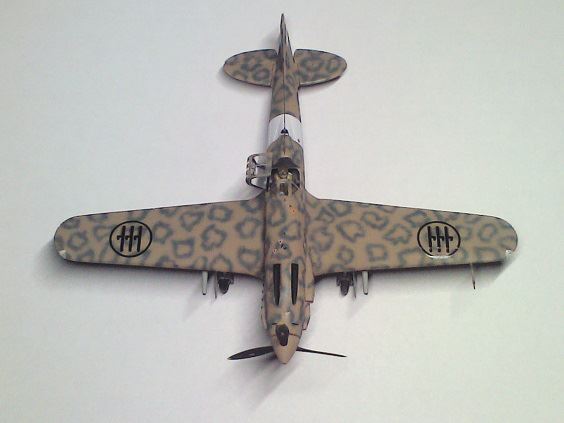
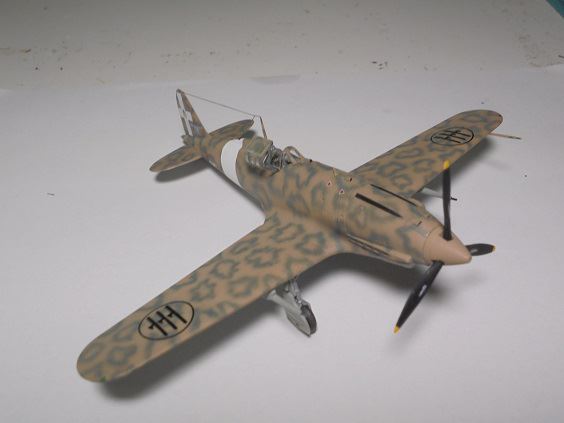
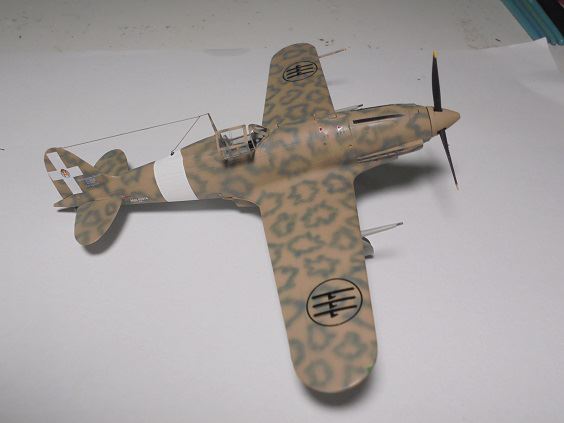
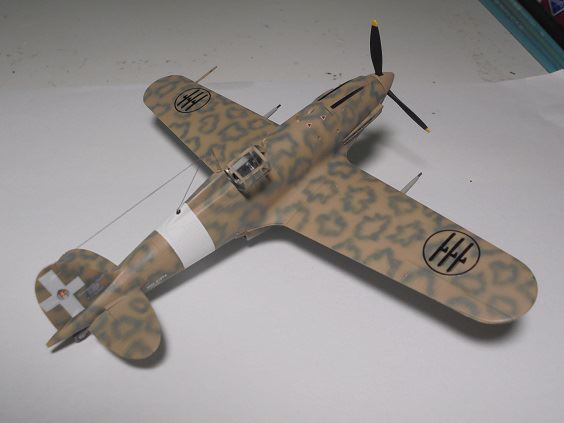
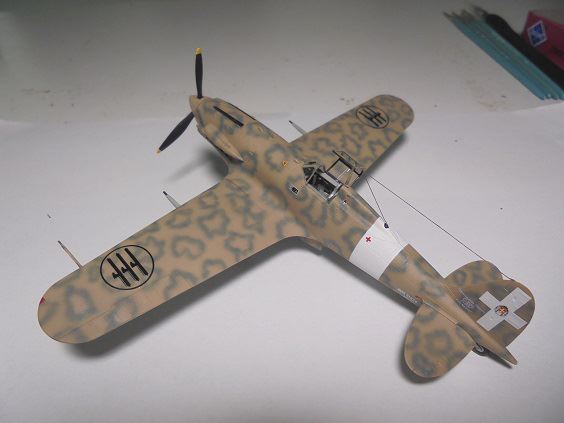
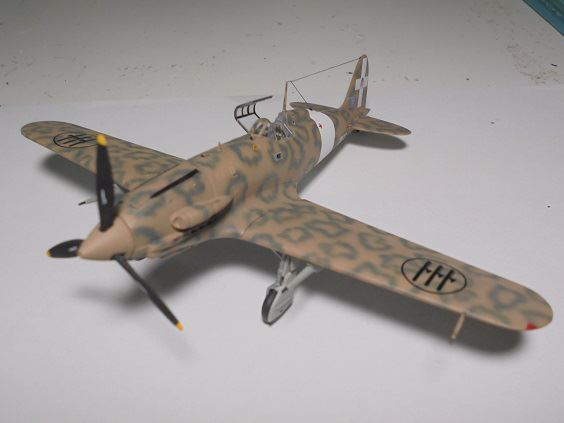
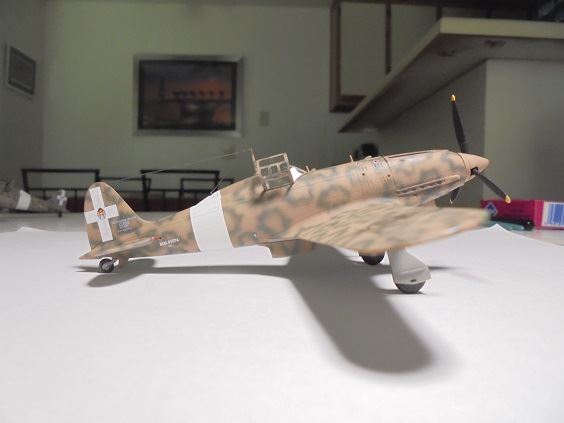
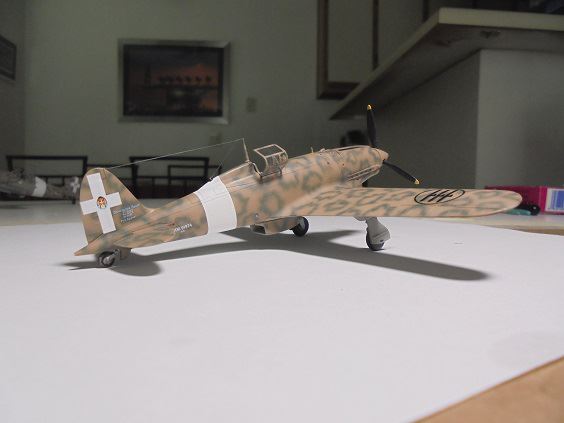
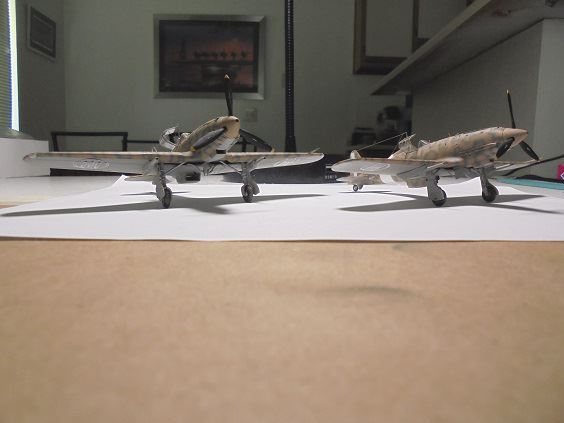
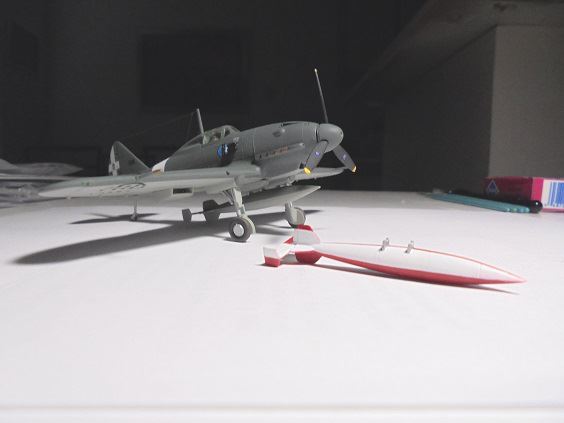
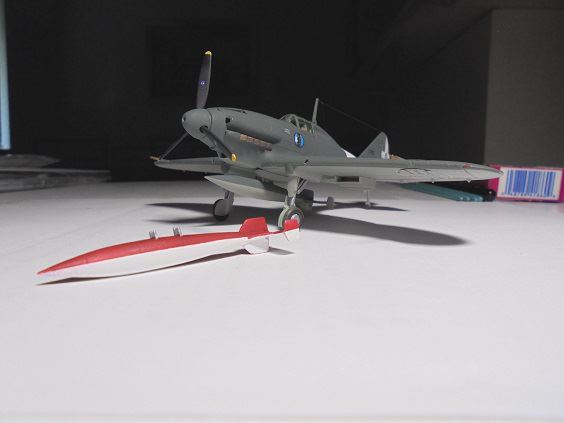
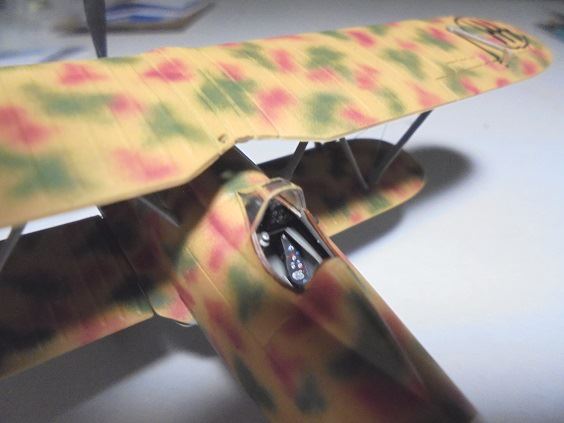
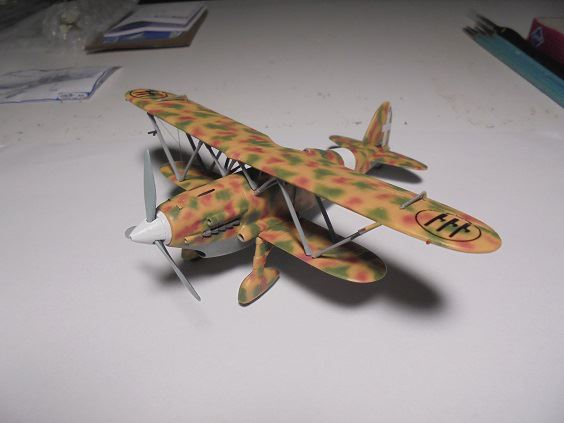
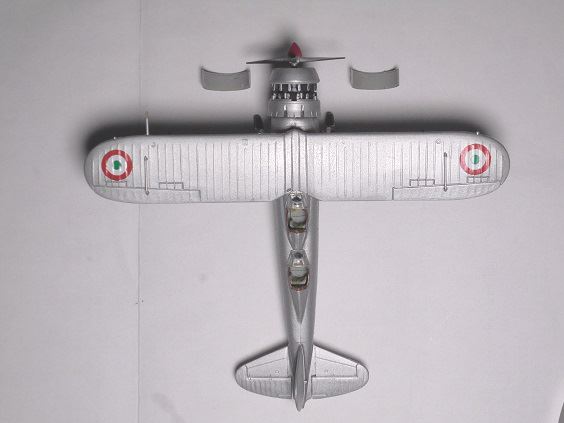
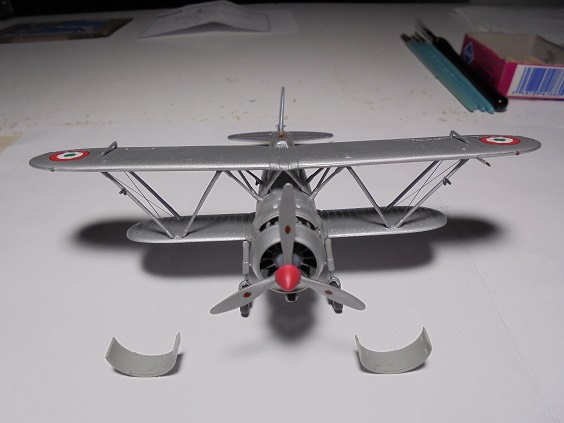
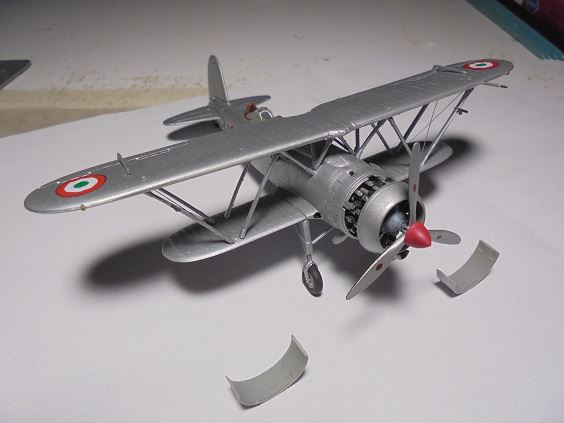
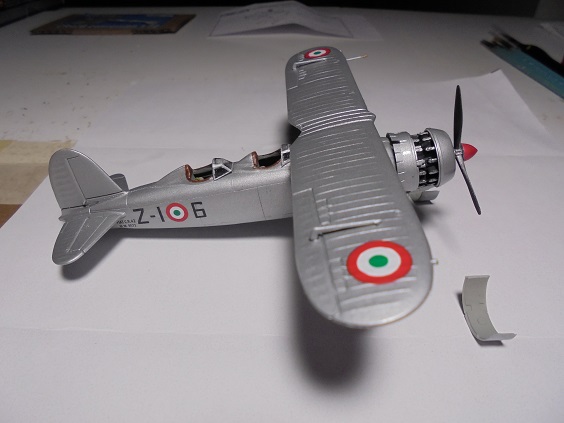
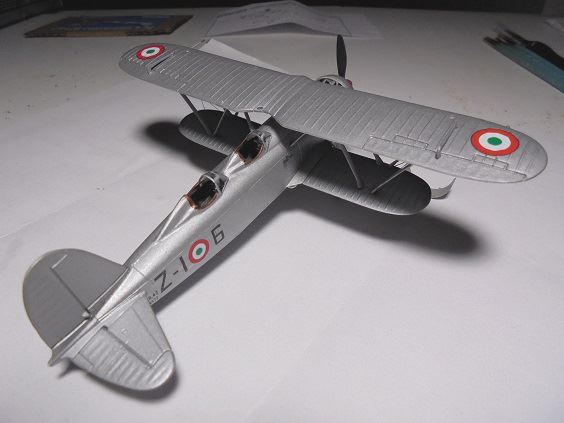
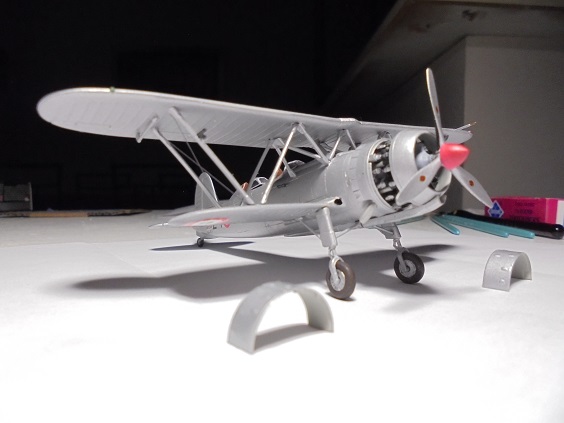
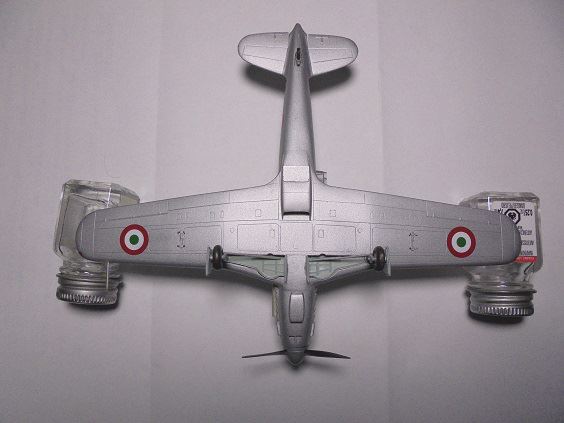
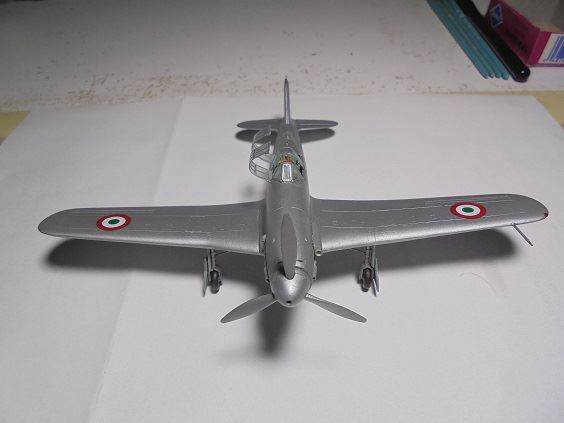
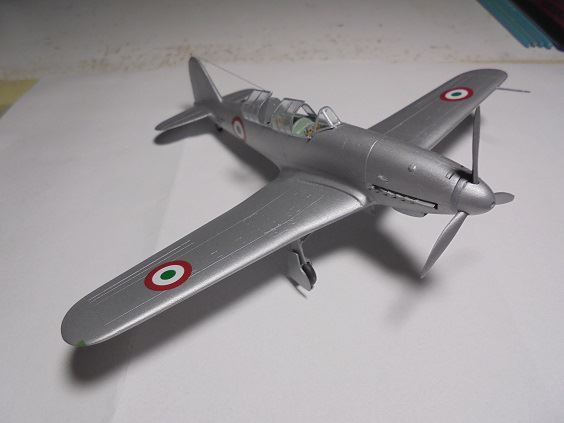
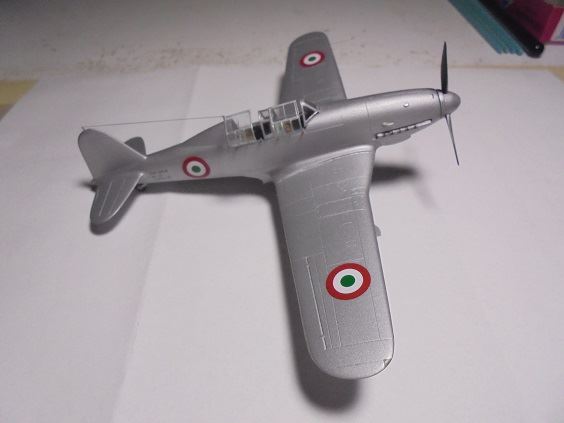
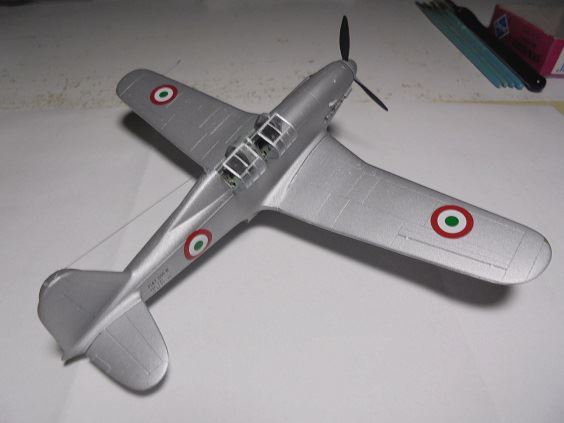
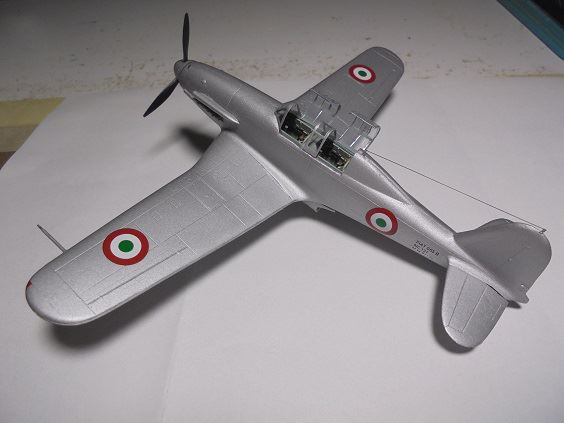
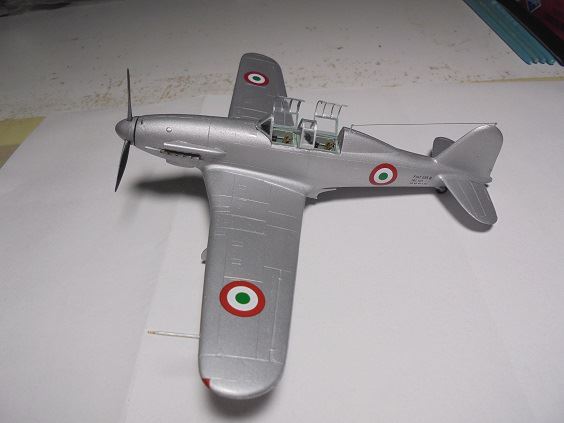
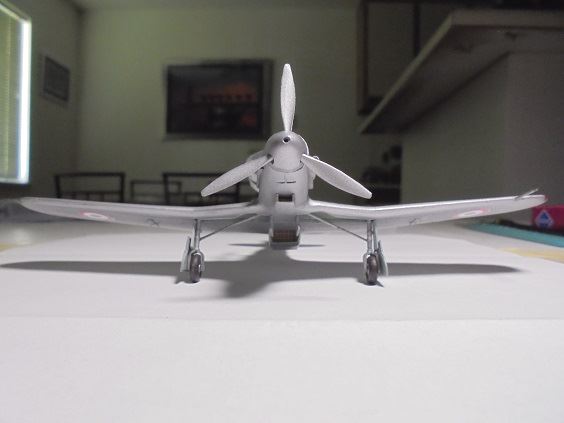
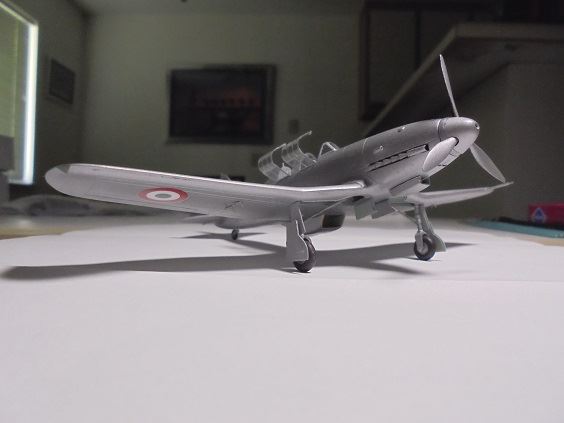
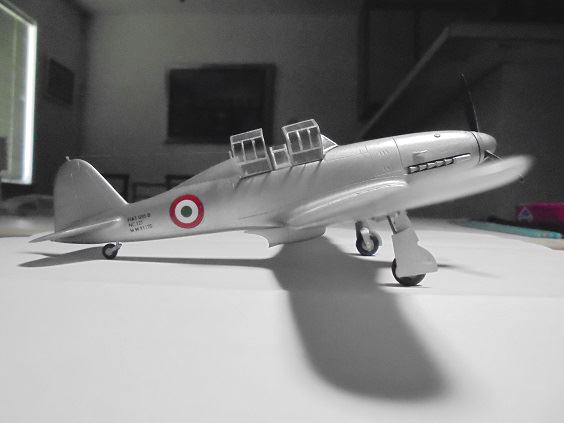
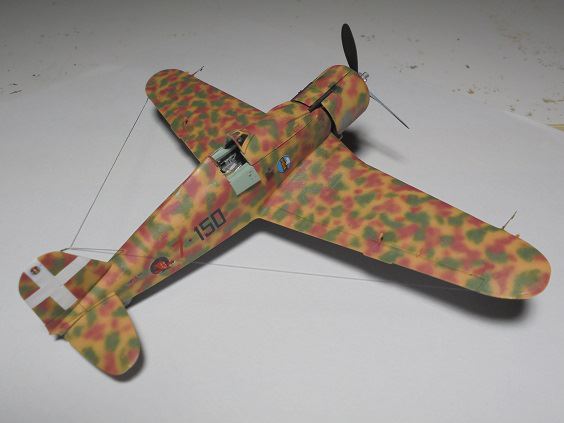
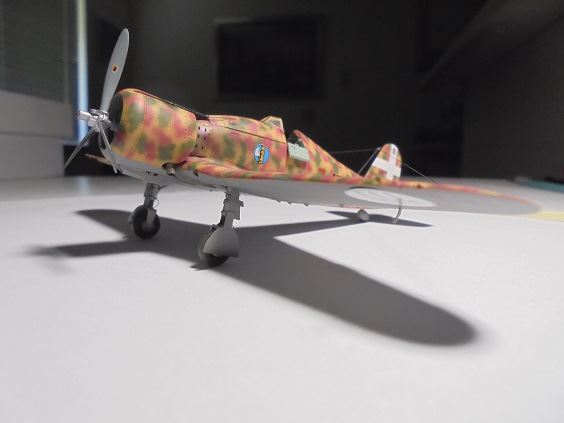
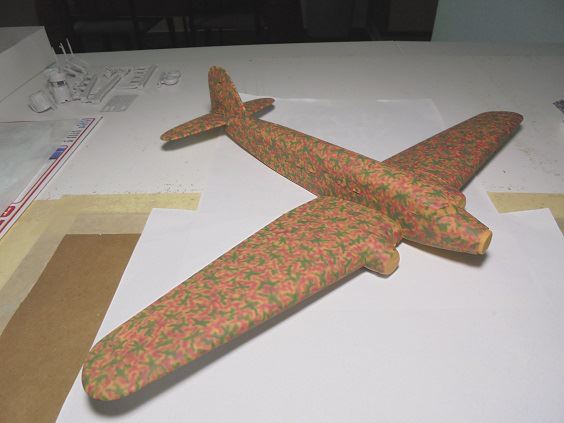
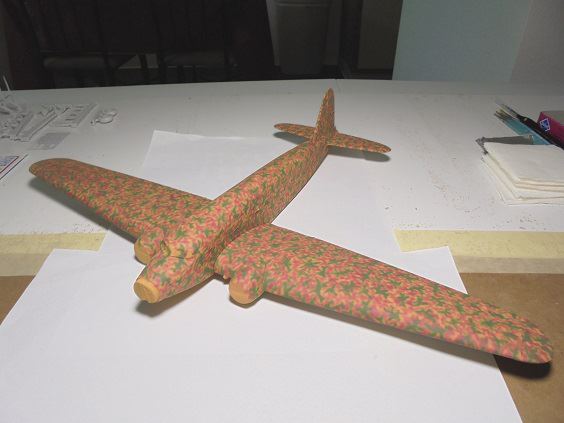
Fuselage fully painted & assembled; several passenger windows needed replacement whilst cleaning others "inside from the outside" with brushes & Q-Tips, FIAT A.74 R.C.42 nose engine cowling lightly weathered then glued on fuselage, exhausts stubs glued on afterwards, radio mast & EZ Line thread replicating antenna wire glued on. Attention turns on final painting & parts assembly of main wings tomorrow, model completion this weekend, watch for photos...