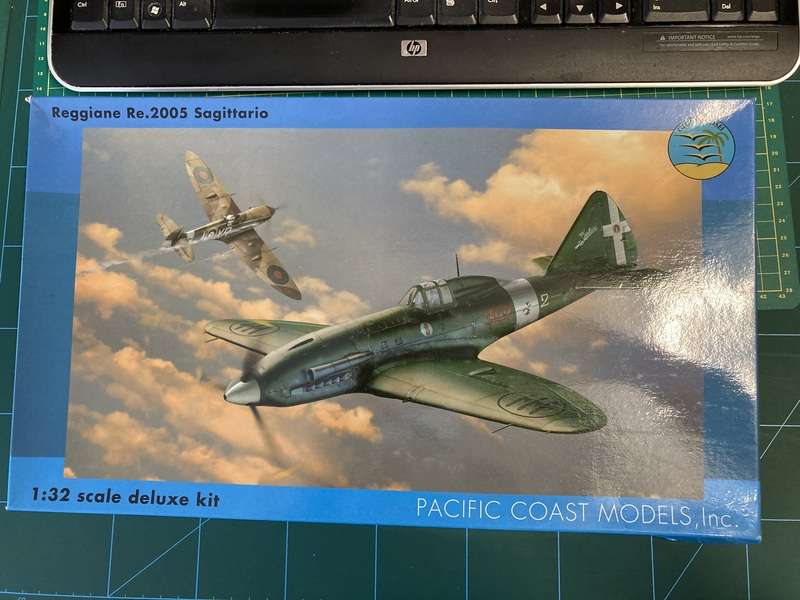
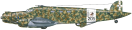
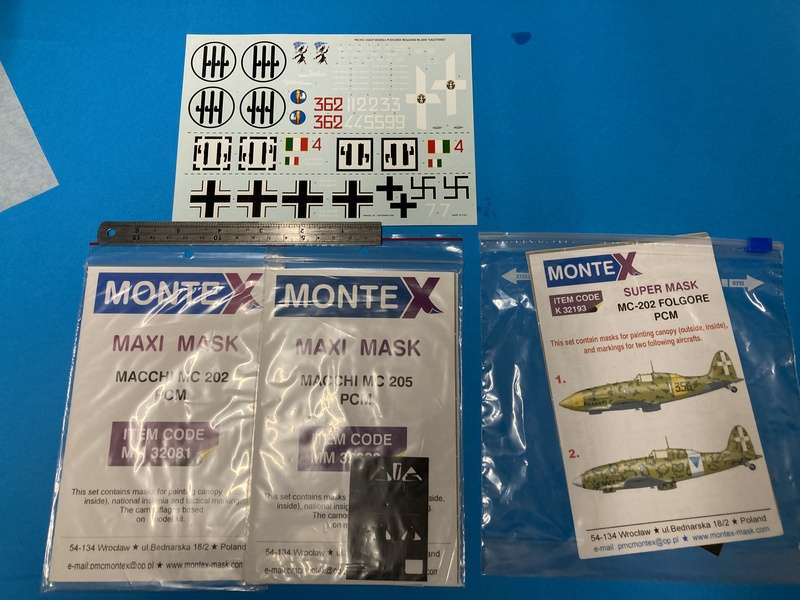
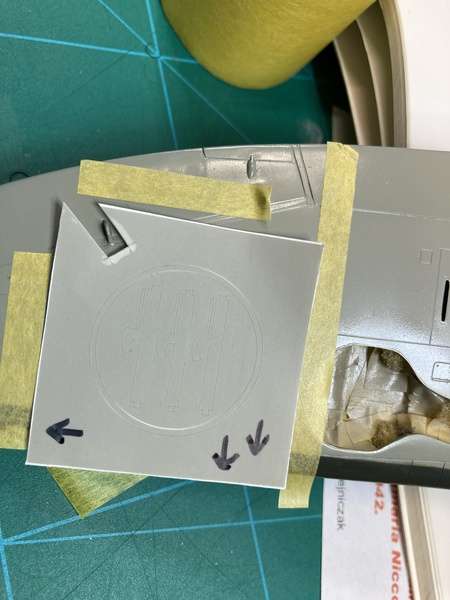
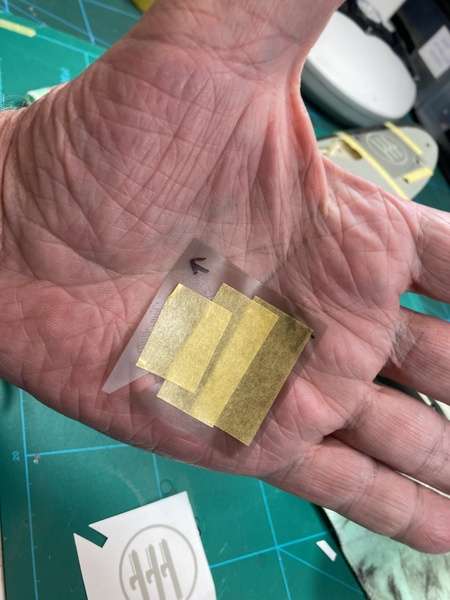
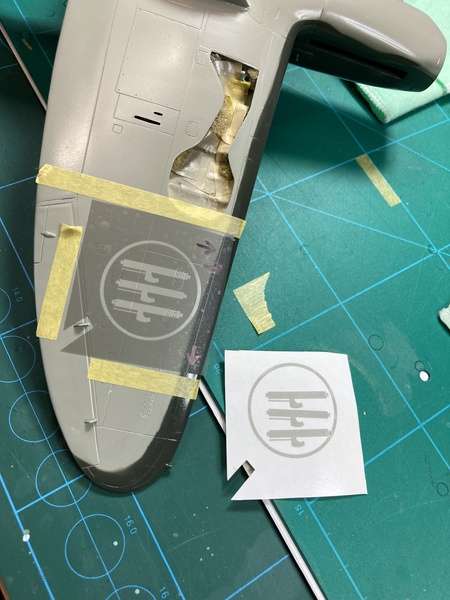
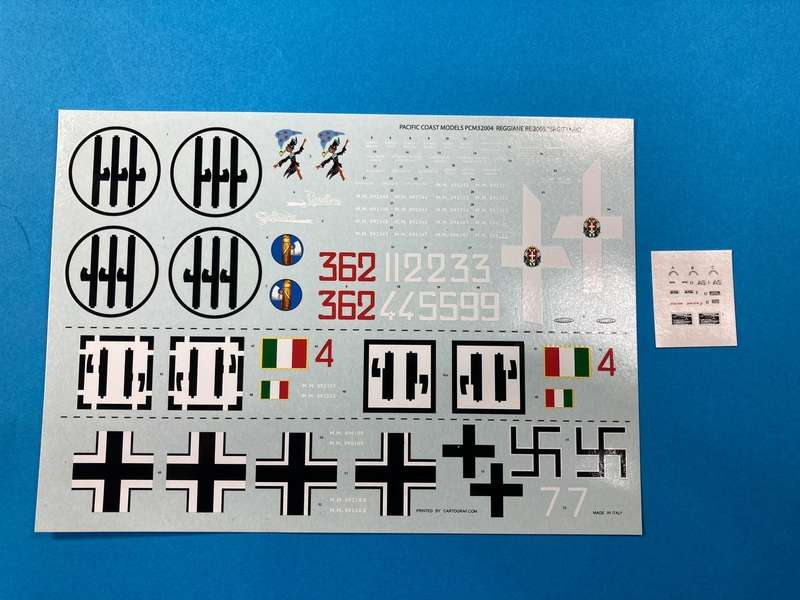
1/32 Pacific Coast Models Reggiane Re.2005 Sagittario

Post in-progress or completed model pics here
dennismcc
Comandante di Gruppo
Posts: 55
Joined: Tue Jul 12, 2022 12:48 pm

1/32 Pacific Coast Models Reggiane Re.2005 Sagittario

Post by dennismcc » Sat Jan 27, 2024 5:06 am

As I had already built a C.205, and a G.55 the Re2005 was a logical next step
The starting point, the kit box
Image
Inside the box is plastic sprues, lots of resin, PE, decals, a very good instruction brochure, and a painting and decal guide.
The later though is a bit haphazard as to placement of the stencils.
An example of the plastic sprues
Image
The resin parts
Image
The PE
Image
The Instruction booklet
Image
And the paint and decal guide
Image
[imghttps://imagizer.imageshack.com/img923/9743/0X6kgu.jpg][/img]

Cheers

Dennis

dennismcc
Comandante di Gruppo
Posts: 55
Joined: Tue Jul 12, 2022 12:48 pm

Re: 1/32 Pacific Coast Models Reggiane Re.2005 Sagittario

Post by dennismcc » Sat Jan 27, 2024 5:07 am

Messed up and pressed the wrong icon
[/quote]
Last edited by dennismcc on Sat Jan 27, 2024 12:14 pm, edited 1 time in total.

dennismcc
Comandante di Gruppo
Posts: 55
Joined: Tue Jul 12, 2022 12:48 pm

Re: 1/32 Pacific Coast Models Reggiane Re.2005 Sagittario

Post by dennismcc » Sat Jan 27, 2024 6:23 am

Here are the decals
Image
PCM kits are not Tamiya or Hasegawa, they require a bit of patience, lots of dry fitting and fettling, old style modelling.
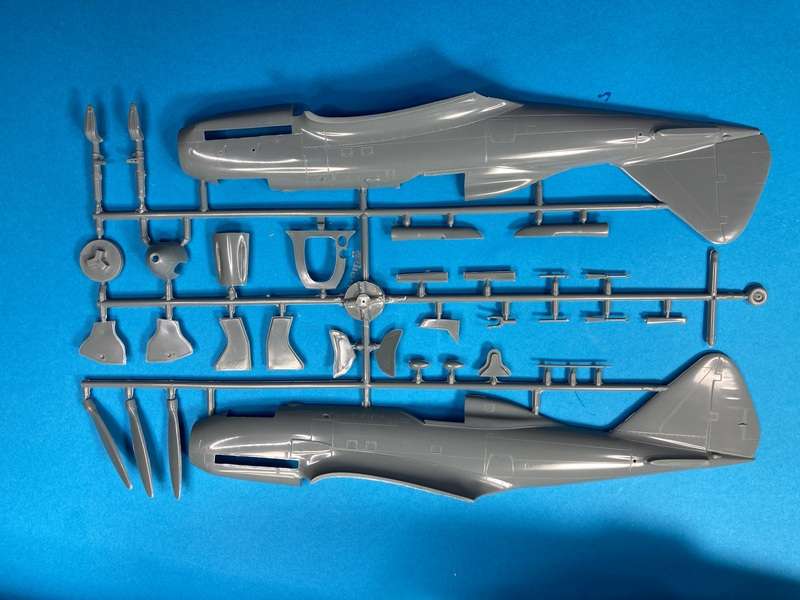
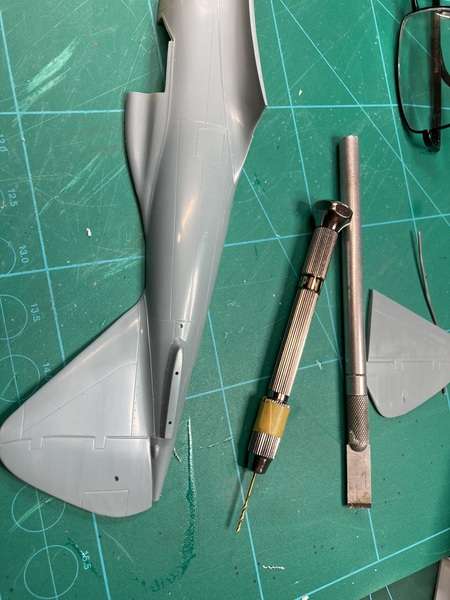
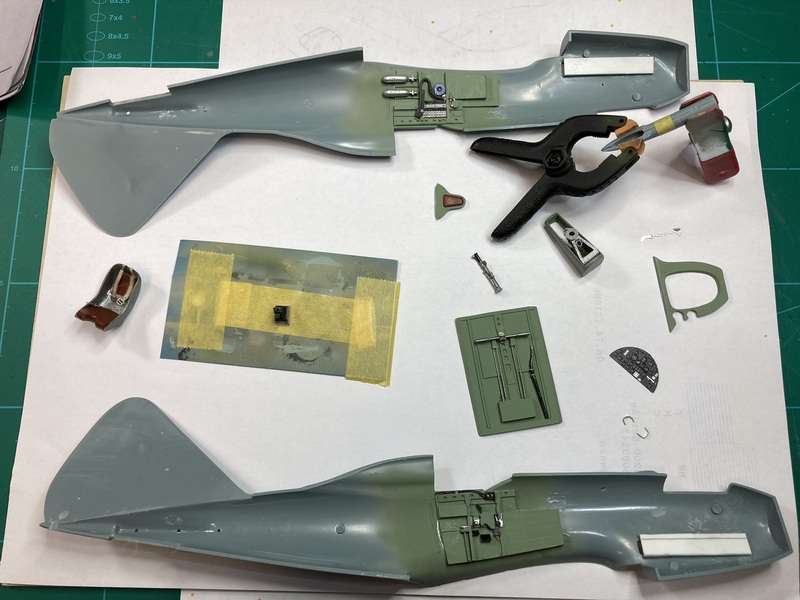
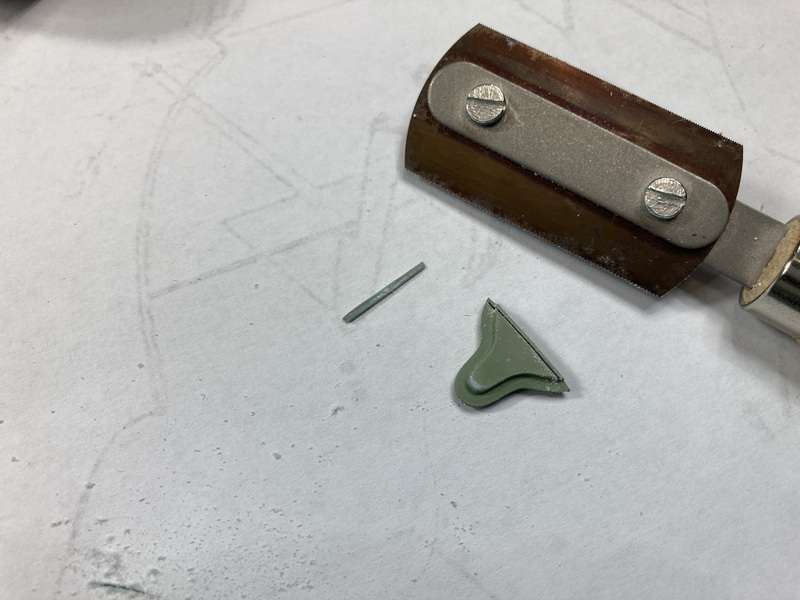
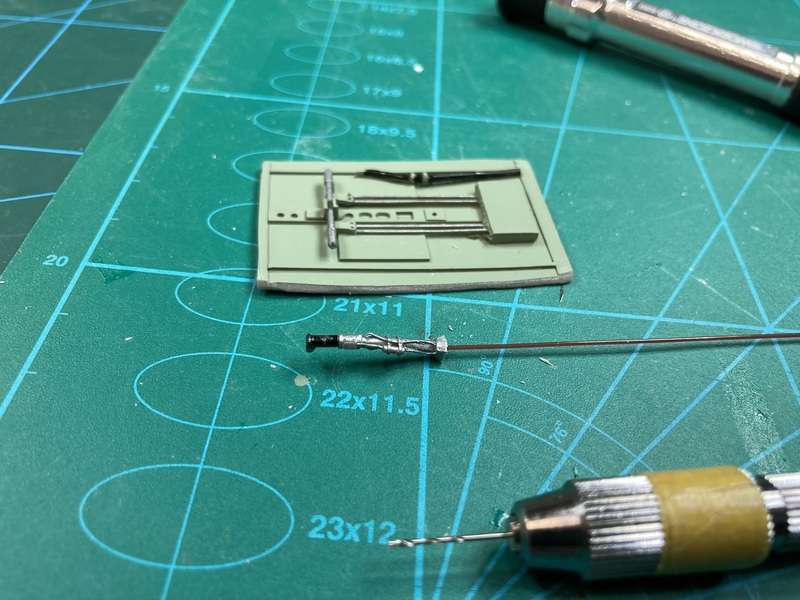
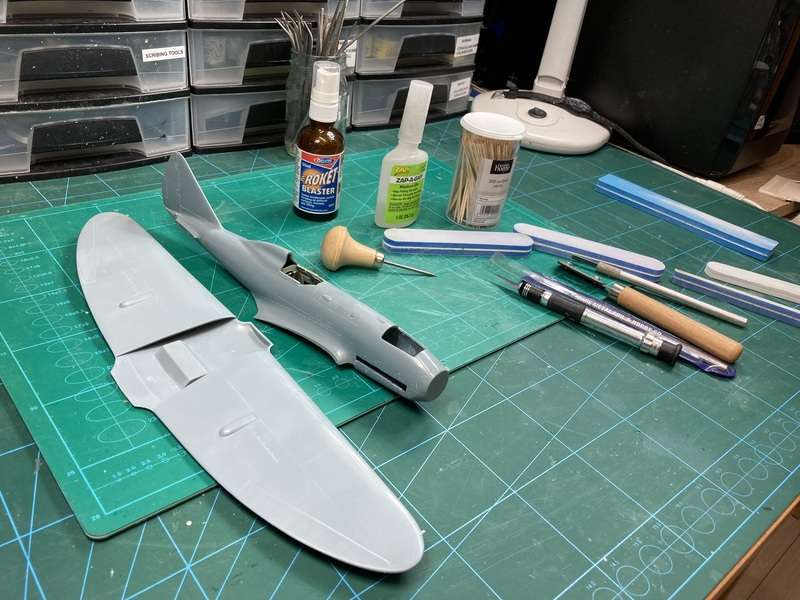
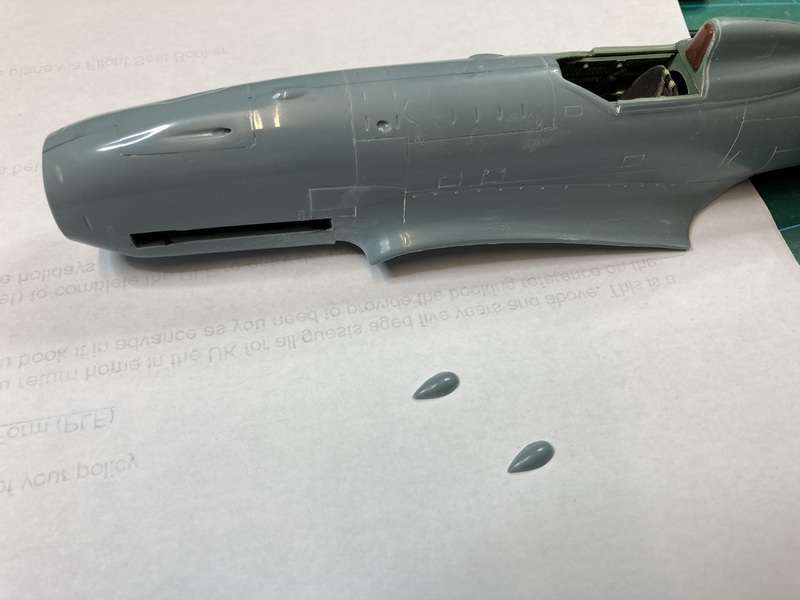
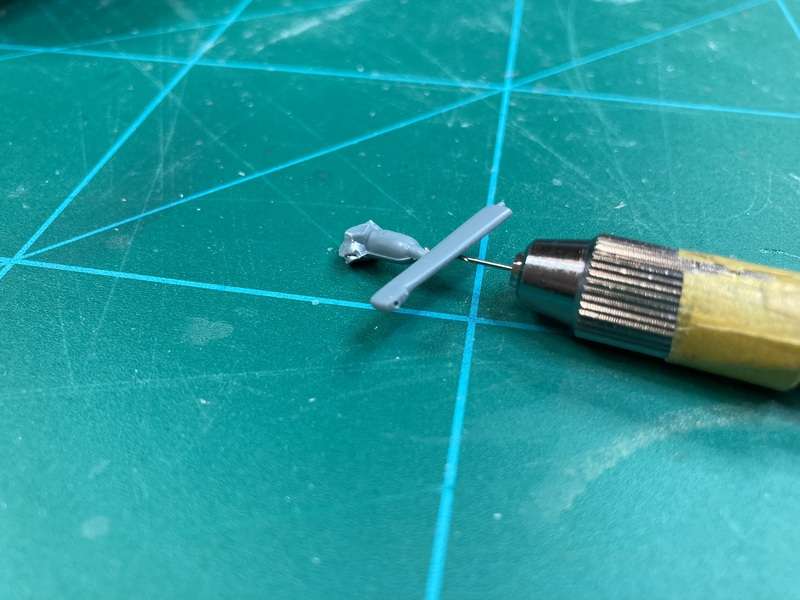
First of all, I cut the parts from their sprues and cleaned them up, the smaller parts were left with some sprue “tails” so they could be held in small clamps for painting.
Mating surfaces were given a clean up with some sand paper, not there are no locating pins on these kits.
Image
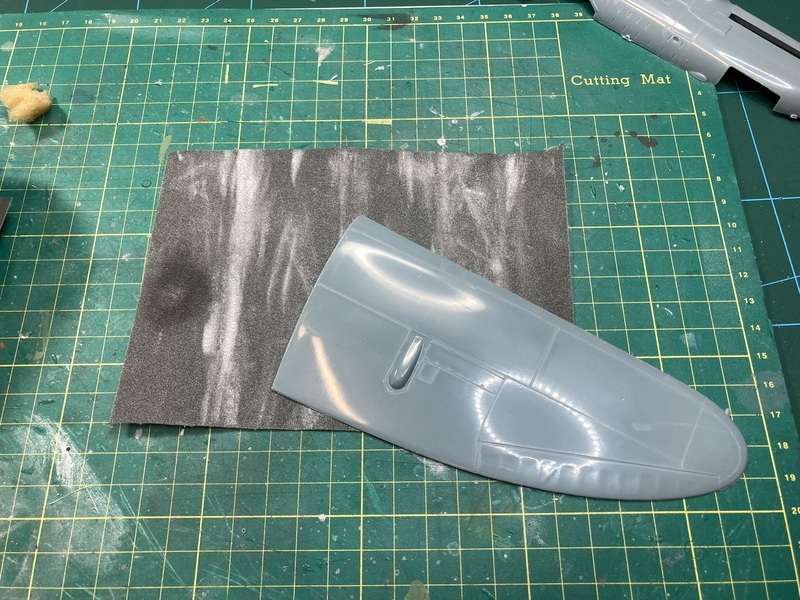
The surface finish looks shiny enough but it felt gritty, so polishing with a nail buffer was carried out.
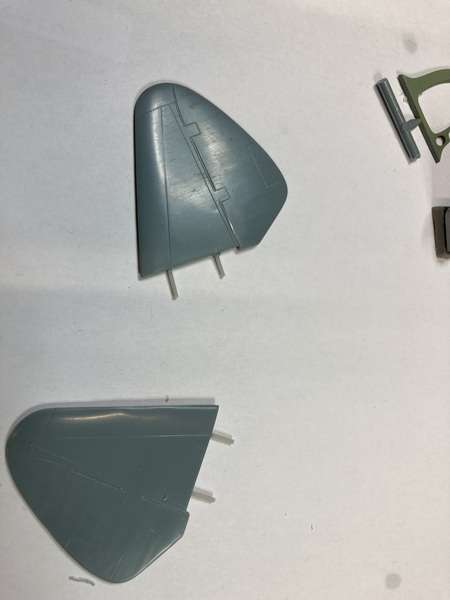
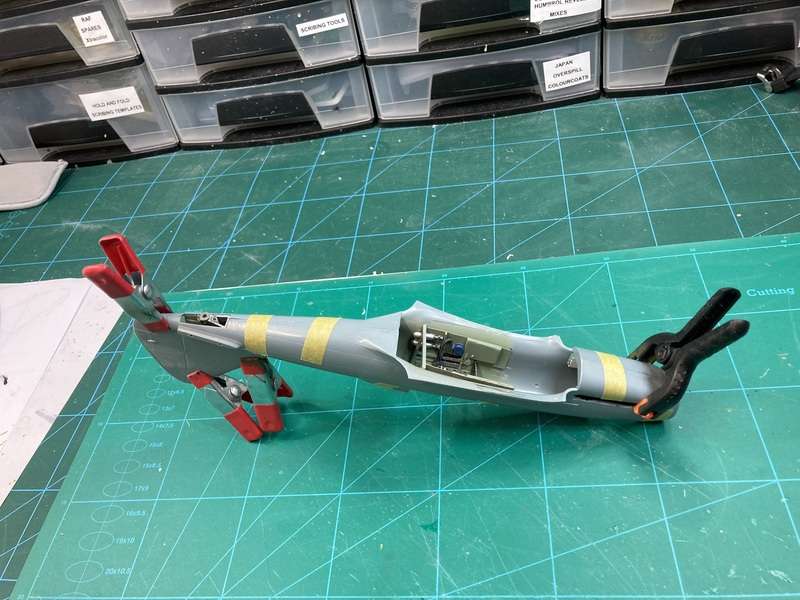
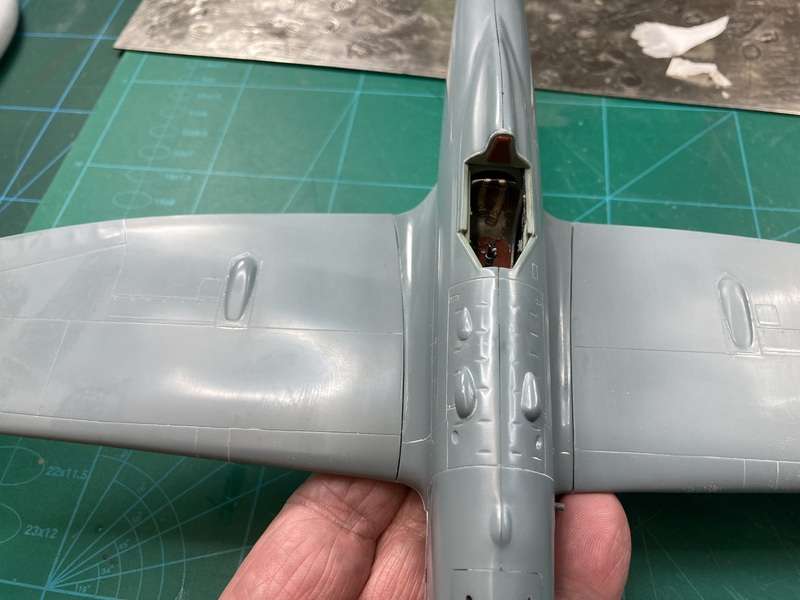
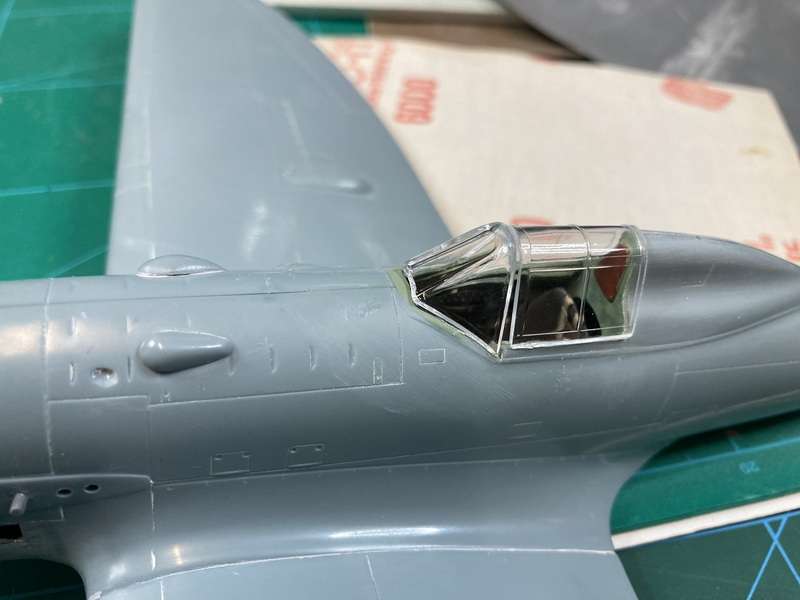
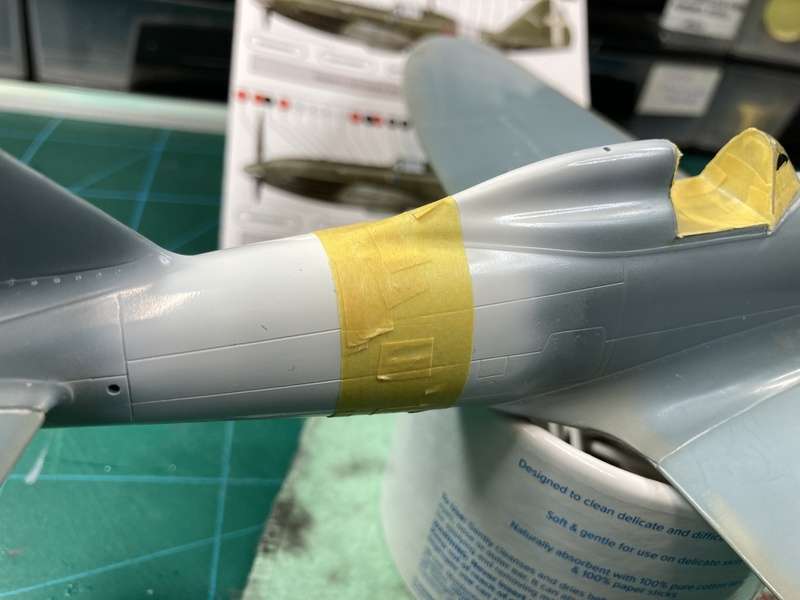
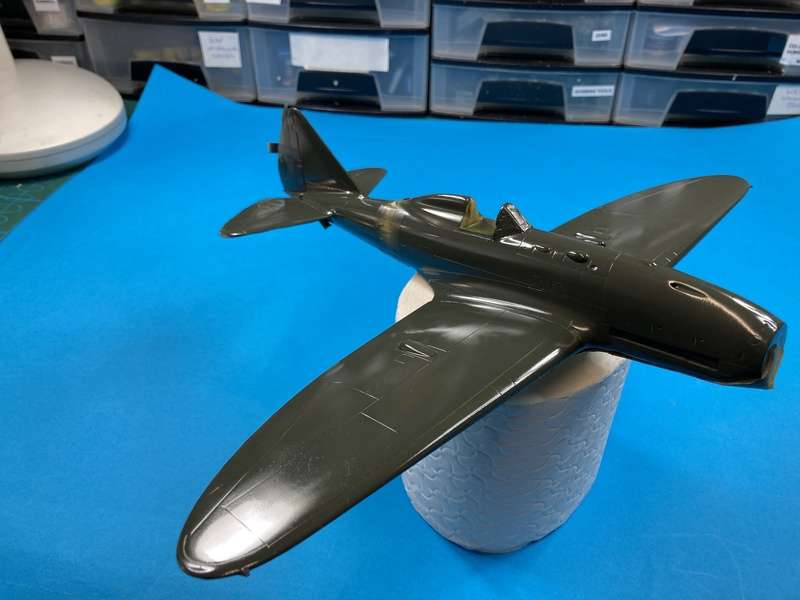
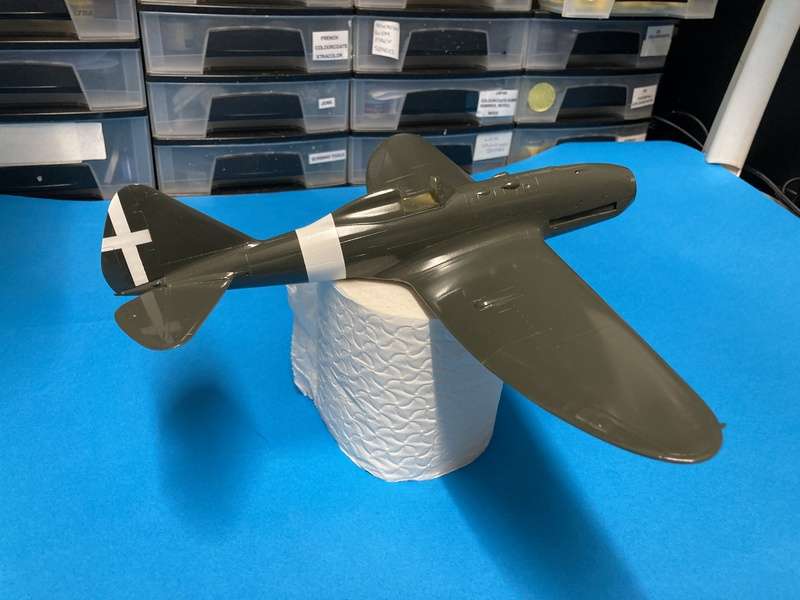
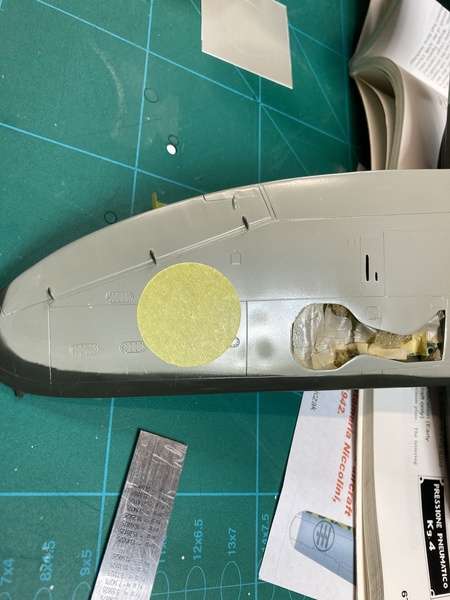
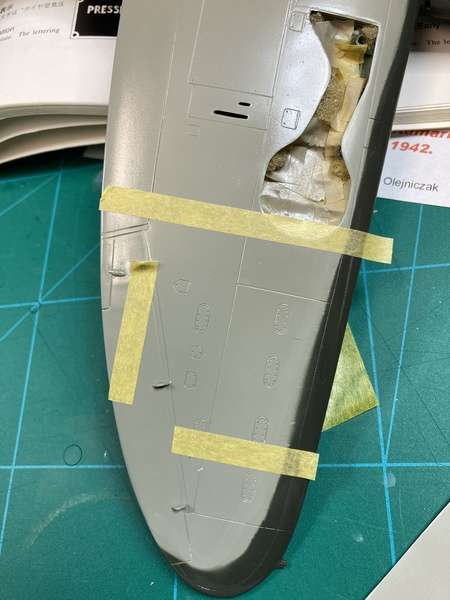
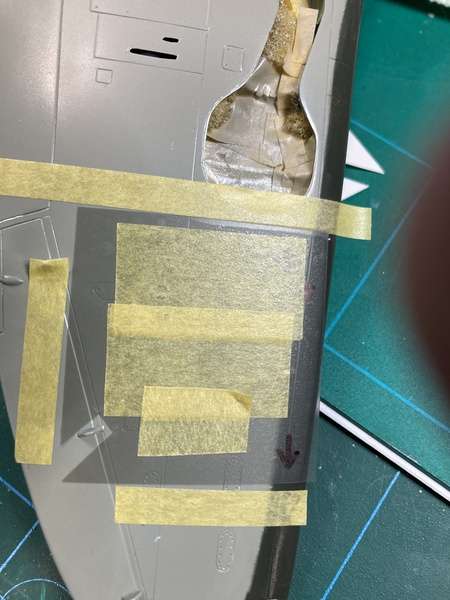
Then out with the Tamiya tape and some test fitting.
Image
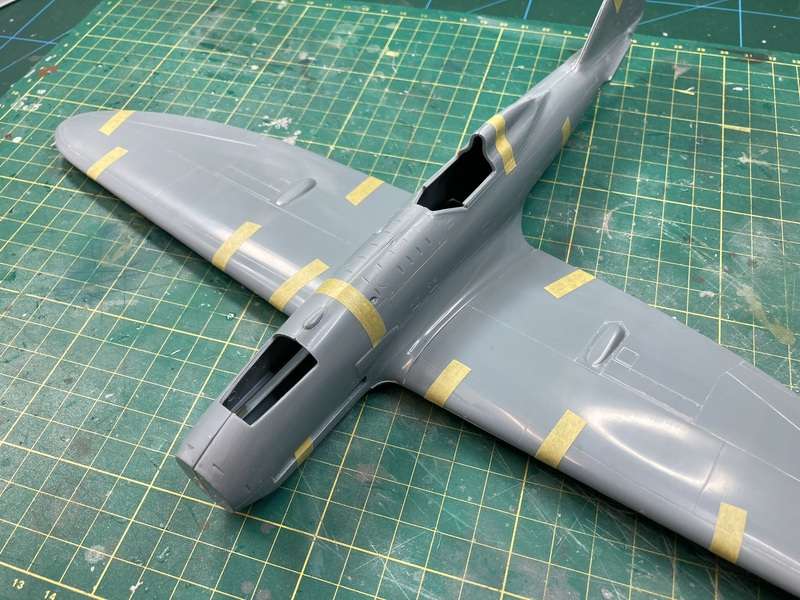
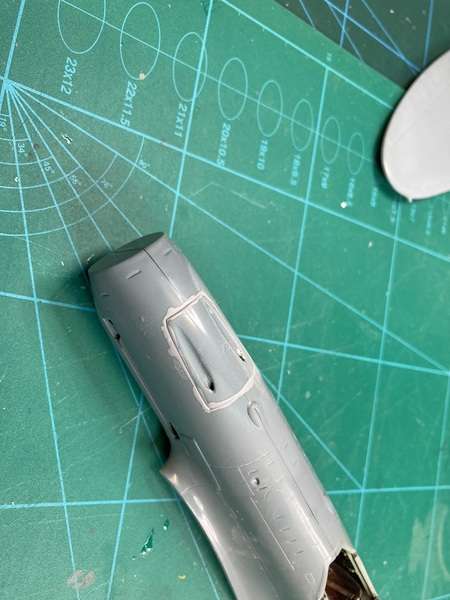
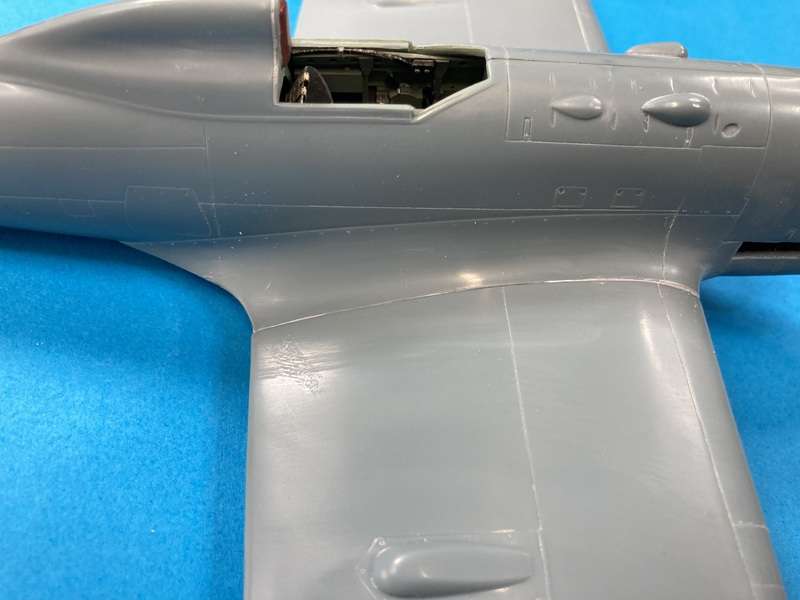
This went very well apart from some small gaps at the wing roots and some overlap on the wing/fuselage join, nothing as bad as the other PCM kits that I have built. I did read that PCM changed the firm who made the plastic parts for their kits to Sword for this one.
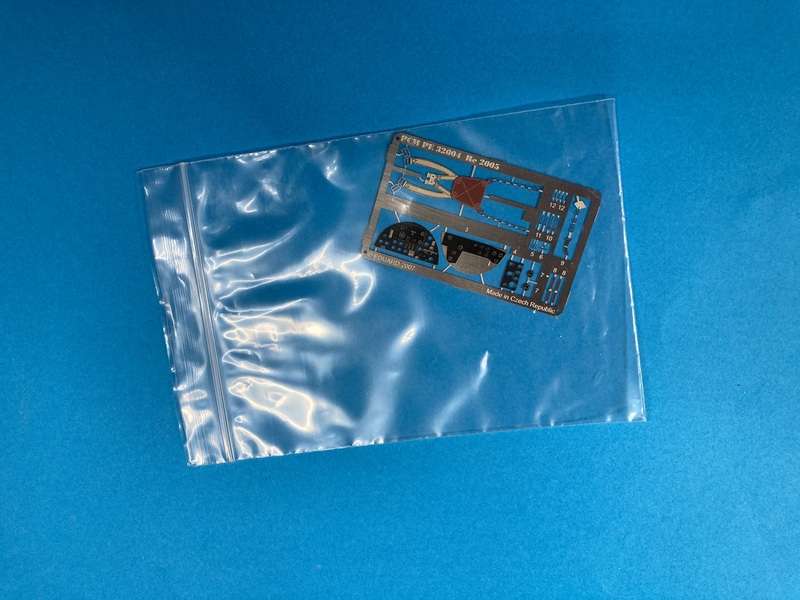
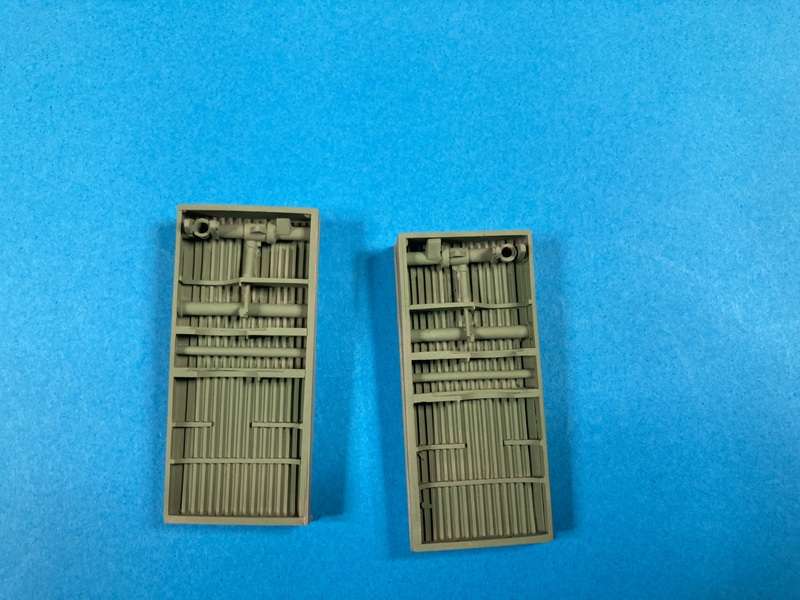
The resin parts were given a wash in warm (not hot) soapy water to make sure that they were really clean, the parts were then left on some kitchen roll to dry.
Then it was time for some paint, on this site I found the following:
“For standardization purpose, Tavola 10 ordered that all interiors had to be painted Grigio Azzurro Chiaro, itself probably a finish coat, as it had little of blue. This happened at least by Spring 1942, but probably the same paint was yet in use before”.
As the Re 2005 was a late war entry I decided to go for grey, Grigio Azzurro Chiaro was airbrushed onto the interior parts with an old tin of White Ensign Colourcoats ACRA15, which came out rather nice.
However, digging a bit deeper on Stormo I came across this:
Here in the cockpit of the 2005 was found a light grey-green (FS 24272). Reggiane also used other kind of greens, at least a darker grey-green for inner fuselage and a grass green (FS 34230) for separate parts as ammo boxes or fin (2001)."
Stefano Lazzaro
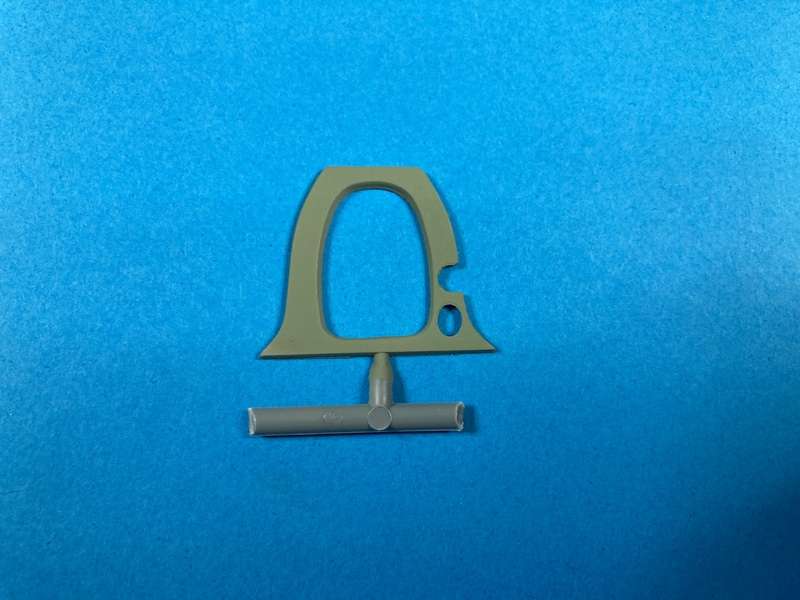
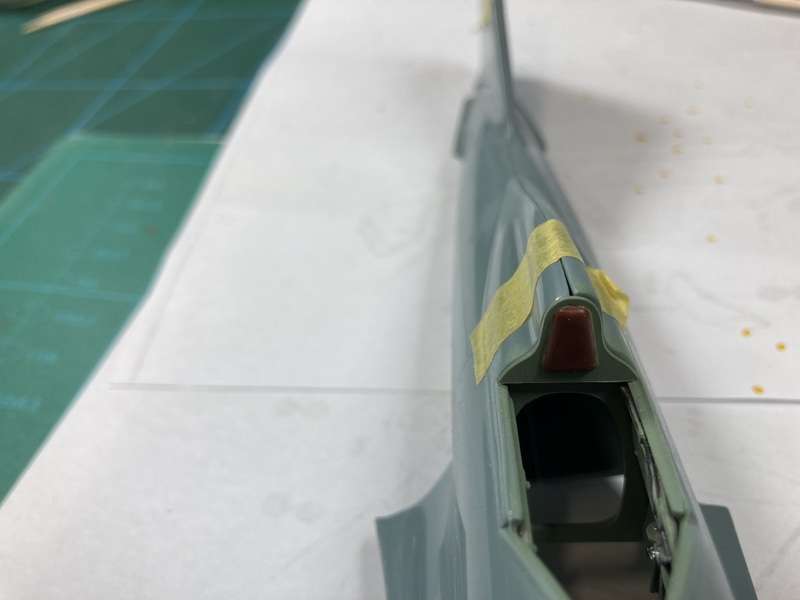
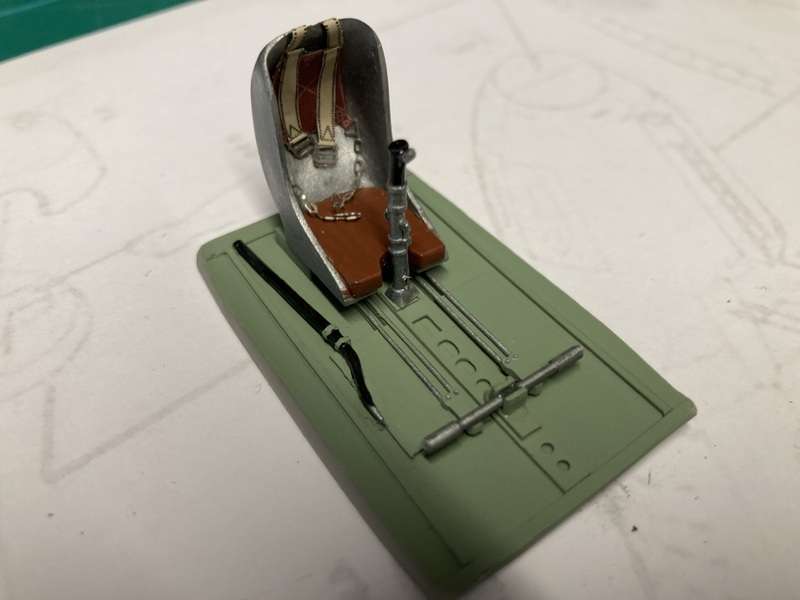
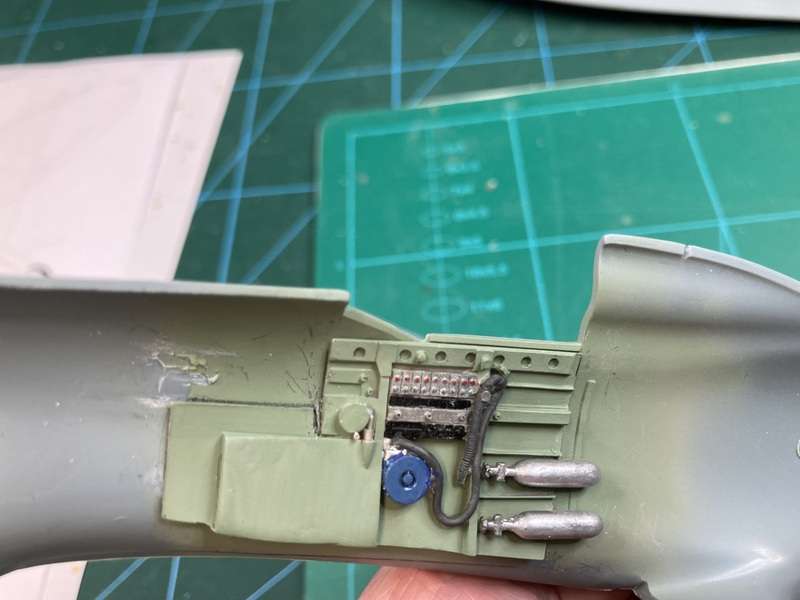
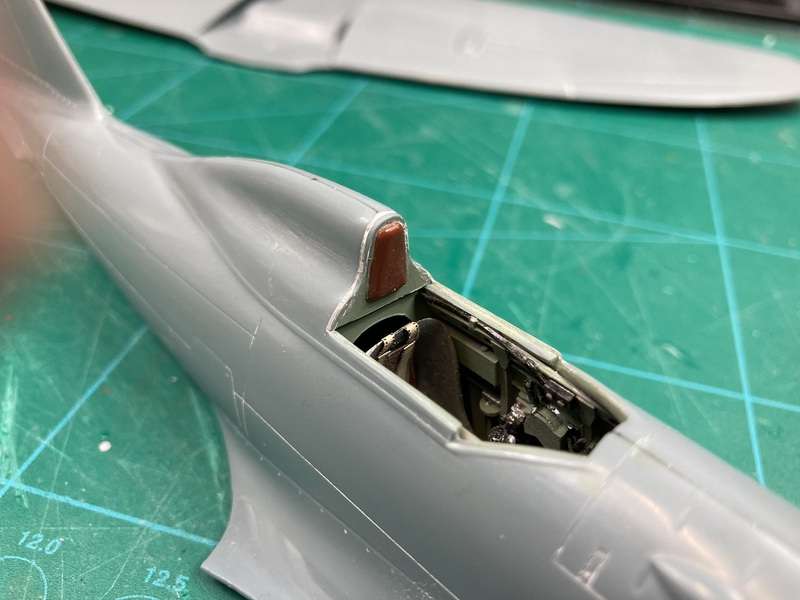
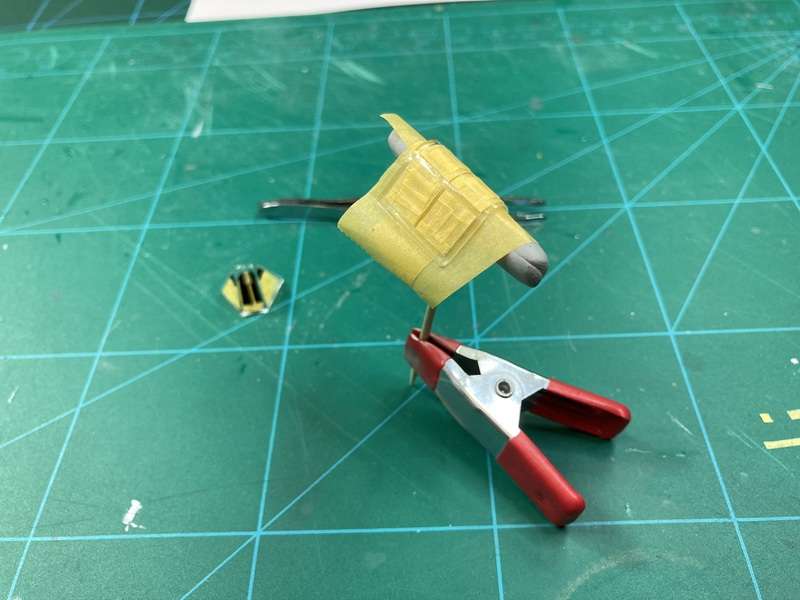
And so, the Verde Anticorrosione Mike Starmer Humbrol mix that I made up for the last Italian build was brought out and all were airbrushed again.
Image
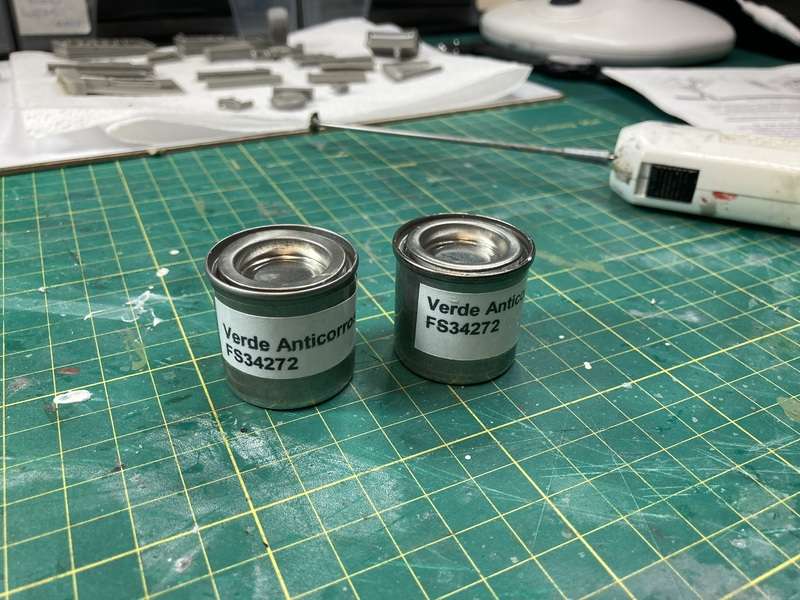
50:50 Humbrol 78 and white 34.
This is how it turned out
Image
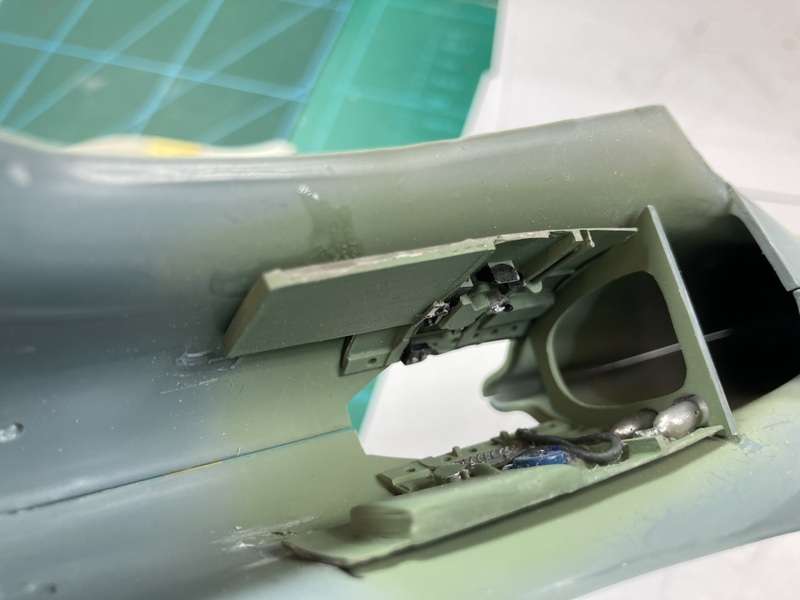
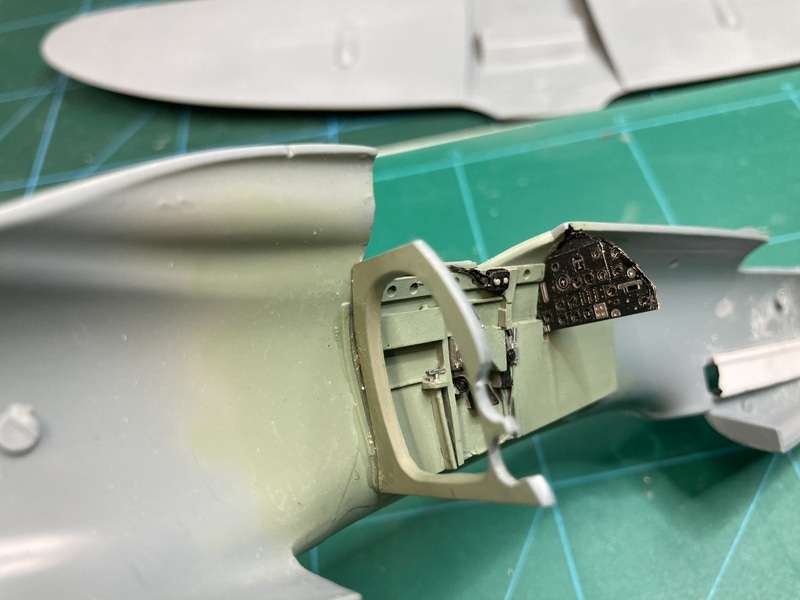
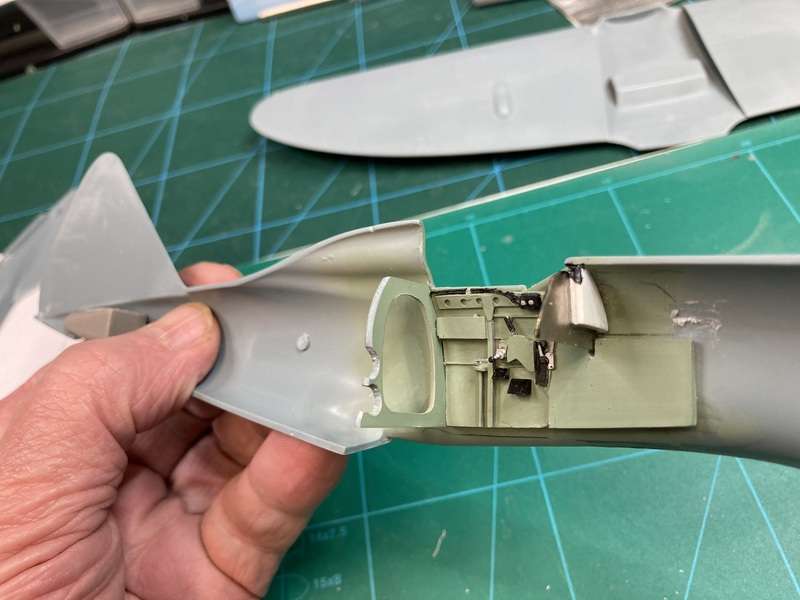
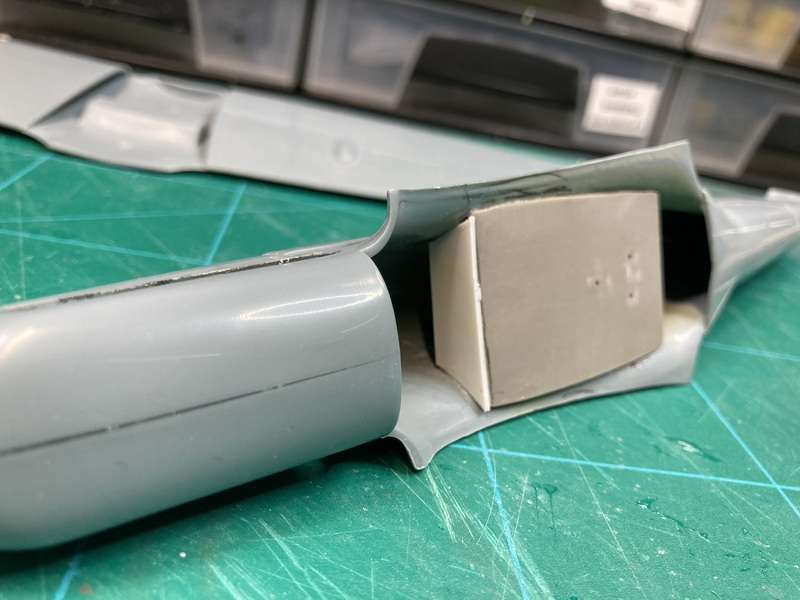
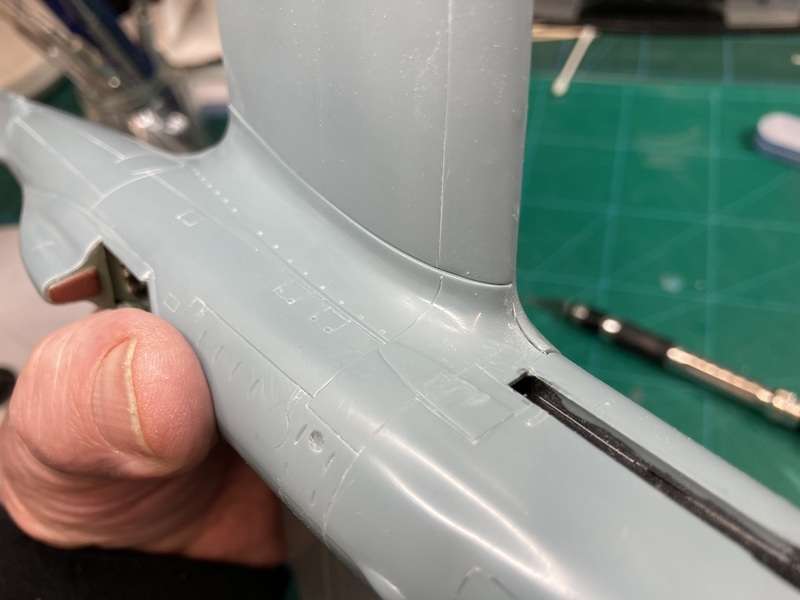
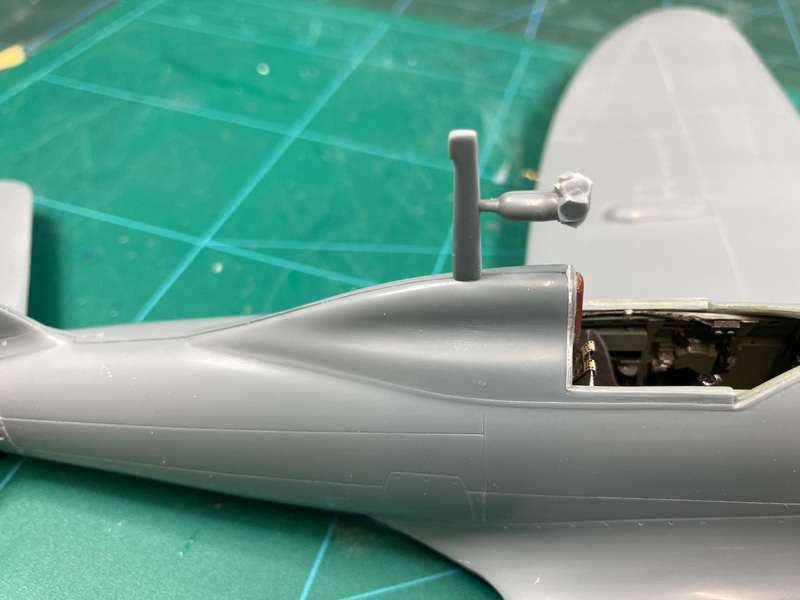
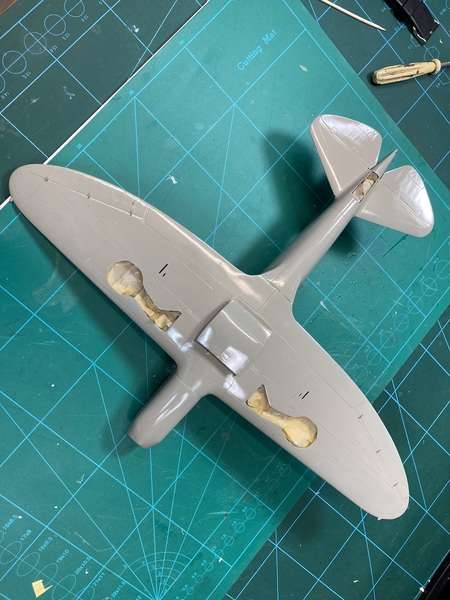
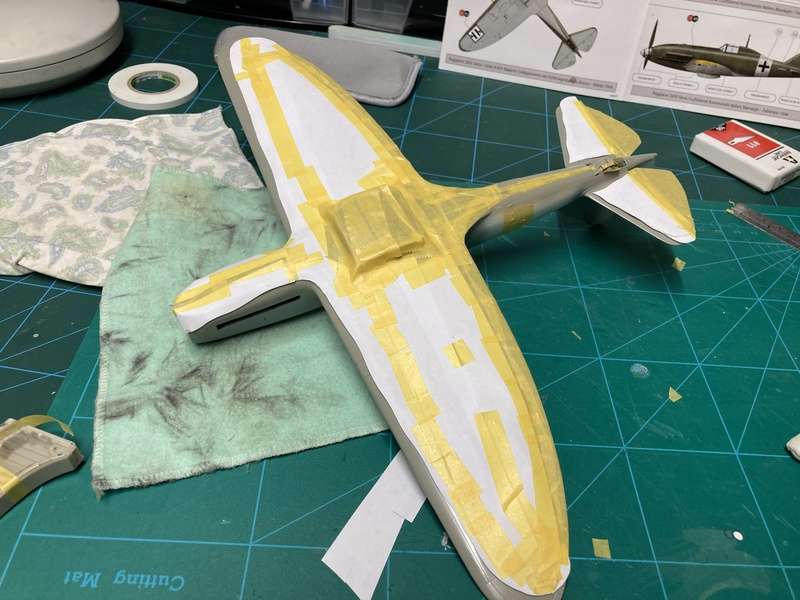
It was looking good at this stage, it's the next stage that goes wrong with PCM kits, trying to get everything to fit into the fuselage, but it is worth it in the end.
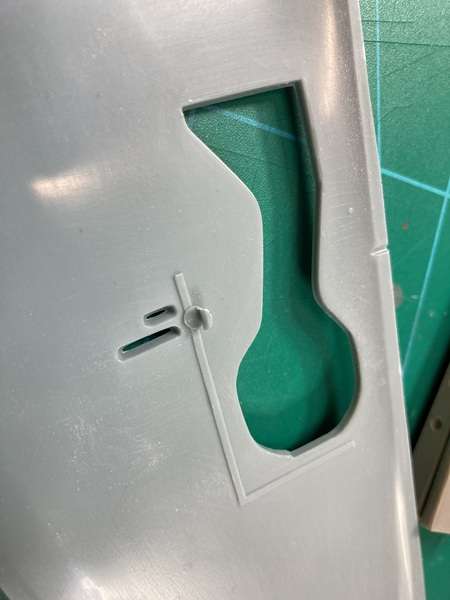
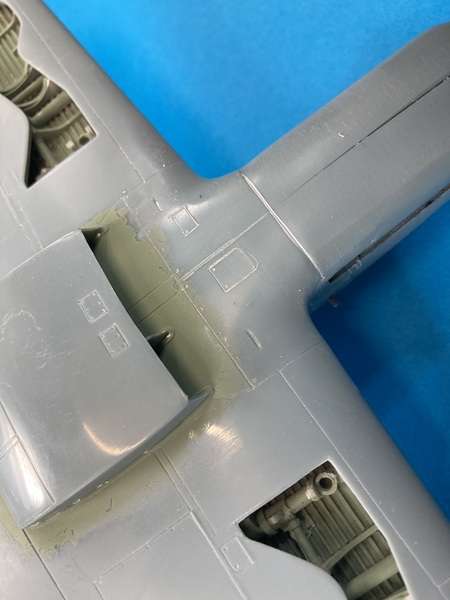
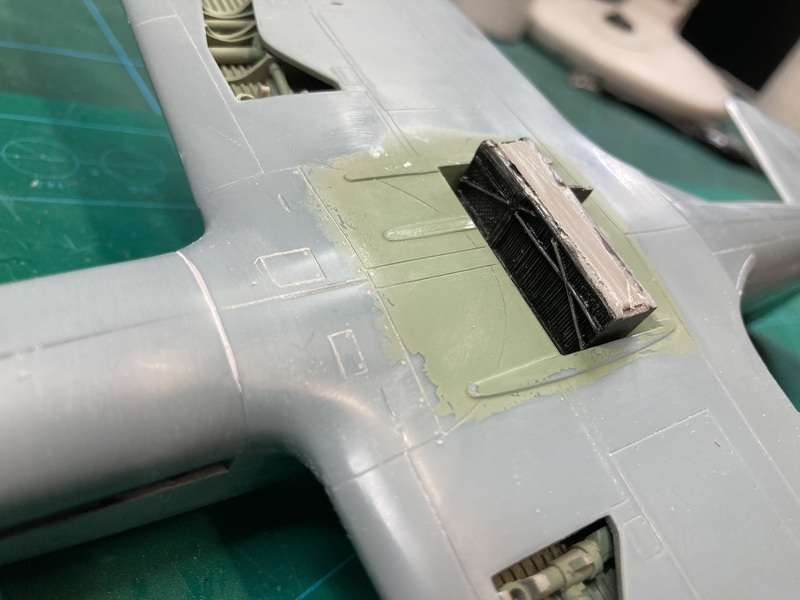
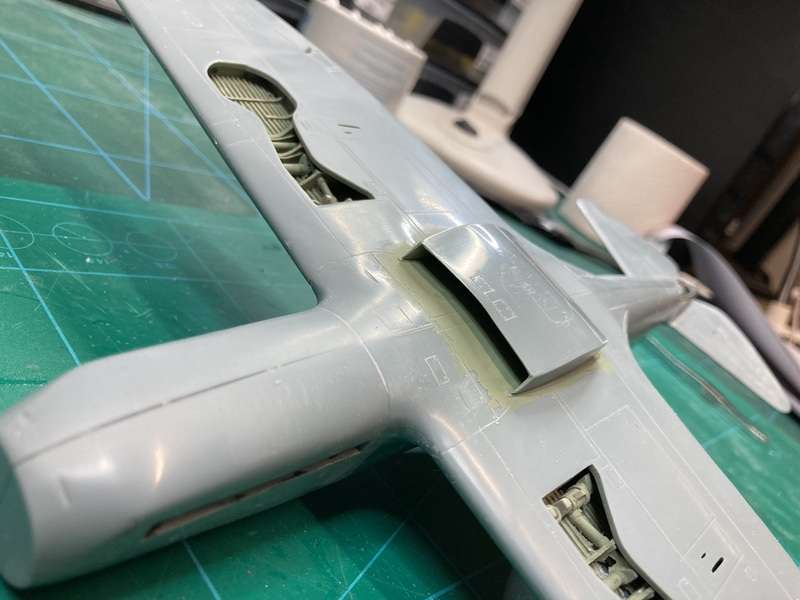
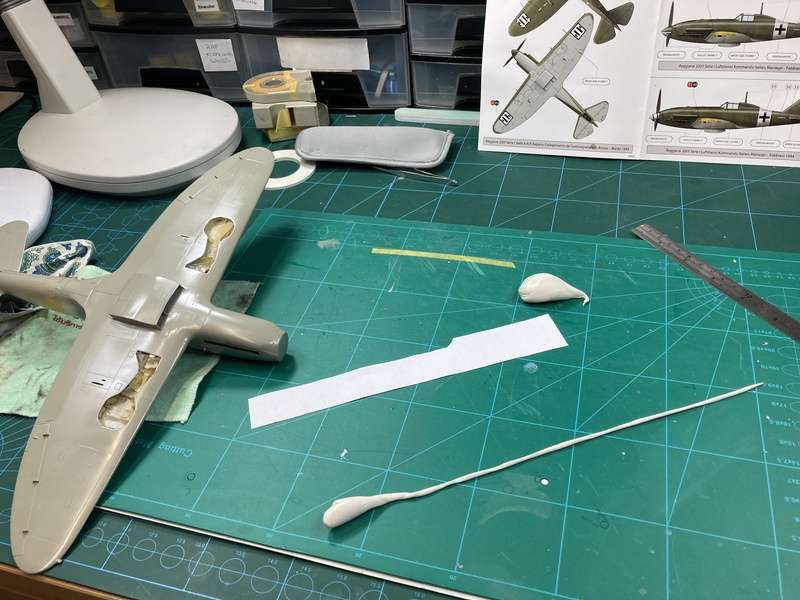
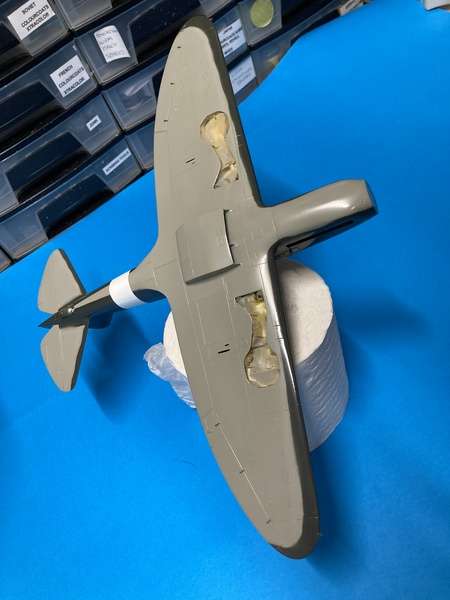
The other tricky bit with PCM kits is trying to persuade the resin wheel wells to fit in the wings, this took some time and patience when sanding but despite being careful I still managed to break through the resin in a couple of places.

More soon

dennismcc
Comandante di Gruppo
Posts: 55
Joined: Tue Jul 12, 2022 12:48 pm

Re: 1/32 Pacific Coast Models Reggiane Re.2005 Sagittario

Post by dennismcc » Sat Jan 27, 2024 6:33 am

Did it again
Last edited by dennismcc on Sat Jan 27, 2024 12:14 pm, edited 1 time in total.

dennismcc
Comandante di Gruppo
Posts: 55
Joined: Tue Jul 12, 2022 12:48 pm

Re: 1/32 Pacific Coast Models Reggiane Re.2005 Sagittario

Post by dennismcc » Sat Jan 27, 2024 6:35 am

dennismcc wrote:
Sat Jan 27, 2024 6:33 am
Below these stubs did not help the fit of the wheel well at all, and they are in numerous places on the kit parts, there are two more right where the tail wheel resin insert fits.
Image
But after lots of test fitting scraping and sanding I was finally happy and applied the CA to the wings and clamped them up, however there are no pins and holes to help with alignment.
Once dry the seams were sanded and polished.
Image
The tailplanes were just a butt fit onto the fuselage so they got some pins to aid in alignment and give a stronger joint .
Image
Image
And onto the cockpit parts, all in Verde Anticorrosione with details picked out with various Humbrol paints.
This is the rear cockpit bulkhead and as others have found it does not fit, you have to enlarge and move the cut outs for the cylinders on the resin cockpit side wall to make it fit.
Image


To be continued

dennismcc
Comandante di Gruppo
Posts: 55
Joined: Tue Jul 12, 2022 12:48 pm

Re: 1/32 Pacific Coast Models Reggiane Re.2005 Sagittario

Post by dennismcc » Sat Jan 27, 2024 6:42 am

And here are all the various bits and pieces ready to assemble, note the modified bulkhead, and the boxed in exhaust sections to allow the exhausts to be fitted later in the build.
Image
Now to squeeze it all in, lots of test fitting and trimming for the rear bulkhead.
Image
Some trimming of the headrest bulkhead.
Image
That now fits better
Image
I then drilled and pinned the seat and control column to the cockpit base and glued them.
Image

Still going

dennismcc
Comandante di Gruppo
Posts: 55
Joined: Tue Jul 12, 2022 12:48 pm

Re: 1/32 Pacific Coast Models Reggiane Re.2005 Sagittario

Post by dennismcc » Sat Jan 27, 2024 6:49 am

Carrying on.
Image
Now was the time to see if I had got it right, it seems that no matter how many times you test fit as soon as you apply glue it no longer wants to fit.
Getting it all ready.
Image
I once had an IP come loose while I was sanding the fuselage to wing joint on another build so I don't like to take chances now, hence the support firmly glued behind the IP.
Image
The other side
Image
And the tail wheel compartment, which I suspected would let me down and not fit.
Image
And away we went, I used a cocktail stick used to apply the CA and then clamped the lot together
Image

To be continued

dennismcc
Comandante di Gruppo
Posts: 55
Joined: Tue Jul 12, 2022 12:48 pm

Re: 1/32 Pacific Coast Models Reggiane Re.2005 Sagittario

Post by dennismcc » Sat Jan 27, 2024 6:50 am

More mistakes
[/quote]
Last edited by dennismcc on Sat Jan 27, 2024 12:15 pm, edited 1 time in total.

User avatar
davenport49
Generale di Brigata Aerea
Posts: 264
Joined: Mon Aug 03, 2020 9:15 am
Location: Michigan

Re: 1/32 Pacific Coast Models Reggiane Re.2005 Sagittario

Post by davenport49 » Sat Jan 27, 2024 7:07 am

beautiful detail

dennismcc
Comandante di Gruppo
Posts: 55
Joined: Tue Jul 12, 2022 12:48 pm

Re: 1/32 Pacific Coast Models Reggiane Re.2005 Sagittario

Post by dennismcc » Sat Jan 27, 2024 7:12 am

The lower part of the engine bay needed a bit of sanding to get it level with the front of the wing, I'm not too worried about the rear as the Re 2005 has full width flaps so there is a join line there anyway.
The cockpit floor and seat assembly fitted well with a few adjustments; however, it is only held really firmly at the rear bulkhead so I added another bulkhead at the front just in case.
Image
All ready for test fitting and fettling, some of the rivets on the fuselage were a bit light so I gave them a once over with the MDC riveter, I also deepened the panel lines in anticipation of the sanding losses.
Image
The fuselage gun cover was fitted, this needed some sanding to get it flush as the cowling was smooth on the real thing, Mr Surfacer was the first attempt at filling the seams but I had to resort to CA to get a nice smooth finish.
Image
The headrest and the bulkhead were then fitted, I started to sand this smooth but on the real thing there was a join so I didn't try too hard just some Mr Surfacer.
Image
Then some sanding to get the wing to fuselage fit as accurate as possible before I start gluing them together.
Image
I very nearly forgot about these bumps.
Image

Break for lunch

dennismcc
Comandante di Gruppo
Posts: 55
Joined: Tue Jul 12, 2022 12:48 pm

Re: 1/32 Pacific Coast Models Reggiane Re.2005 Sagittario

Post by dennismcc » Sat Jan 27, 2024 7:31 am

Back to the nearly forgotten bumps
So, I very carefully put a spot of CA on the place where they were meant to be stuck this was marked on the nose by an engraved half circle.
But to my dismay they were not lined up equally, a quick check on my references confirmed that they should line up the same.
It was one of those I can't "unsee this" moments so I got my little chisel out and decided to remove the offending bump, which I did successfully, but unfortunately it pinged off into the blue.
Despite much searching and dust removal I could not find it, so a new one had to be made from the clipped wingtip cover from a Spitfire, this is not an exact match but a "will do" affair.
Some Mr Surfacer was then applied to fill the slight gaps.
Image
Then onto mating the fuselage to the wings, this went well, a nice close join, which required very little sanding to get level.
Image
The tail was then assembled and all the various gaps filled with Mr Surfacer.
The join below on the real thing is a panel line so I did not go mad with the sanding.
Image
I usually use a toothpick to fill any gaps with Mr Surface and then use a cotton bud dipped in Mr Colour thinner to wipe off the excess, this fills the gap but leaves a panel line.
Image
Then on to the radiator and it's cover, these fitted very well, the radiator was painted matt black and dry brushed with silver
Image
Image

Cheers

Dennis

dennismcc
Comandante di Gruppo
Posts: 55
Joined: Tue Jul 12, 2022 12:48 pm

Re: 1/32 Pacific Coast Models Reggiane Re.2005 Sagittario

Post by dennismcc » Sat Jan 27, 2024 11:52 am

I checked the fitting of the aerial mast, this required a bit of drill work on the fuselage.
This resulted in a nice tight fit of the mast, I left the sprue stub on to allow for later work.
Image
Then how to attach the wire, looking at photos of the real thing the wire goes through the end of the mast, so I drilled a hole right through to enable me to have a good fit, I can then cut off the end and smooth it.
Image
Image
A hole was then drilled in the tail fin for the other end of the wire.
The clear parts were dipped in Klear and left for a few days in my lettuce saver, a trial fit showed that the fit was quite good, very little adjustment was necessary.
Image
And then they were masked off
Image
For the undersides I used Xtracolor X134 FS16307 for the Grigio Azzuro Chiaro 1.
Image
Well true to form I got it wrong, before airbrushing the undersides I should have painted the area where the fuselage white band is going to be and the rudder white in preparation for masking off the cross.
So, I will have to paint the white, then mask it off and touch up the undersides. This is the problem with a start/stop type build you forget were you are up to and what you have to do next.
I did not know what the width of the white fuselage band was so a quick ask on this website revealed the following “The width of the white fuselage band was 600mm or 18.5mm (1.85 cm) in 1/32 and 12.5mm (1.25cm) in 1/48".
So, I could now mask it off, it's nice to know the correct size, I could have fudged it but if I don't do that for RAF Sky bands so I did not feel that I should do it for the Re 2005.
I repainted the white and started to mask off the fuselage band, I was using 6mm Tamiya tape so I just used three widths of tape to mask off the band.

Getting the next instalment ready

dennismcc
Comandante di Gruppo
Posts: 55
Joined: Tue Jul 12, 2022 12:48 pm

Re: 1/32 Pacific Coast Models Reggiane Re.2005 Sagittario

Post by dennismcc » Sat Jan 27, 2024 12:30 pm

Fuselage and tail masking in place, the tail cross came out at a scale 6mm wide, so out with the 6mm Tamiya tape.
Image
Image
Then it was out with the airbrush and repainted the fuselage undersides with Grigio Azzuro Chiaro 1, and back on the shelf to dry.
I was all set to mask off the undersides when I realised looking at photos that the demarcation between the bottom colour and the top was softish, so back to basics, so I broke out the paper and Blu Tac.
I had not done this for years, I have got lazy using masks but the Blu Tac method gives a better finish I believe, it's just fiddley.
Rolling Blu Tac sausages
Image
Making the mask
Image
And in place, leaving a small gap from the model's surface.
Image

More soon

dennismcc
Comandante di Gruppo
Posts: 55
Joined: Tue Jul 12, 2022 12:48 pm

Re: 1/32 Pacific Coast Models Reggiane Re.2005 Sagittario

Post by dennismcc » Sat Jan 27, 2024 12:39 pm

Andt at last the Re2005 has more paint on it, not one of the more usual sexy Italian schemes but plain green, well Verde Oliva Scuro 2.
For this I used Xtracolor X109 – Marine Corps Green FS34052, which is a good match for Verde Oliva Scuro 2 according to the Stormo Colour Reference chart.
I faded it slightly but not too much as these aircraft were new and did not get the chance to get too weathered.
Image
And with the white masking removed.
Image
Image
I did some fading on the upper surfaces but as mentioned early it is very faint as these were new machines that did not last long in service.
There are no commercially available masks for the Re2005, but I only needed the wing national markings really so I stocked up on Montex C202 and C205 masks which would do nicely as they are roughly the right size when compared to the kit decals.
And so, I used a mixture of the kit decals and Montex masks.
Image
First up as usual was to nail down the position of the markings, this was a guesstimate judging by the position on the C202 and C205 from diagrams, as usual I made a test circle using my Offla P cutter.
Image
Putting the mask over this enabled me to mark the place to affix the mask using tape.
Image

Catching up now

dennismcc
Comandante di Gruppo
Posts: 55
Joined: Tue Jul 12, 2022 12:48 pm

Re: 1/32 Pacific Coast Models Reggiane Re.2005 Sagittario

Post by dennismcc » Mon Jan 29, 2024 3:12 am

And with the mask in position, note the arrows are there as a guide, the masks are handed, the axe heads point outwards and the thick ends point backwards.
Image
I put tape on the mask to hold it together when I remove the backing (transfer tape).
Image
The mask backing was removed and the mask was stuck onto my hand to make it less sticky to hopefully prevent the mask pulling paint off.
Image
In position.
Image
Mask in place and the sections to be painted weeded out.
Image
And out with the trusty airbrush, I decided to use Xtracolor Night Black for this, and this was the result.
Image
And this
Image

Cheers

Dennis

Post Reply